Posted on Leave a comment

Why It’s A Bad Idea To Can Homemade Chocolate Sauces

homemade chocolate sauce

For certain, there are home recipes that are not well suited for canning. Homemade chocolate sauce is one of them. The temptation to whip up a large batch of your favorite ice cream topping and can it to save for special occasions is a misguided notion. The process of canning does not lend itself to chocolate in a way that would make the sauce safe to consume. And while this may be disappointing, understanding the rationale against canning your homemade chocolate sauce is important for your health and well-being. CLICK, HERE, FOR MORE DETAILS.

Posted on Leave a comment

Amarachi Clarke’s ultimate chocolate brownies

Amarachi Clark chocolate brownies

After teaching herself how to make chocolate in her North London flat, Amarachi Clarke now sources cocoa beans direct from Ghana and Belize to produce bean to bar chocolate at her company Lucocoa (Loo-cocoa). She’s in the kitchen showing us how to make her indulgent chocolate brownies.

Brownies
Serves: 4

Ingredients:

150g unsalted butter (and a little bit for greasing the tin)

300g chocolate

50g cocoa powder

200g flour

180g coconut sugar (or brown sugar)

1 tsp sea salt (grind to a powder)

¼ tsp baking powder

4 medium eggs

Method:
1. Preheat the oven to 180 (gas 4). Place the butter and chocolate in a bowk and place over a pan of simmering water and allow to melt, stirring occasionally until melted and leave to cool..

2. Whisk the sugar and eggs together until smooth.

3. In a separate bowl, sieve the cocoa powder, flour, baking powder and salt and mix together before pouring into the whisked egg mixture. Mix until fully combined. Add the melted butter and chocolate and mix well.

4. Pour the mixture into a greased and lined 20cm square baking tin. Lightly tap the tin onto the table a few times to release any air bubbles. Use a palette knife to smooth the top of the mixture.

5. Bake for 15 minutes until set, then remove from the oven and leave to cool on a wire rack.

6. Slice and serve with ice cream.

As posted on ITV.COM.

Posted on Leave a comment

Chocolate Dessert Lasagna

chocolate lasagna dessert

As far as pudding cakes go, this no-bake, Chocolate Dessert Lasagna is one of the best. Who can resist a bite into these layers of creamy, dreamy, chocolatey-ness? Serve this cake anytime you need a chilled dessert to keep you feeling cool and satisfied!

What You’ll Need:
1 (14.3-ounce) package of cream-filled chocolate sandwich cookies (about 36)
6 tablespoons butter, melted
1 (8-ounce) package of cream cheese, softened
1 teaspoon vanilla extract
1 cup confectioners’ sugar
1 (12-ounce) container of frozen whipped topping, thawed, divided
2 (4-serving-size) packages of instant chocolate pudding and pie filling
3 cups cold milk
1/4 cup mini chocolate chips

What to Do:
Place cookies in a resealable plastic bag; using a rolling pin, finely crush cookies. Place in a medium bowl, add butter and mix well. Press mixture into the bottom of a 9- x 13-inch baking dish; chill until ready to use.
In a medium bowl, beat cream cheese, vanilla, and confectioners’ sugar until smooth. Stir in 2 cups of whipped topping. Lightly spread the mixture evenly over the cookie crust.
In a large bowl, whisk together chocolate pudding and milk until thick. Evenly spread over the cream cheese layer. Refrigerate for 10 to 15 minutes, or until the pudding is set.
Spread the remaining whipped topping over the pudding layer and sprinkle with chocolate chips. Refrigerate for 4 to 6 hours, or until set.

As posted on KOAMNEWSNOW.COM

Posted on Leave a comment

How to Use Every Type of Chocolate Chip in Your Baking

using chocolate chips in baking

Which chips (or chunks) should you choose for your holiday baking and beyond? ’Tis the season for holiday baking, which, is a season that stretches across most of the year. And if you’re craving a simple, classic chocolate chip cookie, you might head to the baking aisle and be greeted with an abundance of choices. There are many chocolate chips from which to choose; which one is best? Here are seven leading types and the ideal baking scenario for each one (click HERE).

Posted on Leave a comment

A single-serving chocolate chip cookie recipe for dessert emergencies

single serving chocolate chip cookie

When you need nothing other than a warm chocolate chip cookie, here’s a quick and easy recipe that makes just the right number: one. This picture-perfect cookie from “Great British Bake Off” champion Edd Kimber will be on your plate in about half an hour. The chilling time is optional, but if you prefer a thick, chewy cookie, we highly recommend it. Unchilled dough will bake up thinner and slightly crispy. The amounts are so small here and the recipe is so forgiving that you don’t need to worry about weighing your ingredients. It’s also the perfect small bake for your toaster oven. Feel free to change the add-ins to your choice of chocolate or nuts.

Ingredients:
1 tablespoon unsalted butter, melted and slightly cooled
1 tablespoon light brown sugar
1 tablespoon granulated sugar
1 1/2 teaspoons milk
3 tablespoons all-purpose flour, plus more as needed
Pinch baking powder
Pinch baking soda
Pinch fine salt
2 tablespoons roughly chopped dark chocolate
Flaky sea salt, for sprinkling (optional)

Step 1

Position a rack in the middle of the oven and preheat to 350 degrees. Line a rimmed baking sheet (any size, but a quarter- or eighth-sheet is perfect) with parchment paper.

Step 2

In a small bowl, combine the butter, light brown sugar and granulated sugar and stir with a spatula until well combined. Pour in the milk and mix until creamy. Add the flour, baking powder, baking soda and fine salt and mix until a soft but not sticky dough forms. Add the chocolate and stir to combine. If needed, mix in a little extra flour, 1 teaspoon at a time, adding just enough to make the dough lose its stickiness but not become stiff.

Step 3

Shape the dough into a ball and place on the prepared baking sheet. If you prefer a thick and chewy cookie, pop the pan into the freezer to chill for 5 to 10 minutes. Bake for 16 to 20 minutes, or until golden around the edges and a little paler in the center. If you have chilled the dough, you may need the higher end of the time range. Sprinkle with the flaky salt, if using, and let cool on the pan. Serve warm or at room temperature.

Nutrition Information
Per cookie

Calories: 386; Total Fat: 21 g; Saturated Fat: 13 g; Cholesterol: 31 mg; Sodium: 401 mg; Carbohydrates: 52 g; Dietary Fiber: 3 g; Sugar: 31 g; Protein: 5 g

This analysis is an estimate based on available ingredients and this preparation. It should not substitute for a dietitian’s or nutritionist’s advice.

Adapted from “Small Batch Bakes” by Edd Kimber (Kyle Books, 2022), as posted on WashingtonPost.com.


Posted on Leave a comment

I’ve been a chef for 15 years. Here are my 9 tips for making the best chocolate chip cookies.

Tips for making cc cookies

As a professional chef, Alissa Fitzgerald knows that classic chocolate-chip cookies taste a whole lot better with a few key ingredients and techniques. The best cookies are slightly chewy and a little bit gooey with a crispy edge, and there are simple ways to achieve those results in your own kitchen. To discover her 9 tips for baking the best chocolate chip cookies, click HERE.

Posted on Leave a comment

The ultimate chocolate cake

Ultimate chocolate cake

A birthday cake should look as amazing as it tastes, so let your creativity loose and go for gold! Topped with rosebuds, petals, berries, meringues, frozen raspberries and gold pearls. This cake is perfect to celebrate a birthday or any special occasion!

Ingredients:

Melted butter, to grease, plus extra 400g, chopped, softened

½ cup Dutch cocoa

1 cup brown sugar

400ml boiling water

1 cup caster sugar

4 free-range eggs, lightly beaten

3 cups plain flour

1 tsp baking powder

1 tsp bicarbonate of soda

2 Tbsp Callebaut dark chocolate crips pearls

Pinch of edible gold dust or chocolate polish

Rosebuds (for decoration only, not for eating), rose petals, cornflower petals, dianthus petals, raspberries, blueberries, gold speckled mini meringues and crushed freeze-dried raspberries, to decorate

Rich chocolate ganache frosting
250ml thickened cream

400g dark chocolate (45% cocoa), chopped

Method
To make frosting, put cream in a medium saucepan over low heat. Bring to a gentle simmer, remove from heat and stir in chocolate. Set aside for 10 minutes, then briefly stir again until silky-smooth. Set aside at room temperature for 2 hours, stirring occasionally, until it’s a spreadable consistency.
Meanwhile, preheat oven to 160 degrees C fan-forced (180 degrees C conventional). Grease two 20cm round cake tins with butter and line bases and sides with baking paper.

Step 2

Put cocoa and brown sugar in a large heatproof jug and pour in boiling water. Use a whisk to stir until smooth, then set aside to cool for 15 minutes.

Step 3

Meanwhile, put extra butter in a large bowl, add caster sugar and beat with an electric hand beater on high speed until light and fluffy.

Step 4

Add eggs, one at a time, beating well after each addition.

Step 5

Sift in flour, baking powder and bicarb, then add about ½ cup of cocoa mixture. Stir with a whisk to roughly combine. Continue to add cocoa mixture, ½ cup at a time, whisking until a smooth speckled batter forms.

Step 6

Divide batter into thirds, using a cup measure for accuracy, dividing between 2 tins and one large bowl. Cover bowl with plastic wrap and set aside. Bake 2 cakes for 35 minutes, or until cooked when tested with a skewer, swapping positions in oven halfway through. Cool cakes in tins for 15 minutes before turning out onto a wire rack to cool completely.

Step 7

Regrease and line 1 tin, then pour in remaining batter. Bake for 35 minutes, or until cooked when tested with a skewer. Cool completely.

Step 8

To assemble, put 1 cake on a stand. Spread with 1/3 of the frosting. Repeat layering, finishing with frosting.

Step 9

Put pearls in a small zip-lock bag. Add a pinch of gold dust. Seal bag and shake well to coat completely.
Decorate cake with rosebuds, petals, berries, meringues, frozen raspberries and gold pearls. Serve.

As posted on BHG.COM.AU

Posted on Leave a comment

Chocolate Shortbread

Chocolate shortcake

If you’re looking for an easy and classic addition to your holiday cookie repertoire, chocolate shortbread should be your next bake. Slightly crisp with a meltingly tender texture, they’re perfect served with a cup of milky tea or—for intense chocoholics out there—a steaming mug of hot cocoa. Shortbread gets its name from its crumbly textured dough that uses no leaveners and has a high fat content. The addition of cocoa powder here brings this traditional cookie in a whole new direction.

INGREDIENTS
1 1/2 c. (180 g.) all-purpose flour
1 c. (2 sticks) unsalted butter, room temperature
1 c. (115 g.) powdered sugar
1/2 c. (40 g.) Dutch-processed cocoa powder
1/4 c. cornstarch
1/2 tsp. kosher salt
1/2 tsp. pure vanilla extract
1 c. (170 g.) semisweet or white chocolate chips
Sugar pearl sprinkles, for decorating (optional)

DIRECTIONS
In the large bowl of a stand mixer fitted with the paddle attachment, beat flour, butter, powdered sugar, cocoa powder, cornstarch, salt, and vanilla on medium speed until a thick, smooth dough forms, about 1 minute. Scrape down sides of bowl and continue to beat until there are no pockets of unmixed flour, about 30 seconds more.
Using a rubber spatula, scrape dough onto a sheet of plastic wrap. Pat to a disk, then tightly wrap. Chill at least 2 hours or up to 2 days.
Arrange racks in top and bottom third of oven; preheat to 300°. Line 2 baking sheets with parchment paper. Place another large piece of parchment paper on a work surface. Unwrap dough, place on parchment, then top with another large piece of parchment. Using a rolling pin, roll dough to 1/4″ thick. Using a sharp knife or pizza cutter, cut dough into diamond shapes about 3″ long and arrange on prepared sheets, spacing about 1 1/2″ apart (or you can use a 2″ round cookie cutter and cut into rounds). Reroll scraps and cut out more diamond shapes to make 14 to 16 total.
Bake cookies, rotating pans top to bottom halfway through, until firm to the touch, 25 to 30 minutes. Let cool on baking sheet 5 minutes. Using a metal spatula, transfer cookies to a wire rack and let cool completely.
In a small microwave-safe bowl, microwave chocolate chips in 30-second intervals, stirring between each, until melted and smooth. Using a spoon or a piping bag, drizzle chocolate over cooled shortbread. Top with sugar pearls (if using). Refrigerate until set, 15 to 20 minutes.
Make Ahead: Cookies can be made 1 week ahead. Store in an airtight container and refrigerate.

As posted on DELISH.COM.

Posted on Leave a comment

Gordon Ramsay’s Chocolate Rule You Should Never Break

different roles for chocolate

While people at every corner of the earth seem enamored with chocolate, there are regional differences to this sweet. For instance, the chocolate found in America has traits that make it different from European chocolate. According to Gourmet Boutique, those on this side of the Atlantic prefer their chocolate to have less actual cocoa, more sugar, and less fat and cocoa butter. Even with less cocoa and more sugar, Americans enjoy a love affair with chocolates of all types. But some chocolate varieties reign supreme — according to a YouGov survey, 49% of U.S. citizens prefer milk chocolate, while 34% like to nosh on dark chocolate. A mere 11% contend that white chocolate is best. Chef Gordon Ramsay, however, believes that all chocolate varieties bring something special to the culinary world. You just need to know how to best use each type. To find out, click HERE.


Posted on Leave a comment

What’s the Difference Between Regular Chocolate and Baking Chocolate?

Baking chocolate

Wander down the baking aisle of any grocery store and you’ll notice several boxes labeled baking chocolate. Some say unsweetened, others bittersweet or semi-sweet, another labeled German’s sweet chocolate. Have you ever wondered what this chocolate is used for and how it’s any different than the chocolate over in the candy aisle? There’s actually quite a big difference. For baking, it’s important to understand the difference between regular chocolate and baking chocolate—plus, know how to select the right kind of chocolate for every recipe. We’ve broken it all down for you, from types of chocolate to how to use it (click HERE).

Posted on Leave a comment

How Cocoa Powder Affects The Moisture Of Your Cakes

cocoa powder. moisture of cakes

If you love chocolate, we’re willing to bet that chocolate cake is up there among your favorite desserts. Whether the treat in question is a chocolate-iced death by chocolate cake, a cream cheese-rich chocolate gooey butter cake, or a towering, coconut-frosted German chocolate cake, chocolate cake is widely beloved by those who enjoy sweets. Perhaps one of the most diverse dessert categories out there, a good chocolate cake — no matter what variety — should be super-moist, with a deep, rich chocolate flavor.

But as anyone who has sampled their fair share of chocolate cakes knows, this ubiquitous dessert is, all too often, way too dry. According to Better Homes & Gardens, some of the reasons a cake might turn out too dry include baking it for too long, not using precisely measured ingredients, and overmixing the batter. But with chocolate cakes specifically, there’s one factor that you may not have considered that directly affects the cake’s moistness, and that’s the type of cocoa powder you select at the store. Learn more, HERE.


Posted on Leave a comment

12 Types Of Baking Chocolate And What Makes Them Unique

types of baking chocolate

Popular opinion: chocolate might be the perfect food — and yes, we know we’re not going out on much of a limb with this declaration. Sweet, bitter, and complex, chocolate has been the culinary object of desire of cultures around the world for millennia. In its highest-quality forms, chocolate can be one of the most stimulating, nutritious, and heart-healthy foods available. And, as many home cooks know, many types of chocolate are essential to baking.

Today, high-quality chocolate is an essential ingredient in pastry kitchens worldwide. It comes in many forms, from cocoa-rich dark chocolate to sweet and creamy milk chocolate. White chocolate has no cocoa at all, while newcomer ruby chocolate is made using a rare cocoa bean varietal. Cacao nibs and cocoa butter, the building blocks of chocolate, are also being used by pastry chefs and chocolatiers in new and inventive ways. That said, if you’re a baker, it is important to learn about all the different varieties and forms of chocolate used when baking, how they’re made, and their best applications. To learn more, click HERE.


Posted on Leave a comment

2 INGREDIENT NO BAKE CHOCOLATE BANANA CAKE (NO FLOUR, EGGS OR OIL)

chocolate banana cake

This easy no bake chocolate banana cake is just 2 ingredients. It is very rich and full of chocolate and banana flavor. It doesn’t contain any flour, eggs, or oil. It is best served chilled and can be made ahead of time, making it an especially great dessert in the summer, though it can be enjoyed year-round.

INGREDIENTS
Bananas
Semisweet Chocolate Chips
Bananas: This recipe works best with ripe bananas. They do not need to be overripe, though overripe bananas will also work. The bananas will need to be mashed until no lumps remain.

Semisweet Chocolate Chips: If you prefer a less sweet dessert, you can also use bittersweet or dark chocolate. The chocolate will need to be melted either on the stove or in the microwave. The microwave is faster, but either way will work.

NO BAKE BANANA CAKE TEXTURE
This cake is creamy, almost like a cheesecake texture. It is very rich and decadent.

When the bananas are mixed with the melted chocolate, it prevents the chocolate from turning back into its solid form. Instead, the chocolate stays in a semi-solid state. So you end up with a rich, fudgy cake that is similar to a flourless chocolate cake.

INSTRUCTIONS
Grease the interior of a 6 or 7 inch springform baking pan. Line the bottom and inner sides with parchment paper.
Mash bananas with a fork, whisk or potato masher until no lumps remain. Set aside.
Add chocolate chips to a large microwave-safe bowl. Heat at full power in 1 minute intervals, stirring in between with a spatula, until chocolate is fully melted and smooth. (I needed 2 minutes total cooking time). Alternatively, you can melt the chocolate on the stove using the double boiler method.
Once you have a smooth chocolate batter, add in the mashed bananas. Stir with a whiks until bananas are fully incorporated and no banana streaks remain.
Pour batter into prepared cake pan. Place into fridge until set. I recommend refrigerating for at least 1 hour though it may be ready in less time. You can also let it sit in the fridge overnight. If you are decorating the cake, wait for it to set before adding the frosting.

NOTES

For a taller/thicker cake, use a 6-inch cake pan. If you don’t mind that the cake is not that tall, you can use a 7-inch cake pan.
I find this easiest to make in a springform pan but it can be made in a regular round cake pan. It will just be more difficult to remove the cake from the pan.
If you want to make the cake less sweet, you can use dark chocolate instead of semisweet chocolate.
You will need approximately 3 bananas to yield 1 cup of mashed banana.
Make sure you mash the bananas and don’t puree them. Pureeing them in a food processor or blender will make them too liquidy. While the recipe will still work with banana puree, your cake will not be as set.
Mash the bananas before measuring them if you are using a measuring cup.
This recipe does not work well with frozen bananas because frozen bananas contain more liquid.
I decorated the cake with a chocolate ganache frosting and some shaved chocolate on top.
Optional Frosting: To make the chocolate ganache frosting you will need 2 oz heavy cream and 1/2 cup chocolate chips. Place chocolate chips in a mixing bowl. Heat heavy cream until it reaches a simmer. Pour the heavy cream over chocolate. Immediately start stirring until chocolate is completely melted and smooth. Pour ganache over cake and spread it over the cake.

Cake can be made 1-2 days ahead of time. Keep cake in the fridge until ready to serve.

As posted on KIRBIECRAVINGS.COM


Posted on Leave a comment

This easy 10-minute chocolate cake can be made in the microwave

microwave chocolate cake

The rich cake includes cocoa powder and dark chocolate, and it doesn’t require any eggs. The recipe can easily be made vegan-friendly as well.

Ingredients:

For the cake:

150 grams all-purpose flour
100 grams granulated sugar
90 grams unsalted butter (melted)
60 grams cocoa powder
2 teaspoons baking powder
380 milliliters warm water

For the chocolate ganache topping:

150 grams dark chocolate
150 milliliters heavy cream
If you want to make this dish vegan-friendly, you can swap the melted butter for vegetable oil and use a dairy-free chocolate icing for the top instead.

Directions:

First, add the flour, sugar, cocoa powder, and baking powder into a bowl and whisk together until they’re combined. Then add the melted butter and warm water and whisk until the mixture is smooth.

Pour the mixture into a 7-inch microwave-safe dish, and microwave the batter for five to six minutes, until a toothpick comes out clean. Head recommends checking on the cake when you have one minute left to go. Let your cake cool fully in the dish before removing it.

“There should be no wet batter visible, if there is, continue to microwave in 30-second bursts until a toothpick comes out clean.”

Let your cake cool fully in the dish before removing it.

While your cake is cooling, mix your dark chocolate and heavy cream together and microwave for one minute. Stir the ganache topping until it’s smooth.

Carefully flip the cake upside down onto a plate. Pour your ganache topping over the cooled cake, and smooth it out to the edges. And just like that, you’re ready to eat!

As posted on INSIDER.COM.


Posted on Leave a comment

Easy Chocolate Milkshake

Chocolate milkshake

Nothing says “carefree” quite like a frosty, creamy, chocolate milkshake. Way back in the late 1800s, a milkshake was a whiskey drink thickened with cream and egg yolks. Thankfully the whiskey got replaced with syrup and the thickener became ice cream in the 1920s to make the best drinkable dessert known to humankind. Upgrade this summertime staple, swapping the milk for heavy cream and adding homemade chocolate sauce to get the creamiest, chocolatey-est shake imaginable. The secret ingredient is just a pinch of salt. Feel free to double, triple, or quadruple this recipe if you’re feeding a crowd. Heavy cream does add undeniable creaminess, but you don’t have to use it. You can try half-and-half, whole milk, or your favorite vegan milk and still make a delicious milkshake (including the chocolate sauce!). If you do opt for something other than heavy cream, feel free to use your favorite store-bought whipped cream. Finding the target temperature for the ice cream is key for achieving a milkshake that has the right thickness: not too thick and not too thin. For the best results, the ice cream should be firm but still scoopable. Keep the ice cream stored in the main part of your freezer to help avoid temperature fluctuations, which can lead to ice crystal formation and a weird texture. Sometimes you want a little more than just chocolate. This recipe is a perfect base for adding your favorite chocolate-adjacent flavors. You can even throw in a little whiskey like they did back in the day. Here are a few combos to get you started:

– Nutella + orange zest

– Peanut butter + frozen bananas

– Almond butter + toasted coconut flakes

– Ground cinnamon + cayenne pepper

Top a chocolate milkshake with anything your sweet tooth desires. Cookie crumbles, chocolate candies, rainbow sprinkles, chopped pecans, salty caramel, chopped strawberries…

Recipe:

INGREDIENTS:
1/2 c. semisweet chocolate chips
1 c. cold heavy cream, divided
2 tsp. granulated sugar
1 1/2 c. vanilla ice cream
1/4 tsp. kosher salt
Chocolate sprinkles, for garnish

DIRECTIONS:
In a small heatproof bowl, microwave chips and 1/4 c. cream on High for 30 seconds. Stir until chips are melted and a glossy sauce forms.
In a blender on high speed, blend granulated sugar and 1/2 c. cream until whipped cream forms, 1 to 2 minutes. Using a rubber spatula, transfer whipped cream to a small bowl.
In blender on high speed (no need to wipe out), blend ice cream, salt, remaining 1/4 c. cream, and all but 2 tbsp. chocolate sauce until smooth but still thick, about 30 seconds.
Divide milkshake between glasses. Top with whipped cream, reserved chocolate sauce, and sprinkles.

As posted on DELISH.COM.

Posted on Leave a comment

Chocolate Flourless Cupcakes

Flourless chocolate cupcakes

Chocolate Flourless Cupcakes

Ingredients:

4 ounces semi-sweet chocolate chips

1/2 cup butter

2/3 cup packed brown sugar

3 eggs, beaten

3/4 cup unsweetened cocoa powder

Directions:

Preheat oven to 375 F. Butter or spray muffin tin cups with baking spray. In a microwave safe bowl, heat butter and chocolate for 30 to 45 seconds. Stir. Heat another 30 or until just melted. Whisk in brown sugar. Whisk in eggs. Next, whisk in cocoa powder until combined. Fill each muffin cup about half full of batter. Bake about 10 to 14 minutes. Check them at 10 minutes. Do not over bake. They should be fudgy. Cool completely. Great served with fresh whipped cream and berries on top! Makes about a dozen.

As posted on Dayton247now.com.

Posted on Leave a comment

This cacao-rich oatmeal promises to satisfy anyone’s chocolate obsession

Chocolate oatmeal

The dates lightly sweeten the oatmeal, and the chia seeds pack a punch of energy-boosting power.

Yield: 2 servings

What You’ll Need:
2 cups unsweetened plant-based milk, divided
5-6 pitted dates
¾ cup rolled oats
1 ½ Tbsp cacao powder (or cocoa powder)
½ tsp cinnamon
1 Tbsp chia seeds
Fresh or frozen strawberries or dark cherries
Chocolate Obsession Oatmeal

How to Make It:
Blend 1 cup of plant-based milk with dates in a blender until smooth.
In a medium saucepan, combine dates and plant-based milk mixture with the remaining milk and rest of the ingredients, except the berries.
Bring to a low boil and cook on medium-low until thickened, about 15 minutes.
Top with thawed dark sweet cherries or fresh strawberries.

Tips:
Add more milk if you prefer a thinner oatmeal.
You can double or triple the recipe and store the leftovers in the fridge for the rest of the week.
You can also use ground flax seeds instead of chia seeds.
Top with your favorite fresh or frozen fruit of your choice.

As posted on GreenVilleOnline.com.

Posted on Leave a comment

Vegan Chocolate-Chipotle Ice Cream

Vegan chocolate ice cream

This recipe is 100% vegan, but you would never know it: It’s rich and decadent, like frozen ganache, with a bit of smoky tang from the chipotles. Nondairy ice cream is typically made with alternative milks or nondairy yogurt to achieve the creaminess of regular ice cream. Chef and ice cream maker Fany Gerson opts for a combination of both, calling for unsweetened oat milk or rice milk as well as coconut yogurt. The finished product is as creamy as it gets for being made without dairy, and the flavor combination of chocolate and chipotle, which is smoky and a bit hot, adds personality.

Ingredients:

6 medium-sizes dried chipotle chiles (about 1 1/4 ounces)
1 cup hot water
14 ounces vegan dark chocolate (70% cacao), chopped (about 2 1/2 cups)
1 ½ cups plain unsweetened oat milk or rice milk
¾ cup organic granulated sugar
½ cup plus 2 tablespoons unsweetened cocoa (about 2 ounces)
¾ teaspoon kosher salt
½ cup plain coconut yogurt (such as Anita’s)

Directions:

Step 1
Toast chiles in a dry, heavy skillet over medium, turning occasionally, until fragrant, 1 to 2 minutes. Remove from heat. Remove and discard chile stems, seeds, and ribs. Place chiles and 1 cup hot water in a small heatproof bowl; let soak until softened, about 30 minutes. Drain, reserving soaking liquid. Process chiles in a mini food processor or a blender until a smooth paste forms, about 1 minute, adding 2 to 3 tablespoons reserved soaking liquid as needed and stopping to scrape down sides of bowl as needed. Set aside. (Mixture can be stored in an airtight container in refrigerator up to 6 days.)

Step 2
Whisk together chopped chocolate, oat milk, sugar, cocoa, and salt in a medium saucepan. Cook over medium, whisking constantly, until chocolate is melted, about 3 minutes. Remove from heat; let mixture cool to room temperature, about 1 hour. Whisk in yogurt and 2 tablespoons chile paste, or more to taste. (Reserve remaining chile paste in freezer for another use.) Cover and refrigerate chocolate mixture until chilled, at least 3 hours or up to 12 hours.

Step 3
Spoon chilled chocolate mixture into frozen freezer bowl of an ice cream maker, and proceed according to manufacturer’s instructions. Transfer ice cream to a container; cover and freeze until firm, about 3 hours. Ice cream can be stored in an airtight container in freezer up to 1 week.

Make Ahead
Chipotle paste can be frozen up to 1 month. Thaw before using.

As posted on FoodandWine.com.

Posted on Leave a comment

Salted Dark Chocolate Chunk Brownies

Salted dark chocolate brownies

Why you will love this recipe: 3 words, chocolate, chocolate, chocolate. And you don’t even have to get out the mixer! Try using white chocolate chips for an extra shot of sweetness.

INGREDIENTS:
1/2 cup flour
1/3 cup unsweetened cocoa powder
1/4 teaspoon kosher salt
1/2 cup 1 stick unsalted butter
3/4 cup sugar
2 teaspoons pure vanilla extract
2 eggs at room temperature
1/2 cup bitter sweet chocolate chunks
1 teaspoon flake salt
2 teaspoons turbinado sugar

INSTRUCTIONS:
Preheat the oven to 350 degrees F. Spray an 8 inch baking pan with nonstick cooking spray.
In a small bowl, whisk together the flour, cocoa powder and salt. Set aside.
Melt the butter in a medium bowl using the microwave in 20 second increments until just melted, about 40 seconds. Whisk in the sugar and vanilla until incorporated. Whisk in the eggs, one at a time, until smooth.
Using a rubber spatula fold in the flour mixture until a few streaks of dry ingredients remain. Add the chocolate and fold a few more strokes to incorporate. Pour the batter into the prepared pan and sprinkle with the flake salt and turbinado sugar. Bake for 28 minutes or until a toothpick inserted in the center comes out with just a few moist crumbs. Allow to cool completely in the pan.

As posted on GIADZY.COM

Posted on Leave a comment

One-Bowl Chocolate Cake Recipe!

1 bowl chocolate cake

This easy-to-make chocolate cake is dark, moist, rich–and only dirties one bowl!

Servings: 12

Ingredients:

3/4 cup plus 2 tablespoons whole-wheat pastry flour
½ cup granulated sugar
⅓ cup unsweetened cocoa powder
1 teaspoon baking powder
1 teaspoon baking soda
¼ teaspoon salt
1/2 cup nonfat buttermilk
½ cup packed light brown sugar
1 large egg, lightly beaten
2 tablespoons canola oil
1 teaspoon vanilla extract
½ cup hot strong black coffee
Confectioners’ sugar, for dusting

Directions

Step 1: Preheat oven to 350 degrees F. Coat a 9-inch round cake pan with cooking spray. Line the pan with a circle of wax paper.
Step 2: Whisk flour, granulated sugar, cocoa, baking powder, baking soda and salt in a large bowl. Add buttermilk, brown sugar, egg, oil and vanilla. Beat with an electric mixer on medium speed for 2 minutes. Add hot coffee and beat to blend. (The batter will be quite thin.) Pour the batter into the prepared pan.
Step 3: Bake the cake until a skewer inserted in the center comes out clean, 30 to 35 minutes. Cool in the pan on a wire rack for 10 minutes; remove from the pan, peel off the wax paper and let cool completely. Dust the top with confectioners’ sugar before slicing.

As posted on PRAGATIVADI.COM

Posted on Leave a comment

Why You Should Use Warm Ingredients When Cooking With Chocolate

warm ingredients for chocolate

Having success with chocolate doesn’t require a trip to culinary school or tutelage from a master chocolatier living high in the Swiss Alps. You simply need to understand a few basic rules. Cooking with chocolate typically involves melting it, and often, other ingredients are added to the melted chocolate. For example, adding cream to melted chocolate creates a sauce called ganache. Ganache can also be made with a number of other ingredients, including liqueurs, fruit purees, nut butters, and spices (via Handle the Heat). Before other ingredients are added, however, chocolate must go through a melting process called tempering. This process, which is used to give melted chocolate a desirable consistency, is sensitive to both temperature and moisture. If the chocolate reaches temperatures above 130 degrees Fahrenheit, it will burn and be unusable. If even a small amount of water or liquid is added to chocolate before it is tempered, it can cause the chocolate to seize (via Ghiradelli). Read more about tempering HERE.


Posted on Leave a comment

Why Cocoa Percentage Is Important When Cooking With Chocolate

cocoa percentage

One of the first things you notice on the label of a chocolate bar these days is a number, often in a prominent bold font and hard to miss when staring down your array of options at the grocery store. This number doesn’t refer to calories or price but to the percentage of cocoa the bar contains. More specifically, the number describes how much of the chocolate actually came directly from cacao beans (via Bar and Cocoa). From creamy 33% milk chocolate-peanut butter blends or 55% dark chocolate raspberry, all the way to intense 72% bars of bliss, the variety of chocolate available seems to grow constantly. When it comes to late-night bites or a shared movie theater snack, your selection really comes down to personal preference. But cooking requires a slightly more calculated approach as far as cacao percentage is concerned. From a favorite chocolate birthday cake to ganache-topped delicacies, delicious baked goods often call for specific types of chocolate in the recipe — so keep your pantry prepared by having a variety on hand. To discover why cocoa percentage is important when cooking with chocolate, read HERE.


Posted on Leave a comment

What You Should Know Before Melting Chocolate In The Microwave

melting chocolate

If you’re baking a dessert with chocolate, incorporating some chocolate into candy, or making a dip for fresh strawberries, then you’ll need to melt some chocolate. And while using a double boiler may be the traditional method of choice for professional bakers, many home bakers find it easier to use their microwave instead. And while the microwave may seem to be the easiest method for melting chocolate, a lot can go wrong if you’re not careful. As Good Housekeeping explains, microwaves do not usually heat food evenly, which means there is a risk of overheating and potentially burning the chocolate if you try to melt it in a microwave, which would be a real shame indeed. Burnt (or “seized”) chocolate is thick and dull, and pretty much useless to dip or coat anything with, and really should either be tossed out entirely or used in a recipe where you’re meting chocolate with a liquid like butter or cream, warns Food52. Luckily, there are a few things you can do to mitigate the risk of ruining your chocolate in the microwave. To avoid burning chocolate in the microwave, read more, HERE.


Posted on Leave a comment

Purim: Chocolate hamantashen recipes for cheaper, slightly healthier holiday

Chocolate and poppy seed hamantashen

Hamantashen have not been spared the general rise in the cost of food prices. But here’s a solution: Make your own.

Makes about 20 hamantashen.
Prep. time: 25 minutes, plus cooling and chilling
Cook time: 30 minutes

For the filling:
1 cup poppy seeds
½ cup whole milk or water
2 Tbsp. (¼ stick) unsalted butter, cut into small cubes
¼ cup soft brown sugar
1 Tbsp. maple syrup or runny honey
2 Tbsp. sultanas or raisins
30g. good-quality dark chocolate, finely chopped, or dark chocolate chips
½ cup ground almonds
1 tsp. vanilla extract a pinch of fine sea salt

For pastry:
1¾ cups plain flour, plus extra for dusting
A pinch of fine sea salt
⅔ cup (1¼ sticks) unsalted cold butter, cut into small cubes
2 Tbsp. cold water
1 Tbsp. orange blossom
Water, or 2 tsp. lemon
Juice and 2 tsp. extra cold water
1–2 Tbsp. icing sugar, for dusting

First, make the filling. Grind the poppy seeds in a nut– or coffee-grinder, then place in a saucepan with all the other filling ingredients and heat gently, stirring constantly, until a very thick paste is formed that leaves the bottom of the pan clean when stirred, about 5 minutes. Remove from the heat, transfer to a bowl and leave to cool.
Meanwhile, make the pastry. Put the flour and salt into the bowl of a food processor with the well-chilled butter. Pour the cold water and orange blossom water or lemon juice/water mixture into the bowl, pulsing until the mixture looks like a moist crumble, then tip it into a bowl and gather it together to form a dough. Press the dough into a slightly flattened disc, then wrap it in plastic wrap and chill in the fridge until the filling is cold and you’re ready to make the hamantashen. To make the pastry without a food processor, simply sift the flour and salt into a bowl, then lightly rub in the cubes of butter until the mixture resembles breadcrumbs. Add the cold water and orange blossom water or lemon juice/water mixture and mix to a dough, then shape, wrap and chill as above.
Preheat the oven to 190°C or 170°C with fan. Line two baking sheets with non-stick baking paper.
Unwrap the chilled dough and roll it out on a lightly floured work surface to a thickness of 3mm. Cut the pastry into approx. 20 circles, each about 7.5cm. in diameter (an empty, well-washed tuna makes for an ideal cutter, or just use a round cookie cutter).
Put a heaping teaspoonful of the cooled filling in the center of each pastry circle, then bring the edges of each up and over the filling to form a triangle, pinching them together with your fingers to ensure a tight seal but leaving a gap in the center of each to allow steam to escape. Place on the prepared baking sheets, leaving a space between each one.
Bake for 25 minutes or until firm when gently touched, but uncolored. Remove from the oven, transfer to a wire rack and leave to cool for 10 minutes, then lightly dust with icing sugar. When quite cold, lightly dust them again, then serve.
Store any leftovers in an airtight container at room temperature for up to a week, or freeze for up to 3 months (defrost before serving).

By LAHAV HARKOV as posted  on JPOST.COM.

Posted on Leave a comment

Tahini chocolate chip hamantaschen

Chocolate chip hamantashen

Chocolate and tahini are a perfect pairing for Purim.

Ingredients:

For the dough:

2 eggs
1/4 cup vegetable oil
1/4 cup tahini paste
1/2 cup sugar
1 tsp vanilla extract
2 cups plain flour
1 tsp kosher salt
1/2 tsp baking powder
1/4 cup finely chopped dark chocolate

For the filling:

½ cup tahini
1 cup icing sugar
½ cup dark cocoa powder
½ teaspoon salt
2 Tbsp milk (can also use
non-dairy milk or water)
1 tsp sesame oil

For the egg wash:

1 large egg + 1 Tbsp water

For the ganache:

½ cup bittersweet chocolate
2 tablespoons sesame oil
For decorating: (optional)
Flaky sea salt
Toasted sesame seeds

Directions:
1. Preheat oven to 175 degrees C. Prepare two baking sheets with silicone baking mats or baking paper sprayed with cooking spray.

2. In a mixing bowl, combine eggs, oil, tahini and sugar and whisk together until smooth.

3. Sift flour and baking powder into the wet ingredients. Add chopped chocolate, and mix with a rubber spatula until a dough forms.

4. Work the dough briefly with your hands to form a ball. Set aside.

5. Combine all of the ingredients for the chocolate filling, and whisk until smooth.

6. On a floured surface, roll out the dough to just over 1/2 cm thickness. Use a 8cm cutter to cut circles out of the dough.

7. Place about a teaspoon of filling in the center of each circle. Brush the edges lightly with egg wash and pinch the corners together to form triangles.

8. Place on baking sheets about 4cm apart. Brush the tops lightly with egg wash. Bake for 10-15 minutes or until golden brown around the edges. Remove from the oven and cool on a wire rack.

9. To prepare the ganache: Over a double boiler, add chocolate and sesame oil. Heat until melted. (Or, use a microwave, heating the oil and chocolate in 20-second intervals and stirring between each turn until the chocolate is melted.)

10. Pour toasted sesame seeds into a shallow dish. Dip hamantaschen in the ganache and then in the sesame seeds, and place on a wire rack to cool. You can also sprinkle dipped hamantaschen with flaky sea salt. Once dipped, store in an airtight container at room temperature for two to three days.

Recipe by Stephanie Ganz for The Nosher as posted on AUSTRALIANJEWISHNEWS.COM.

Posted on Leave a comment

This swoon-worthy chocolate dessert begins with a box of cake mix — the rest is culinary magic

Chocolate dessert

Like the hot fudge cake or the St. Louis gooey cake, the Sicilian love cake is a little bit of culinary magic. A cheesecake-ish filling is spooned atop a regular old chocolate cake mix batter. The filling sinks as the cake bakes, transforming the entire dessert into something new and amazing. What’s more, it gets topped with a chocolate pudding frosting. The end result is a sheet cake guaranteed to make any crowd swoon.

Ingredients:

Cake:

1 box chocolate cake mix, plus the ingredients in the directions
Additional oil, for greasing the pan

Filling:

1 32-ounce tub ricotta cheese
3 large eggs
3/4 cup sugar
1/8 teaspoon sea salt

Frosting:

2 cups whole milk
1 box instant chocolate pudding mix

Directions:

Preheat the oven according to the directions on the box of cake mix. Coat a 9-by-13-inch pan with oil. In a large bowl, prepare the cake batter (per the directions), pour it into the pan and set the pan aside.

Combine the ricotta, eggs, sugar and salt in the same bowl and mix until smooth.

Pour the filling onto the cake pan over the chocolate batter.

Bake until the cake is firm and the chocolate layer has risen to the top, about 40 minutes. Let the cake cool completely.

In a bowl, blend the pudding mix and milk until smooth, then frost the cake. Serve it straight out of the pan.

From Valerie Bertinelli’s book, “Enough Already: Learning to Love the Way I Am Today” as posted on Salon.com

Posted on Leave a comment

Chocolate Cream Puffs

chocolate cream puffs

It goes without saying that classic treats like brownies or cookies, or even a favorite candy bar, will always cure a chocolate craving. But what about when you’re looking for something just a bit elevated from the norm? Cream puffs are a traditional dessert, but they can sometimes feel a bit too intimidating to tackle at home. Of course, a French bakery is always a great spot to grab a beautiful cream puff filled with luscious whipped cream. But what if you could pull off making them yourself? Certainly, it would be an impressive treat to serve for dessert, whether you’re hosting guests or simply gathering the family around the table. Cream puffs may seem like a challenging recipe, but this chocolate cream puffs recipe can be made in just 45 minutes and is easier to make than you think.

TOTAL TIME: 40 MINUTES
Ingredients:
½ cup water
½ cup milk
8 tablespoons salted butter
1 cup flour
3 eggs
2 cups heavy whipped cream, divided
2 tablespoons cocoa powder
4 ounces semi-sweet baking chocolate
Optional Ingredients
Powdered sugar, to taste

Directions:
Preheat the oven to 350 F.
In a small saucepan, add the water, milk, and salted butter. Turn the stove to medium heat to melt the butter.
When the butter is completely melted, turn the heat down to low. Stir in the flour, stirring rapidly until it’s entirely incorporated.
Continue to stir and cook the dough for one minute. It will begin to pull away from the sides of the pot and resemble mashed potatoes.
Transfer the beginning of the choux dough to a stand mixer. Fit the mixer with the paddle attachment and beat the dough for a few minutes to cool it down.
Once the dough has cooled, add in the 3 eggs one at a time. Allow each egg to fully incorporate before adding the next. If the mixture seems too thick and won’t be pipeable, add another egg.
Scoop the choux dough into a piping bag. Pipe mounds of choux dough on a greased baking sheet or a baking sheet lined with parchment paper. Bake the choux for 20 minutes until the tops are lightly golden brown. Do not open the oven while baking.
Remove the cream puff shells from the oven and poke them with a toothpick or skewer to create a small hole in the side to allow them to vent. Set aside to cool.
While the cream puff shells cool, make the chocolate topping. Heat ½ cup heavy whipping cream until boiling. Chop the baking chocolate and put it in a bowl. Pour the hot cream over top, allow it to sit, and then stir or whisk until smooth.
Once the cream puff shells are cool, cut them in half horizontally. Dip the tops in the prepared chocolate topping, and allow them to set at room temperature.
While the chocolate sets, make the chocolate whipped cream. Pour the remaining 1 ½ cups heavy cream into a mixing bowl. Use a hand mixer to whip the cream until stiff peaks form, about 8 minutes. Mix in the cocoa powder. Add powdered sugar, if desired, to taste.
Pipe the bottom shells with chocolate whipped cream and carefully place the top back on. Serve immediately.

As posted on TastingTable.com.

Posted on Leave a comment

5-minute recipe: End your day with this decadent eggless chocolate cake

eggless chocolate cake

The texture of this microwave cake is a little different than a regularly baked cake; but in terms of taste it is simply delicious.

Ingredients for the cake:

Plain flour (maida) — 2 cups
Baking powder — 2 tsp
Instant coffee powder — 1 tsp
Cocoa powder (unsweetened) — ¼ cup
Castor sugar (alternatively powdered sugar can be used) — ¾ cup
Oil (odorless) — ½ cup
Warm water — 2 cups
Dark chocolate (melted) — 200 gm
Fresh cream (at room temperature) — 100 gm
Strawberries — 12-15
Blueberries — 8-10

Method for the cake:

*Take a bowl and add 2 cups of plain flour, 2 tsp baking powder, 1 tsp instant coffee powder, 1/4 cup cocoa powder. Mix well.

*Take another bowl and add the castor sugar and half a cup of odorless oil. Mix well.

*Now strain and add dry ingredients into the wet ingredient batter. Whisk well to avoid getting lumps.

*Take a microwave safe plate or tray and grease with oil. Place a parchment paper on it and bake for 5 minutes in a microwave.

*Rest the cake for 10 minutes after taking it out of the microwave.

*Melt 200 gms of dark chocolate and mix in 100 gms of fresh cream with the melted chocolate to make ganache.

*Demould the cake onto the plate and set aside.

*Pour ganache in a piping bag and proceed to spread evenly on the cake in concentric circles.

*Decorate the cake with fresh strawberries, blueberries and a mint leaf.

As posted on IndianExpress.com.

Posted on Leave a comment

12 Types of Chocolate That Every Baker Should Know

12 types of chocolate

Next time you’re in the baking aisle, spend an extra minute or two in the chocolate section—the possibilities are endless! Want to know how to melt chocolate for dipping fruit? Cocoa powder for Ree Drummond’s sheet cake? How about a rich chocolate for brownies? Or chocolate chips for cookies? There’s a chocolate for everything! But how do you know what to use? Click HERE and read on for 12 of the most popular types of chocolate—and the best ways to try them.

Posted on Leave a comment

Chocolate Gravy Is a Thing and Better Yet, It’s for Breakfast

Chocolate gravy

Your biscuits will never be the same. If you like Nutella spread on bread, or love your pudding warm, this combo will blow your mind. And biscuits are the perfect foil. Chocolate gravy on biscuits has long roots in Appalachia, and because is it essentially a pantry recipe, using cocoa powder for the chocolate, it is one of those things that can be made almost any time on a whim. It is super easy to make, you can hold it in a slow cooker on warm, and it is always that surprising bonus special dish that makes guests excited.

Ingredients:

1/4 cup cocoa powder
1 cup granulated sugar
3 tablespoons instant flour or all-purpose flour
Pinch of kosher salt
2 cups whole milk, warmed
4 tablespoons butter, cubed and chilled
Hot biscuits for serving

Directions:

Step 1
Sift together the cocoa, sugar, flour, and salt into a large skillet.

Step 2
Whisking continuously, add the warm milk in a slow, steady stream and whisk until smooth.

Step 3
Cook over medium heat, stirring continuously with a heatproof spatula until the gravy thickly coats it, about 8 minutes.

Step 4
Remove the skillet from the heat, add the butter, and stir until melted.

Step 5
To serve: Split the hot biscuits in half and divide among serving plates. Top with warm gravy and serve straightaway.

Sheri Castle’s recipe, posted on MyRecipes.com.

Posted on Leave a comment

You only need 3 ingredients and 15 minutes to bake this magical chocolate cake

3 ingredient chocolate cake

The flourless chocolate cake is one of the greatest feats of baking magic ever invented. It’s a chic little showstopper, the kind of thing that makes people go, “It’s so rich, I can only have a teensy slice,” but you’re like, “I’ll be the judge of that, thank you.” It’s exactly the right dessert to chase away the winter blahs, a cake that feels festive when the weather says otherwise. One word of warning: This is a very simple recipe, but it’s also very ingredient and technique specific. There are only 3 ingredients, so pick out the butter, chocolate and eggs you really love. Yes, you really have to whip the eggs for 5 minutes; you really have to use a bain-marie; and you really have to cover it in foil and then remove the foil.

Recipe: 15-Minute Chocolate Cake

Inspired by “Italian Easy: Recipes from London’s River Cafe

Yields: 12 servings (or maybe 8, no judgment)
Bake Time: 15 minutes

Ingredients:

1 pound of chocolate with at least 70% cocoa solids, broken up into pieces (I like Lindt.)
2 1/2 sticks of butter (I’m fond of Kerrygold.)
6 eggs, organic if possible

Directions:

Preheat the oven to 425°F.
Generously butter a 10-inch springform pan and line the bottom with parchment paper. (No springform pan? You can do this in a cake pan of the same size, but it will be trickier to release.)

Set a medium pan of water to simmer. You’ll be whipping your eggs in a bowl over this water, so fill it about halfway.
In a large microwave-safe bowl, melt the chocolate and butter in the microwave for 1 minute. Stir, then microwave in 15 second intervals until completely melted. (You can do the melting over a simmering bowl of water thing, if you’re inclined; but I never have, and I wouldn’t ask you to try.)
Break all of the eggs into a bowl large enough to fit over the pan of water. Place the pan over the water and beat the eggs until they just start to thicken, about 1 minute or so.
Remove the pan from the heat and beat the eggs another 4-5 minutes, until they’re very light and foamy.
Meanwhile, pour your hot water into a roasting pan.
Fold half of the eggs into the chocolate mixture to combine, then fold in the remainder.
Pour the batter into your springform pan, then cover with a lightly buttered sheet of foil. Gently place the springform pan in the roasting pan, so the water comes about halfway up the sides.
Bake for 5 minutes, then remove the foil and bake for another 10 minutes.
Remove everything from the oven. The cake should be a little wiggly in the center. Remove it from the roasting pan and allow it to cool completely.
Unmold and dust with confectioners sugar, or serve with whipped cream and fruit.

As posted on SALON.COM by Mary Elizabeth Williams.

Posted on Leave a comment

How to make ONE ingredient chocolate mousse

1 ingredient chocolate mousse

A cookbook author and pilates instructor has shared how to make a mouthwatering chocolate mousse using one ingredient. Amy from Melbourne, who goes by Amy Lee Active online, uses her favorite block of quality chocolate and boiling water to create the tasty dessert.

Amy begins by breaking up a block of her favorite quality chocolate and placing it into a heat proof bowl. The chocolate must have a cocoa content of 60% or more. Next she pours three quarter cups of boiling water directly on top of the chocolate, then begin whisking the water and chocolate together. Continue whisking until all of the chocolate has melted and the consistency resembles ‘thickened cream’. Next she whips the mixture with an electric mixing device over a bowl of ice until it is thick and creamy, this will take eight to 10 minutes. Finally Amy pipes the chocolate mousse into a glass and tops it with dark chocolate shavings and strawberries.

As posted on DAILYMAIL.CO.UK. Click HERE to watch the video of how it’s made.

Posted on Leave a comment

5 CREATIVE HOT CHOCOLATE UPGRADES TO TRY THIS WINTER

5 hot chocolate upgrades

Hot chocolate is a cozy cold-weather favorite. While the traditional beverage is always a tasty option, hot chocolate is capable of so much more. From baked goods to frozen treats, there are many sweet ways to put those hot cocoa packets to work. Enjoy hot chocolate’s versatility with these five unique recipes for Baileys slow cooker hot chocolate, hot chocolate with cheese, hot chocolate dip, Ferrero Rocher hot chocolate, and Tahini hot chocolate, with recipes HERE.

Posted on Leave a comment

These Chocolate Desserts Won’t Mess With Your Blood Sugar (At Least, Not As Much)

chocolate treats

While any sweet will cause some blood sugar rise, picking strategic recipes (like these five) can mean enjoying your dessert knowing your body’s response won’t be quite as dramatic—which is a good thing for your health. Click, HERE, for recipes for 5 delicious recipes: 3-Ingredient Chocolate Truffles, One-Bowl Brownies, Seeded Chocolate-Tahini Bark, Collagen Chocolate Mousse, and Choco-cado pudding pops.


Posted on Leave a comment

Difference Between Hot Cocoa and Hot Chocolate

hot chocolate vs hot cocoa

Try the following recipes to see!

Hot Chocolate Recipe

Ingredients:

8 ounces bittersweet chocolate at least 70%, chopped (Godiva or Trader Joe’s is suggested)
1.5 cups whole milk
1/2 cup heavy cream
2 teaspoons powdered sugar
1/2 teaspoon espresso powder

Method:

In a medium saucepan over medium heat, whisk together the whole milk, heavy cream, powdered sugar, and espresso powder until small bubbles appear around the edges. Do not allow the mixture to boil.
Remove from saucepan from the heat and stir in the chopped chocolate until melted, returning the sauce to low heat if needed for the chocolate to melt completely. Serve warm, topped with lots of whipped cream.

Hot Cocoa Recipe

Ingredients:

2 tablespoons unsweetened cocoa powder
1 to 2 tablespoons sugar
pinch of salt
1 cup milk or any combination of milk, half-and-half, or cream
1/4 teaspoon vanilla extract

Method:

Whisk together the cocoa, sugar, salt, and about 2 tablespoons milk in a small saucepan over medium-low heat until cocoa and sugar are dissolved. Whisk in the rest of the milk and heat it over medium heat, whisking occasionally, until it is hot. Stir in the vanilla and serve.
If you like it frothy, blend it in the blender. Add salt to taste.

As posted on TheManual.com.


Posted on Leave a comment

Jamika Pessoa’s melty chocolate peppermint ‘Grinch’ cookies

Chocolate peppermint grinch cookies

Inspired by “How the Grinch Stole Christmas,” these peppermint cookies have a green hue and a melty chocolate-hazelnut center.

Makes: 24 cookies

Ingredients:

1/2 cup hazelnut spread (preferably Nutella) 2 1/2 cups flour
1/2 teaspoon baking powder
1/2 teaspoon salt
1 1/2 sticks unsalted butter, softened
1 cup granulated sugar + 1/4 cup for rolling
2 eggs
1 teaspoon vanilla extract
Several drops of green food coloring
1/4 cup crushed peppermint candies or candy canes

Directions:

Spoon hazelnut spread into a plastic piping bag. On a sheet of parchment paper, pipe 1 teaspoon (nickel sized) rounds about 1 inch apart. Pipe approximately 24 rounds. Place in the freezer. Freeze hazelnut spread for at least 1 hour until firm.

In a bowl, whisk flour, baking powder, and salt and set aside.

In a separate bowl, beat softened butter and sugar until fluffy, approximately for 2 minutes, on medium high-speed using a stand mixer paddle attachment or electric hand mixer.

Add in one egg at time, followed by vanilla extract. Add enough food coloring until desired bright green color is achieved. Mix until well combined.

Reduce speed to low and pour in flour mixture. Mix just until flour is well incorporated into dough. Cover bowl with plastic wrap and chill in refrigerator for 1 hour.

Preheat oven to 350 degrees.

Combine remaining sugar and crushed peppermint candies in a bowl.

Remove firm hazelnut spread rounds from freezer. Working swiftly, scoop 1 ½ tablespoons of chilled dough from bowl. Place hazelnut round in the center of portioned dough and wrap around dough around until it is completely covered. Shape cookie dough into ball using your hands. Then roll cookie dough in candy mixture. Place cookie dough balls about 2 inches apart on parchment paper (or silicon baking mat) lined baking sheet.

Bake for 10-12 minutes. Cool on baking sheet for 5 minutes. Serve warm.

As posted on GoodMorningAmerica.com.

Posted on Leave a comment

Anthony Underwood’s perfect chocolate chip cookies

Anthony Underwood chocolate chip cookie

Inspired by the hit Christmas movie “Rudolph the Red-Nosed Reindeer” Anthony Underwood shares a special recipe nearly a decade in the making. Underwood said this recipe delivers a chewy cookie with a crispy edge has a soft and melty center.

Ingredients:

2 cups (260g) unbleached all-purpose flour
1/2 teaspoon baking soda
1 1/2 teaspoons instant espresso powder
14 tablespoons unsalted butter (1 ¾ sticks; 198g), divided and cut into 1 tablespoon pieces
1/2 cup (100g) granulated sugar
3/4 cup (150g) dark brown sugar
1 1/2 teaspoons kosher salt (Diamond Crystal)
2 teaspoons vanilla extract
1 large egg
1 large egg yolk
1/2 cup (87g) semi-sweet chocolate chips (like Guittard)
1/2 cup (80g) cark chocolate (70%) discs (can substitute chopped chocolate from a bar)
3/4 cup (87g) chopped, toasted walnuts or pecans (optional)

Directions:

Whisk together flour, baking soda, and espresso powder in a medium bowl and set aside.

In a saucepan over medium-high heat, melt 1 stick of butter (8 tablespoons or115 g). Continue cooking until butter begins to brown. Swirl pan constantly until butter has foamed and takes on a dark golden brown color and smells nutty. Watch carefully, as it can quickly go from dark to burnt. Carefully pour browned butter into a large heat-proof bowl, scraping all the browned bits from the pan by using a heat-proof spatula.

Immediately whisk the remaining butter pieces into the browned butter, until melted. Add sugars, salt, and vanilla to the bowl, and whisk to fully incorporate.

Add egg and egg yolk and whisk until smooth with no lumps remaining, about 30 seconds. Let mixture stand for 2-3 minutes to let the sugars melt, then whisk for another 30 seconds. Repeat this rest-and-whisk process 3 times, total. Mixture should seem thickened, smooth, and shiny.

Using a spatula, stir in dry ingredients until just combined (and a few flour streaks still remain). Stir in chocolate chips, discs, and nuts (if using) until evenly distributed and no flour pockets remain. Refrigerate dough for at least 2 hours, or overnight.

Once dough has chilled, scoop into balls that are slightly bigger than a golf ball. (At this point, I put them on a quarter sheet tray in the freezer, once frozen solid, I transfer them to a resealable freezer bag, so I always have homemade dough at the ready!).

Place cookies 2 inches apart on lined baking sheets (or a nonstick cookie sheet).

Bake at 375 degrees for 10 to 14 minutes until cookies are golden brown and puffy in center, but edges are darker and fully set. Transfer cookie sheet to a rack to cool completely (or at least 10 minutes).

NOTE: If baking from frozen, I let dough balls sit out for 20-30 mins while the oven preheats to 350 degrees and bake for 16 to 20 minutes.

As posted on GoodMorningAmerica.com.

Posted on Leave a comment

The Best Boozy Hot Chocolate

boozy hot chocolate

Few drinks embody happiness in a mug like hot chocolate. There are countless ways to make it, from instant packs of cocoa powder to double-boiler setups used to carefully melt down chocolate bars or chips. While there’s something to be said for the convenience of premade mixes, if you’re truly looking to soak in the decadence of drinking melted chocolate, opt for a from-scratch recipe that uses both cocoa powder and semisweet chocolate for added body and flavor. This yields a true hot chocolate, rather than simply hot cocoa.

Prep time – 5 min.
Cook Time – 5 min.
Total Time – 12 min.
Serving Size – 4

INGREDIENTS:

4 cups whole milk
4 tablespoons unsweetened cocoa powder
4 tablespoons fine granulated sugar
1/8 teaspoon salt
3 ounces semisweet or bittersweet chocolate, finely chopped
¼ teaspoon vanilla extract
6 ounces rum
1 cup heavy cream

DIRECTIONS:

Heat milk in thick-bottomed saucepan over low heat, stirring continuously. When warm, whisk in cocoa powder, 3 tablespoons sugar, salt and chopped chocolate. Continue to whisk vigorously until all ingredients are fully melted and incorporated. Remove from heat and whisk in 4 ounces rum.

In separate mixing bowl, add heavy cream, vanilla extract, 1 tablespoon sugar and 2 ounces rum. Whisk vigorously for 2–4 minutes, until thick enough to firmly coat spoon but before solid peaks begin to form.

To serve, add chocolate mixture to heat-proof mug, leaving room for cream. Float 2 ounces of cream atop the drink by gently pouring it over the back of a spoon.

As posted on WINEMAG.COM.

Posted on Leave a comment

Gingerbread Hot Chocolate

gingerbread hot chocolate

During the wintertime, there are several warm drinks that can keep you nice and toasty, but a lot of them involve coffee. There’s no doubt that lattes are great, but every once in a while, a nice cup of hot chocolate just hits the spot. This gingerbread hot chocolate not only tastes amazing, but it is sure to be popular with everyone from kids to grownups.

4 servings

Ingredients:
2 (13.5-ounce) cans unsweetened coconut milk
6 tablespoons unsweetened cocoa powder
2 tablespoons maple syrup
1 tablespoon molasses
1 teaspoon cinnamon
1 teaspoon ginger
1 teaspoon allspice
1 teaspoon vanilla extract
¼ teaspoon cloves
Optional Ingredients
whipped cream, for topping
cinnamon, for topping

Directions:
Add the coconut milk, cocoa powder, maple syrup, molasses, cinnamon, ginger, allspice, vanilla, and cloves to a medium-sized pot.
Warm on medium heat, stirring with a whisk to blend for about 5 minutes.
When it starts to bubble, reduce the heat to low.
Pour the hot chocolate into mugs and top with whipped cream and additional cinnamon if desired.

As posted on MASHED.COM.


Posted on Leave a comment

Chocolate-Dipped Cookies

chocolate dipped cookies

Ingredients:

3 cups butter-flavored shortening (she prefers Crisco)
4-1/2 cups sugar
6 eggs
6 tablespoons milk
3 teaspoons vanilla
1-1/2 teaspoons salt
1-1/2 teaspoons baking powder
7-1/2 cups flour

Directions:

Mix ingredients. Bake at 375 F for 7-9 minutes or longer. Brush with melted butter. Cool. Dip 1/2 the cookie in melted chocolate.

Recipe by Jenica Zimmerman, Annville, Pennsylvania as posted on LANCASTERFARMING.COM.

Posted on Leave a comment

Chocolate-covered bourbon cherries for Christmas dessert

chocolate bourbon cherries

Enjoy your holiday season with this easy and delicious dessert recipe. These chocolate covered bourbon cherries from Southern food blog, Quiche My Grits, are “quick and easy to make,” blog creator Debi Morgan says in her post. “You’ll love the explosion of bourbon flavor followed by the bitterness of semi-sweet chocolate,” Morgan says, adding that a glass of red wine pairs perfectly with the adult-only treat.

Ingredients:
1 – 16 oz. jar maraschino cherries with stems

1 cup bourbon (or liquor of your choice)

12 oz. semi-sweet chocolate chips

1 Tbsp. coconut oil

Instructions:
1. Drain cherry juice from jar. Place cherries in a bowl or airtight container.

2. Pour bourbon over cherries until they are covered. Refrigerate overnight.

3. Drain bourbon from cherries. Pat cherries with a paper towel to dry.

4. Melt chocolate chips and coconut oil in a microwave at 30-second intervals, stirring each time. Chocolate is ready when it is completely smooth.

5. Holding the stem of one cherry at a time, dip it into the chocolate. Use a spoon to help cover the cherries with chocolate.

6. Transfer the chocolate-covered cherries to a parchment-lined baking sheet to cool. Refrigerate cherries for one hour so chocolate will set.

As posted on FOXNEWS.COM

Posted on Leave a comment

Chocolate-Chess Mini Pies Will Make the Chocolate Lovers In Your Life So Happy

chocolate mini pie

Kids and adults alike will love Chocolate-Chess Mini Pies for the holidays! These personal-size pies start with a time-saving refrigerated pie crust and have a classic, creamy chocolate filling. Instant espresso powder adds deep, rich flavor to this mini dessert. Dust with a mix of cocoa and espresso powder and top with a dollop of whipped cream before serving for a perfectly portioned, indulgent treat.

INGREDIENTS
For the crust:
2 (14.1-oz) packages refrigerated pie dough (4 sheets total)
Chocolate chess filling:
2 oz dark unsweetened baking chocolate
⅔ cup butter
½ cup evaporated milk
1 tsp vanilla
1 large egg
1 cup sugar
4 Tbsp unsweetened cocoa powder, divided
1½ Tbsp flour
1 Tbsp instant espresso powder

Directions:

For the crust:
Coat a standard-size 12-cup muffin tin with nonstick cooking spray. Allow pie dough to come to room temperature.

On a lightly floured surface, use a rolling pin or your hands to slightly thin out dough.

Using a 4-inch cookie cutter or glass (or 5-inch cutter, to have excess for a fluted edge, as pictured with Cranberry- Pecan Crumble Pie), cut three circles from each dough sheet to make 12 circles total.

Fit circles into the muffin-tin cups. Trim excess or pinch into a fluted edge. Refrigerate until ready to fill.

Chocolate chess filling:
Preheat oven to 350°F. In a microwave safe bowl, melt together chocolate and butter. Heat at 30 second intervals, stirring until fully melted and well blended. Cool 5 minutes.

In a large bowl, whisk together milk, vanilla and egg. Stir in cooled chocolate-butter mixture until well blended. Add sugar, 2 Tbsp cocoa powder and flour, whisking until combined. Pour equal amounts of the filling into chilled crusts.

Bake 20 to 25 minutes. Filling may be slightly jiggly. Remove from oven and cool 15 minutes. Carefully remove pies from muffin tin and cool completely on a wire rack.

In a small bowl, combine espresso and remaining 2 Tbsp cocoa powder. If desired, top each pie with whipped cream and a dusting of the cocoa-espresso mixture.

As posted on PARADE.COM.

Posted on Leave a comment

Mint Chocolate Chip Cake

no bake chocolate mint cake

Fresh mint leaves, not mint extract, make the flavor of this layer cake truly special. Because the flavor of the mint is so natural and subtle, we added it to the rich devil’s food-like cake layers and the fluffy buttercream frosting. The trick to extracting the most fresh mint flavor is to bruise the mint leaves by slapping them a few times between your hands. This helps the oils in the leaves come out more easily. Then, steep the mint sprigs in hot water (for the cake layers) and cook them in butter (for the frosting). The flavor of this cake can’t be beat. If you’re a fan of mint chocolate chip ice cream, this might become your new favorite dessert.

Ingredients:
Cake
Baking spray with flour
Parchment paper
1/2 cup boiling water
4 mint sprigs, bruised
2/3 cup semisweet chocolate chips
1/3 cup canola oil
1/3 cup sour cream
3 large eggs
1 teaspoon vanilla extract
1 1/3 cups (about 5 3/4 oz.) all-purpose flour
1 1/3 cups granulated sugar
3 tablespoons unsweetened cocoa
1 teaspoon baking soda
1/2 teaspoon kosher salt
1/2 teaspoon baking powder
Frosting:
2 cups (16 oz.) unsalted butter
12 large mint leaves, bruised
4 cups (about 12 oz.) powdered sugar
1/2 teaspoon vanilla extract
1/4 teaspoon kosher salt
2 to 4 tablespoons heavy whipping cream
Mint green liquid food coloring
Garnish
Mint sprigs, mini chocolate chips

Directions:
Step 1
Prepare the Cake: Preheat oven to 350°F. Coat 2 (8-inch) round cake pans with baking spray and line with parchment paper.

Step 2
Place boiling water and mint sprigs in a heatproof bowl. Let steep 10 minutes. Discard mint, and stir in chocolate chips; let stand 2 minutes. Stir until chocolate is melted, about 1 minute. Whisk in oil, sour cream, eggs, and vanilla until smooth.

Step 3
Stir together flour, sugar, cocoa, baking soda, salt, and baking powder in a large bowl. Stir in wet ingredients. Pour batter evenly (about 2 cups per pan) into prepared pans.

Step 4
Bake in preheated oven until a wooden pick inserted in center comes out clean, 20 to 25 minutes. Cool in pans 10 minutes. Remove cake layers to wire racks, and let cool completely, about 1 hour.

Step 5
Prepare the Frosting: Place butter and mint leaves in a small saucepan over low. Cook, stirring often, until butter is melted and begins to foam, about 15 minutes. Remove from heat; discard mint. Transfer mint butter to a heatproof bowl, and refrigerate until re-solidified but still soft, about 1 1/2 hours.

Step 6
Beat mint butter in bowl of a stand mixer fitted with a paddle attachment on medium-high speed until light and fluffy, about 2 minutes. Reduce speed to low, and add powdered sugar, vanilla, salt, and 2 tablespoons of the cream until combined. Increase speed to medium-high, and beat until fluffy, about 2 minutes, adding remaining cream, 1 teaspoon at a time, to reach desired consistency if needed. Beat in 1 drop liquid food coloring, adding more, if necessary, until desired color of pale green is reached.

Step 7
Spread 1 cup frosting between cake layers; spread a thin layer on top and sides of cake, smoothing with a spatula. Chill cake and remaining frosting 30 minutes. Spread remaining chilled frosting on top and sides of cake. Chill cake until firm enough to cut, about 1 hour. Garnish with mint sprigs, if desired.

As posted on SOUTHERNLIVING.COM.

Posted on Leave a comment

No-Bake Dark Chocolate-Peppermint Sandwich Cookies Recipe

no bake chocolate cookies

Christmas cookies just got a whole lot easier. Sure, we love to go all-out with homemade layer cakes and pies, but sometimes, you just don’t want to turn on the oven. When you’ve got a family to feed and cookie tins to fill, these No-Bake Dark Chocolate-Peppermint Sandwich Cookies will be your holiday hero.

Ingredients:

1 cup unsifted powdered sugar
½ cup unsalted butter
1 tablespoon whole milk
¼ teaspoon peppermint extract
Red food coloring gel
54 chocolate wafer cookies (from 2 [9-oz.] pkg., such as Nabisco Famous Chocolate Wafers)
2 (12-oz.) pkg. bittersweet chocolate chips
1 tablespoon plus 1 tsp. coconut oil
Crushed hard peppermint candies

Directions:
Step 1
Beat powdered sugar, butter, milk, and peppermint extract with a stand mixer fitted with a paddle attachment on medium speed until smooth, about 1 minute. Using a wooden pick, add 1 small drop of food coloring to mixture. Beat until color is evenly distributed, about 1 minute. Beat in additional food coloring until desired color is reached. Transfer frosting to a piping bag or a ziplock plastic bag with a ½-inch corner snipped off.

Step 2
Arrange half of wafer cookies upside down on a clean work surface. Pipe a 1-inch dollop (about 2 teaspoons) frosting onto each cookie; top with remaining cookies facing right side up. (Reserve any remaining frosting for another use.) Gently press sandwich cookies to push filling almost to outer edges.

Step 3
Place chocolate and coconut oil in a microwavable bowl. Microwave on HIGH until fully melted and smooth, 3 minutes, stopping to stir every 30 seconds. Dip 1 sandwich cookie into melted chocolate mixture using a fork, coating completely and letting excess drip back into bowl. Transfer dipped sandwich cookie to a baking sheet lined with parchment paper, and immediately sprinkle with crushed peppermint candies. Repeat procedure with remaining sandwich cookies, melted chocolate mixture, and crushed candies.

Step 4
Chill dipped sandwich cookies until set, about 30 minutes. Store in an airtight container in refrigerator up to 5 days.

As posted on SOUTHERNLIVING.COM.

Posted on Leave a comment

Only 2 Ingredient Chocolate Cookie Recipe – Without Milk, Flour, Cocoa, Butter!

2 ingredients chocolate cookies

Here’s an amazing and incredible recipe to share with you! Sure you have tried many cookie recipes but this one is super easy and delicious. You only need 2 ingredients. ONLY 2! You will love this cookie dessert and surprise everyone! For specific directions check out the YouTube demonstration HERE.

Ingredients;
2 Egg Whites
80 gr bitter chocolate

Posted on Leave a comment

Chocolate Tassies

chocolate tassies

These tiny pies get their name from the Scottish and French words for small cup or glass. A tender, buttery crust encases a dark chocolate, brownie-like filling. Add a pinch of flaky sea salt to the top of each one to bring out the sweetness of the dark chocolate. Tassies are best the day they are baked, but the dough and filling may be made up to 3 days in advance. You’ll need a mini muffin tin to make these. If your tin has 24 cups, you can double the recipe, or make another filling flavor. It’s not necessary to grease the tin.

Active time: 20 mins; Total time: 40 mins, plus 1 hour for chilling dough

Make Ahead: The dough must be refrigerated for 1 hour. Dough and filling can be made up to 3 days in advance. Bring the filling back to room temperature before portioning it into cups and baking.

Storage Notes: Leftover tassies may be covered and refrigerated for up to 2 days.

SERVINGS:
12

INGREDIENTS:
FOR THE CRUST
4 tablespoons (2 ounces/60 grams) unsalted butter, softened, but still cool to the touch
1 1/2 ounces (40 grams) cream cheese, softened, but still cool to the touch
1/2 cup plus 1 tablespoon (70 grams) all-purpose flour
FOR THE FILLING
2 tablespoons unsweetened cocoa powder, preferably Dutch processed
1 tablespoon unsalted butter, melted
1/3 cup (65 grams) granulated sugar
1 teaspoon all-purpose flour
1 large egg white (see NOTE)
1/8 teaspoon fine sea or table salt
1/4 cup (45 grams) chopped dark chocolate (60 to 70 percent) or chocolate chips, chopped
Flaky sea salt, for garnish (optional)

DIRECTIONS:
Make the crust: In the bowl of a stand mixer fitted with the paddle attachment — or, if using a hand mixer, in a large bowl — beat together the butter and cream cheese until smooth, about 2 minutes. Stop the mixer and add the flour. On low speed, mix until no streaks remain and the dough starts to come together, about 1 minute. Scrape any stray dough from the sides of the bowl, gather into a ball and flatten into a smooth rectangle or disc. Cover tightly and refrigerate for 1 hour.

Cut the cold dough into 12 equal pieces, about 1-inch cubes, and, using your fingers, evenly press each piece into the bottom and up the sides of 12 mini muffin cups, making sure there are no holes. Refrigerate, uncovered, while you make the filling.

Position a rack in the middle of the oven and preheat to 350 degrees.

For the filling: Place the cocoa powder in a small, heatproof bowl. In a small skillet over medium-high heat, heat the butter just until it’s melted. Immediately pour it over the cocoa, and stir until smooth. Stir in the sugar, flour, egg white and salt just until combined. Stir in the chopped chocolate until the mixture is combined, but still chunky.

Retrieve the muffin pan from the refrigerator, and using a soup spoon, fill each dough cup about 3/4 of the way.

Bake for 15 to 20 minutes, or until the crust is golden brown and the filling is puffed and set. Transfer the pan to a wire rack and let cool completely before removing the tassies. Top each with a pinch of flaky sea salt, if desired, before serving.

NOTE: If doubling this recipe, you can use 2 egg whites or 1 whole egg.

Scott Suchman for The Washington Post; styling by Lisa Cherkasky for The Washington Post, as posted on WashingtonPost.com.


Posted on Leave a comment

Caramel Crunch–Chocolate Chunklet Cookies

Chocolate caramel cookies

These not-your-average chocolate chunk cookies boast big caramel flavor—but there’s no caramel in the ingredient list. Instead, the sugar and butter in these slice-and-bake one-bowl cookies brown in the oven for a deeply sweet, nutty, caramelly flavor, and the cookies are baked in muffin tins for extra toasty, crisp edges. If walnuts aren’t your thing, feel free to substitute with more chopped chocolate.

Ingredients
Makes 24
½ cup (100 g) granulated sugar
½ cup (55 g) powdered sugar
1 tsp. Diamond Crystal or ½ tsp. Morton kosher salt
1 cup (2 sticks) unsalted butter, cut into pieces, room temperature, plus more for pans
1 tsp. vanilla extract
2¼ cups (281 g) all-purpose flour
3 oz. bittersweet, semisweet, or milk chocolate, coarsely chopped
½ cup coarsely chopped walnuts
Preparation
Step 1
Using an electric mixer on medium speed, beat granulated sugar, powdered sugar, salt, and 1 cup butter in a large bowl until creamy, about 2 minutes. Beat in vanilla; scrape down sides of bowl. Add flour and pulse mixer a few times, then beat on low speed until flour is almost fully incorporated, about 1 minute (don’t overbeat; dough should be more clumpy than smooth). Beat in chocolate and walnuts just to blend.

Step 2
Turn dough out onto a surface and knead gently to bring together. Divide in half and form into 6″-long logs about 2″ in diameter (no need to be perfect about shape of logs). Wrap in plastic and chill until firm, at least 2 hours.

Step 3
Place racks in upper and lower thirds of oven; preheat to 350°. Butter 2 standard 12-cup muffin pans. Unwrap logs and mark at ½” intervals, then cut into rounds with a chef’s knife. Place rounds in muffin cups.

Step 4
Bake cookies, rotating pans top to bottom and front to back halfway through, until golden on top, browned around the edges, and slightly soft in the center (cookies will firm up as they cool), 20–22 minutes. Let cool in pans 3 minutes, then transfer cookies to wire racks and let cool completely.

Do Ahead: Dough can be formed into logs 3 days ahead; keep chilled, or freeze up to 2 months. Thaw 1 hour at room temperature or overnight in the refrigerator before slicing and baking. Cookies can be baked 7 days ahead; store airtight at room temperature.

Excerpted from ‘Baking With Dorie: Sweet, Salty, & Simple’ 2021 by Dorie Greenspan, as posted on BonAppetit.com.

Posted on Leave a comment

Hand out this Creepy, Crawly, Chocolate Spider for Halloween

Halloween chocolate spiders

Add pretzel legs to REESE’S Peanut Butter Pumpkins and garnish with candy eyes. Part recipe, part quick Halloween craft, these pretzel spiders use HERSHEY’S MIlk Chocolate Chips to boost the flavor and fun.

Ingredients:

8                REESE’S Peanut Butter Pumpkins (1.2 oz each)
32              large pretzel twists (2-1/2 to 3 in)
1/4 cup    HERSHEY’S Milk Chocolate Chips, HERSHEY’S SPECIAL DARK Chocolate Chips or HERSHEY’S Semi-Sweet Chocolate Chips (this amount of                                                                              chocolate will make about 8 spiders)
candy eyes

Directions:

Equipment Needed:
Tray or Cookie Sheet
Wax Paper
Microwave-Safe Bowl
Microwave
Measuring Cup
Rubber Scraper
Food Storage Bag

1. Line tray or cookie sheet with wax paper. Remove wrappers from desired number of peanut butter pumpkins. For each spider, cut 8 matching curved sections from pretzels which will form the legs. Set aside remaining pretzels pieces.

2. Place milk chocolate chips in small microwave-safe bowl. Microwave at medium (50%) 30 seconds; stir. If necessary, microwave at medium an additional 10 seconds at a time, stirring after each heating, until chips are melted and smooth when stirred. Transfer to small heavy duty plastic food storage bag. Cut off one corner of bag about 1/4 inch from the tip.

3. For each spider, place peanut butter pumpkin on prepared tray. Attach pretzel legs and candy eyes to spider with melted chocolate. Allow chocolate to set before moving spiders.

As posted on Hersheyland.com

Posted on Leave a comment

Make your own chocolate sunflower energy bars

chocolate sunflower energy bars

Nutritionist Brittany Gordon shares a tasty snack idea for your kids’ school lunches.

Chocolate Sunflower Energy Bars

Ingredients:

1/3 cup sunflower seed butter (melted)
3 tbsp maple syrup
1/2 tsp ground ginger
1/2 tsp cinnamon
1 1/2 cup Rice Krispies-type cereal
1/2 cup sunflower seeds
28 grams dark chocolate chips (Enjoy Life brand to keep it nut safe)

Directions:

1. In a large mixing bowl combine melted sunflower butter, maple syrup, ginger and ground cinnamon until well combined. Then gently fold in the rice cereal and sunflower seeds.

2. Line an 8 x 8 casserole dish with parchment paper making sure the parchment comes up and over the sides to make it easy to pull out later.

3. Press the rice cereal mixture into the prepared dish. To keep your hands clean, place a piece of parchment paper or wax paper on top and press down to even out the mix. Be sure to really press down to make sure the mixture sticks together.

4. Put your dark chocolate into a microwave-safe bowl and microwave for no more than 30 seconds at a time, until the chocolate has melted. Using a spoon drizzle chocolate all over the top of the Rice Krispies mixture, get creative with it.

5. Place in the freezer for at least 30 minutes, then slice into 6 bars.

Pro tip: Double the batch and save yourself snack prep for a couple of weeks. These delicious bars will keep for up to two weeks in the fridge or two months in the freezer. Serves six.

As posted on CBC.ca


Posted on Leave a comment

Double Chocolate SMOKEY Brownies

smokey brownies

Convert your kitchen into a chocolatier’s heaven and wow family and friends with smoky chocolate brownies. These delicious brownies are coated in rich chocolate and topped with smoked paprika and salt.

Ilse’s Double Chocolate Brownies with Smoked Paprika & Salt

You’ll need:

230g butter; 375g sugar; 125g cocoa powder; 10ml smoked paprika, plus extra for sprinkling; 2,5ml salt; 5ml vanilla extract; 3 XL eggs; 100g cake flour; 100g walnuts, roughly chopped; 80g coffee flavored dark chocolate; smoked salt, for sprinkling

How to:

Preheat the oven to 170°C and position the rack in the lower third of the oven. In a medium pot over low heat, melt the butter (do not boil).

When completely melted, remove from the heat and add the sugar, cocoa powder, paprika and salt to the warm pot. Stir with a wooden spoon until well mixed, then add the vanilla and one egg at a time, mixing very well between the additions of each egg.

When the mixture is thick and glossy, stir in the flour (no need to sift) until no streaks remain, then keep stirring for exactly 40 strokes.

Now stir in the chopped walnuts. Line a 30x20cm baking tin with non-stick baking paper, then transfer the brownie mixture into the lined tin, edging it evenly into all corners.

Bake for 20-22 minutes until the middle is risen but still very soft (it must look slightly under-baked), then remove from the oven to cool completely.

For the top layer, break the chocolate into smaller blocks and melt in a small bowl in the microwave at 30-second increments until fully melted. Pour over the brownies, then spread evenly all over.

Sprinkle lightly with smoked salt flakes and some smoked paprika, then cut into bars/ squares when the chocolate has firmed up.

Store in an airtight container for up to 5 days.

Created by Ilse van der Merwe, as the perfect indulgence with a glass of Roodeberg, as posted on SouthCoastHerald.co.za


Posted on Leave a comment

How to temper chocolate—even in hot weather

temper chocolate

You don’t need to be a professional chocolatier to make beautiful tempered chocolate. Achieving its signature shiny, crisp finish may take a few attempts to master, but some common kitchen tools and a little patience can go a long way. Before you know it, you’ll be making confections worthy of a high-end candy counter.

How to Temper Chocolate

Time: 30 to 35 minutes
Cost: $15
Difficulty: Hard

Materials

1 large bar of premium baking dark chocolate

Tools

Large serrated knife
A saucepan, double boiler, or microwave-safe bowl
A spatula
A food thermometer
(Optional) A large bowl of lukewarm water

Instructions

1. Chop up the chocolate. Use a large serrated knife. Set one third of the chopped chocolate aside.

Note: Avoid using chocolate chips. They often have additives that will help them hold their shape during baking, but will disrupt the tempering process.

2. Melt the chocolate on low heat. You can do this in a microwave, a bowl placed over a pot of simmering water, or a double boiler. Stirring constantly is key, as it’ll prevent the chocolate from burning as it heats up, or solidifying as it cools down.

Pro tip: Use a spoon or spatula, as a whisk will add too much air into the mixture and keep the cocoa butter crystals from packing tightly together.
Warning: Don’t place a pot lid over your chocolate—this will cause any steam coming off of the chocolate to condense and drip back into it. Even the smallest amount of water can ruin a batch of melted chocolate.
3. Very carefully, heat your melted chocolate to 115 degrees Fahrenheit while stirring constantly. A couple degrees above or below this temperature is okay, but don’t let it exceed 120 degrees.

Pro tip: Be sure to use a thermometer that can accurately measure low temperatures—in the 80- to 90-degree range—as well as high ones. “A human thermometer actually works the best. You’re at really low temperatures for most things in the kitchen,” says food scientist Pat Polowsky, who currently works for Walmart’s health and wellness division.
4. Remove the chocolate from the heat and stir in the unmelted chocolate you put aside earlier.

5. Stir and monitor the chocolate until it reaches 84 degrees. This could take as long as 15 minutes. Be patient and don’t stop stirring.

Warning: “Never put [the melted chocolate] in the fridge—that’s a cardinal sin in chocolate-making,” Polowsky cautions. “If you put tempered chocolate in the fridge, even though it’s not melting, these [weaker] crystals will slowly form over time.”
6. (Optional) Dunk the bottom of your melting vessel into lukewarm water. If warm weather is giving you trouble lowering the melted chocolate’s temperature, this will speed up the process. Just make sure no water comes in contact with the chocolate itself.

7. Heat the chocolate again. Use low heat and monitor its temperature carefully. When it reaches 88 degrees, remove it from the heat source. Your melted chocolate is now ready to pipe, dip, spread, and mold.

If your end result doesn’t come out as planned, don’t fret—you can always re-melt it and restart the tempering process. And even if you aren’t satisfied with its appearance, poorly tempered chocolate still tastes great. This process is about adjusting the chocolate’s appearance and heat resilience, and doesn’t compromise the flavor at all.

So, what is “tempering” anyway?
Tempering is the process of using heat to break down the cocoa butter crystals in chocolate and then allowing only the strongest and most stable ones to re-form.

The cocoa butter in chocolate exists in several different types of crystals, which break apart at different temperatures. Tempering starts by thoroughly melting the chocolate to break up all the crystals and then cooling the mixture just enough to let only the strongest ones form again. When they do, they take a shape similar to a tuning fork.

As published on PopularScience.com.

Posted on Leave a comment

Jennifer Aniston Shares Her Chocolate Protein Smoothie Recipe That Tastes Like Dessert

Jennifer Aniston chocolate protein

It contains one of Vital Proteins’ chocolate powders, chocolate almond milk, maca berry, cinnamon, matcha, and spinach, with a few daily variants like banana and berries.

The smoothie consists of:

Vital Proteins Chocolate Collagen Powder or Chocolate Vital Performance Protein Powder
Chocolate almond milk
Cinnamon
Maca berry
Cacao
Matcha powder
Spinach

She’ll sometimes switch it up by throwing in a banana and handful of berries. “The chocolate-flavored Vital Performance Protein is also made with collagen and is my latest obsession,” she said. “It’s so filling, and it tastes like I just indulged.”

Posted on Leave a comment

Chocolate Party Cake with Dark Chocolate Ganache and Homemade Sprinkles

Chocolate party cake

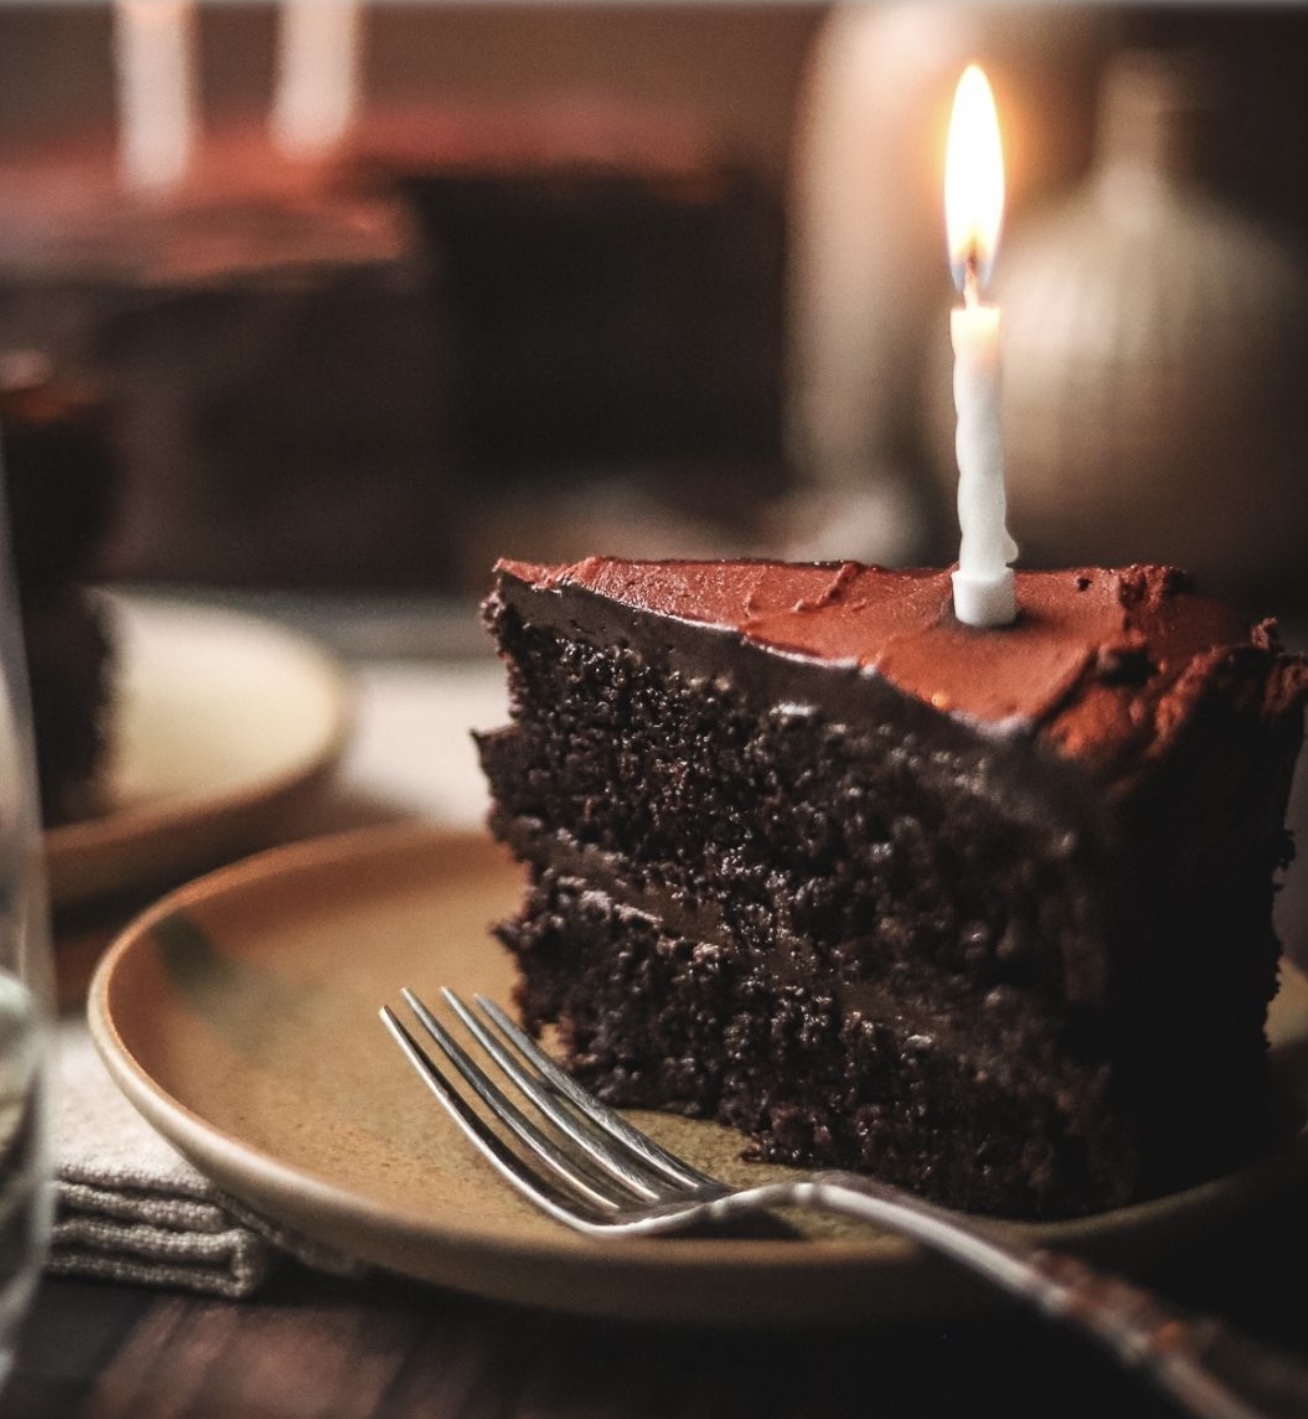
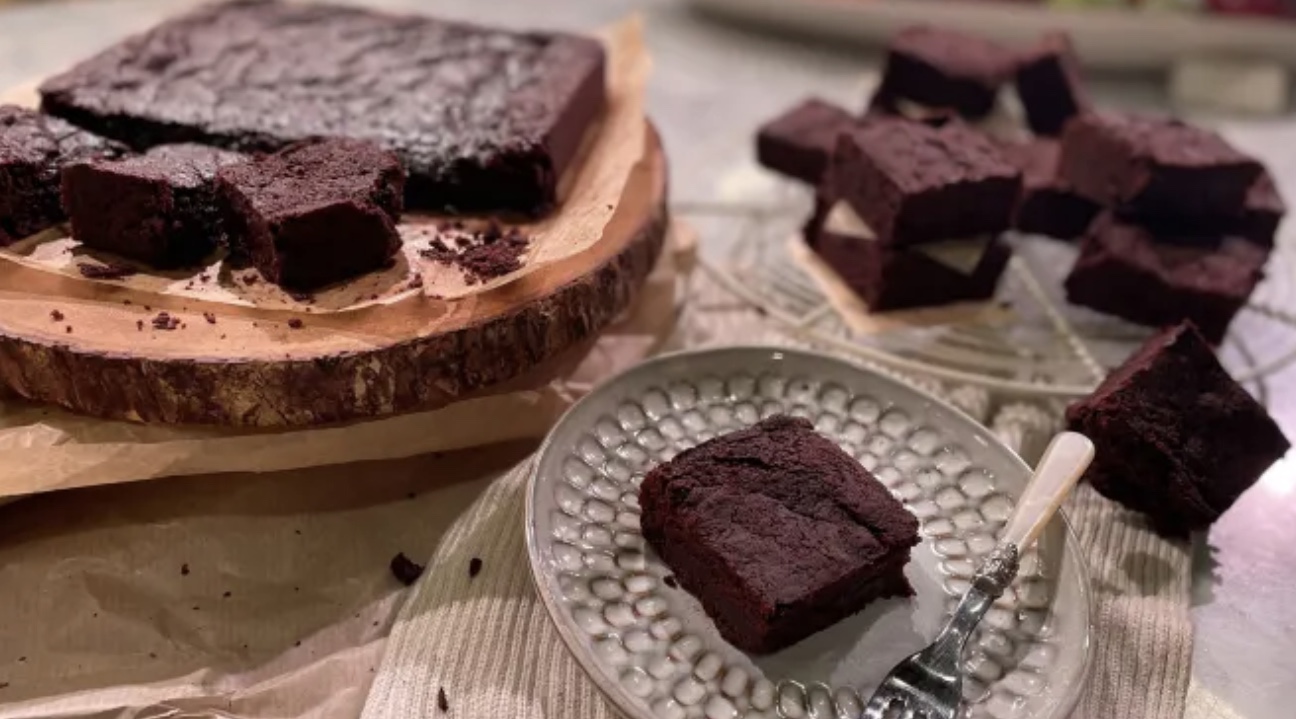
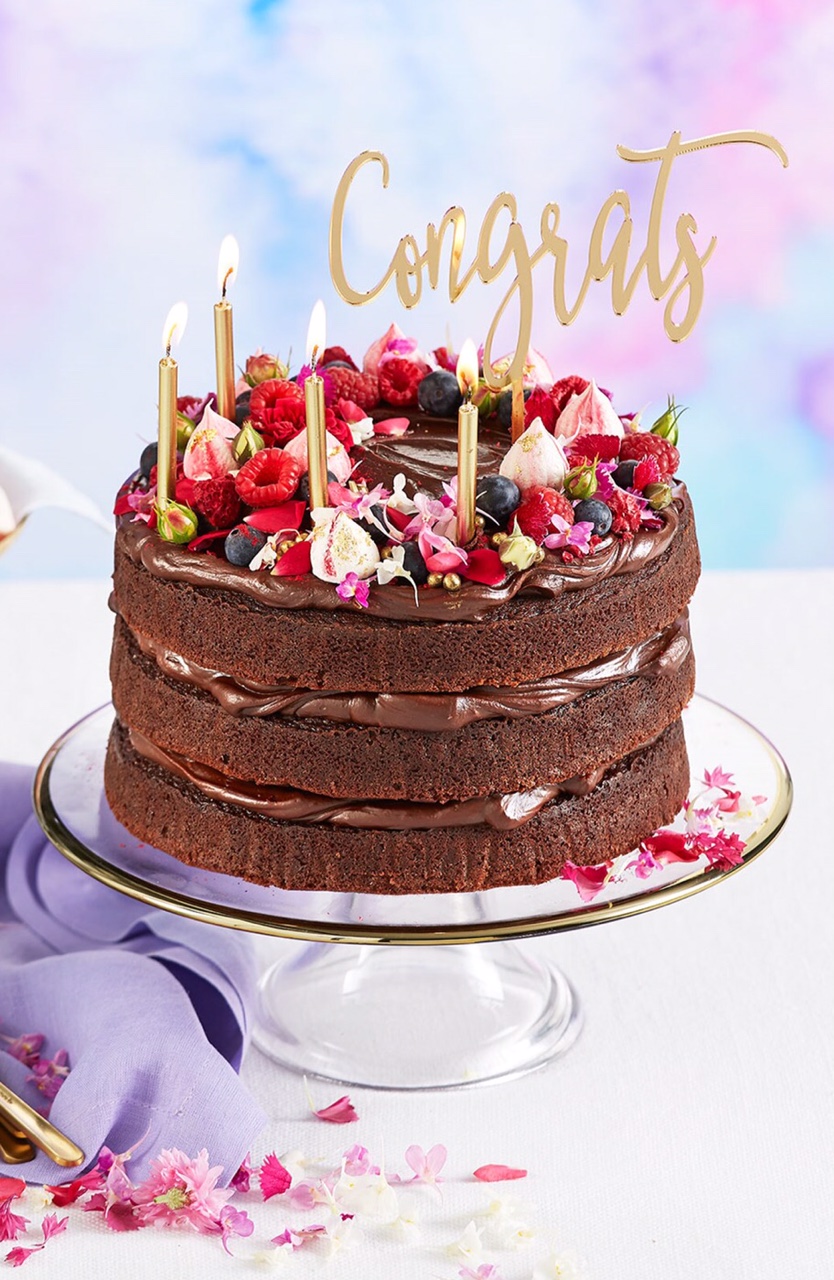
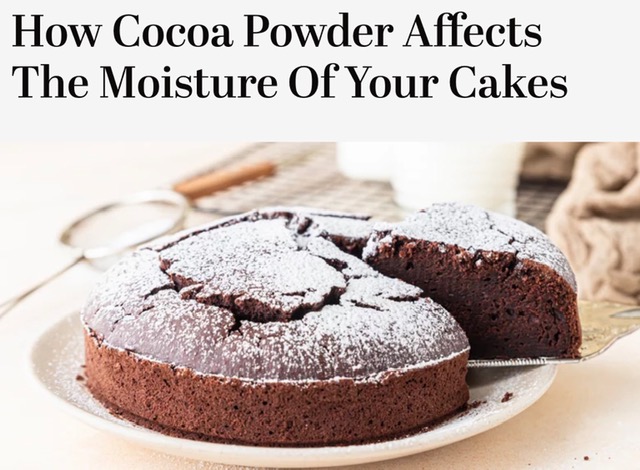
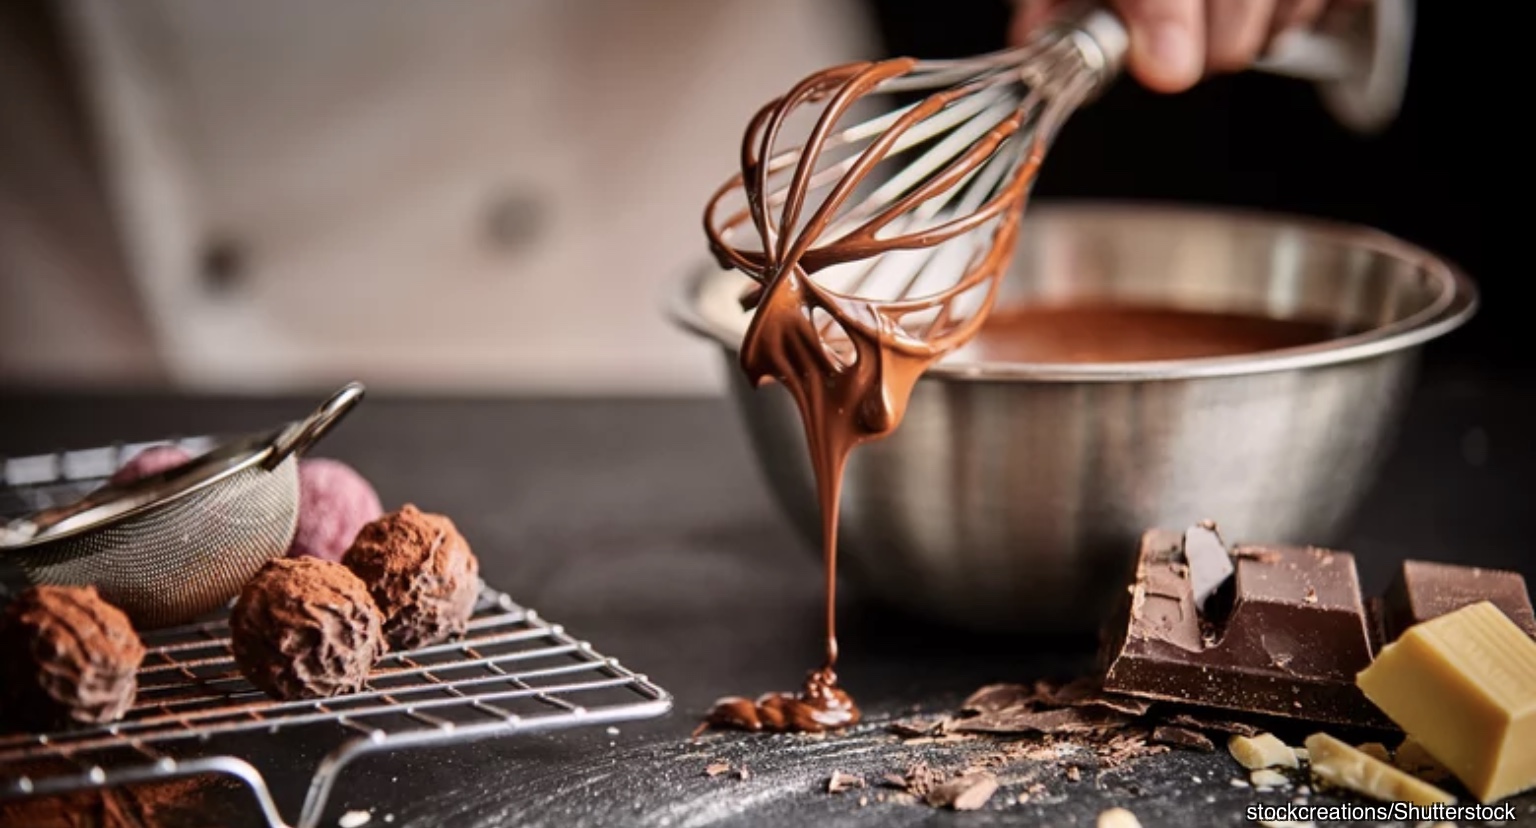
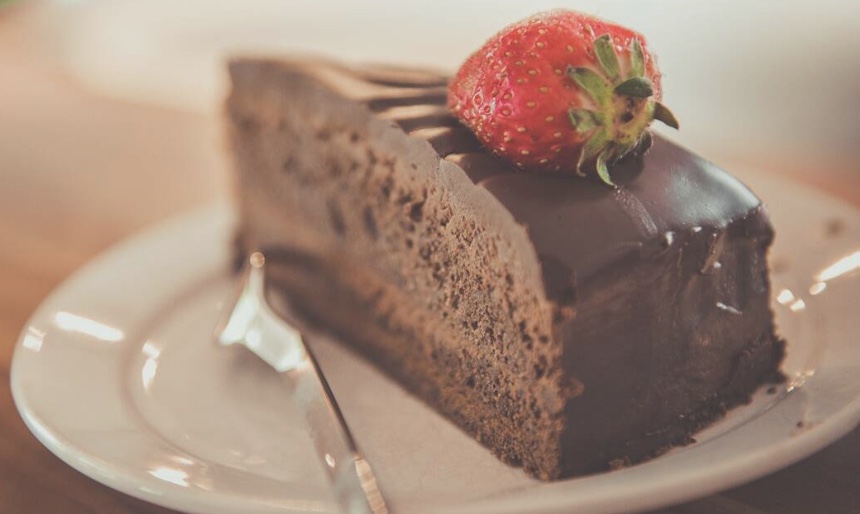
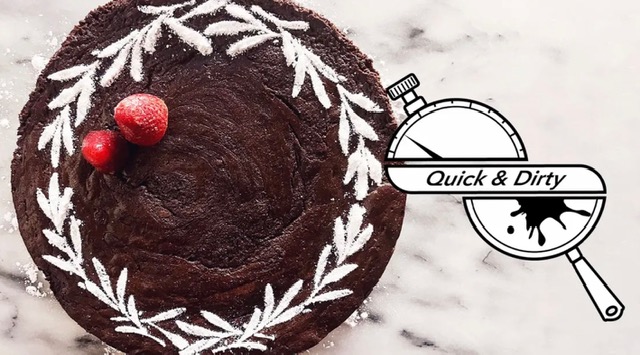
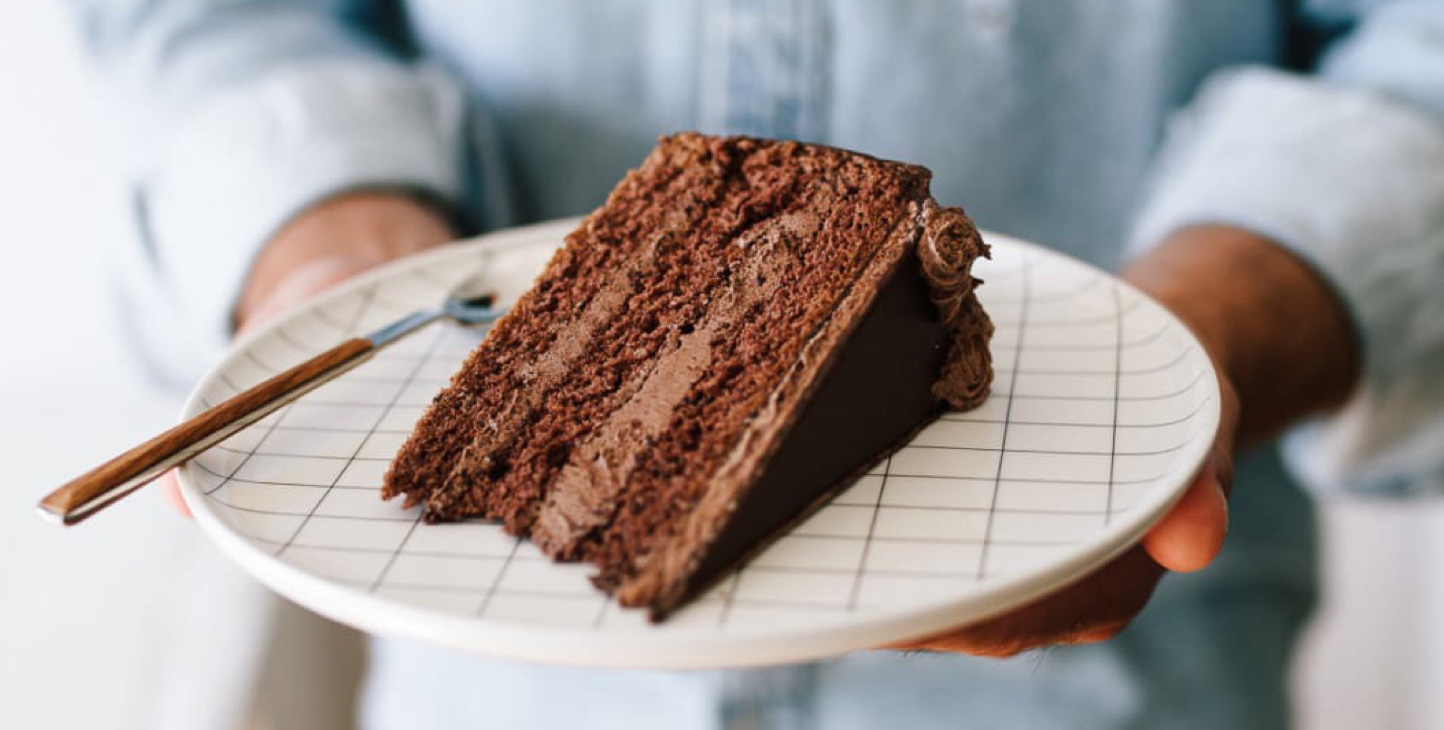
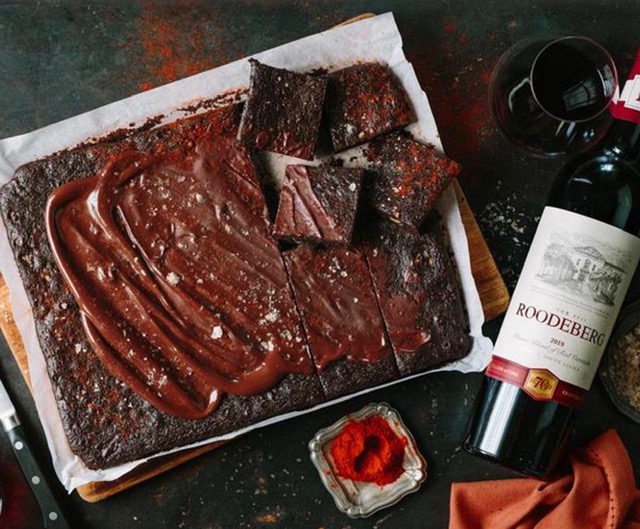
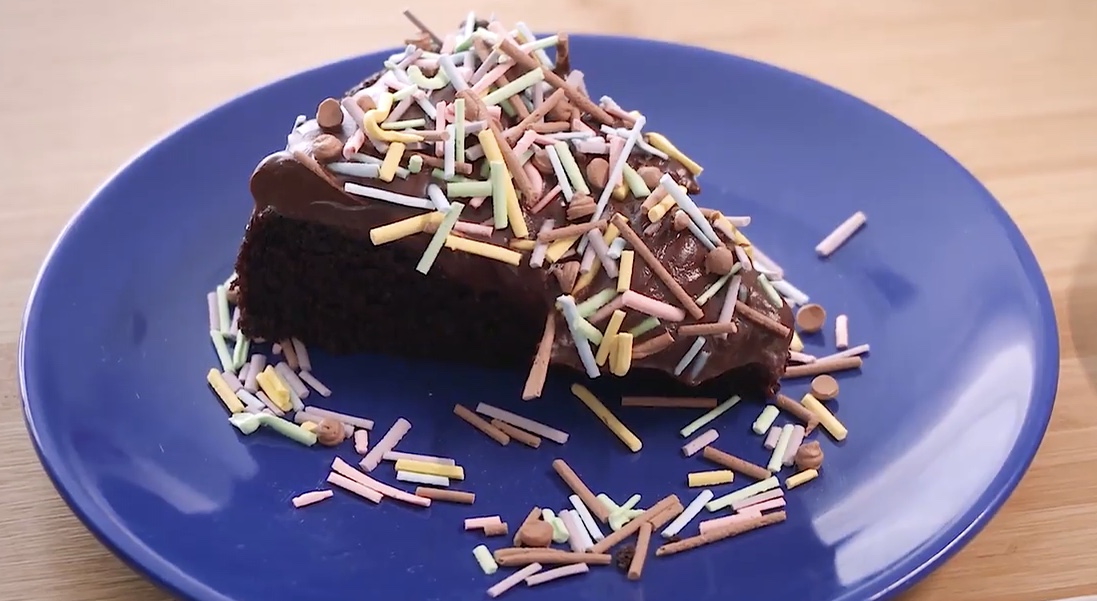
Rich, chocolaty, and so very festive, this chocolate cake with ganache frosting is worthy of a party. Ganache has many applications in pastry, and here Chef Paola Velez uses it to make the silky-smooth frosting to top her chocolate cake. If you’re making the sprinkles from scratch, remember to start one day ahead so they can dry overnight.

Ingredients:

For the Chocolate Cake;

⅔ cup olive oil, plus more for the pan
1 cup (140 grams) all-purpose flour
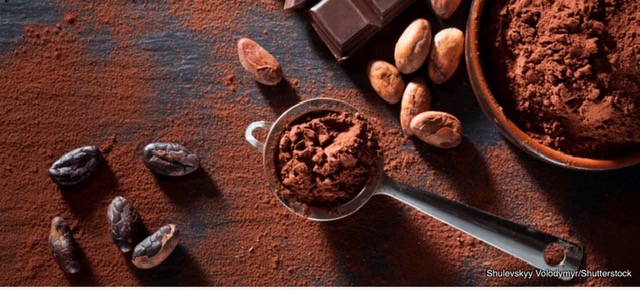
⅓ cup (40 grams) unsweetened cocoa powder
2 teaspoons (40 grams) unsweetened cocoa powder
2 teaspoons baking soda
¼ teaspoon freshly grated or ground nutmeg
Pinch of kosher salt
2 large eggs
1 ⅓ cups granulated sugar
¾ cup brewed coffee, at room temperature
½ cup Greek yogurt
1 teaspoon vanilla extract

For the Chocolate Ganache:

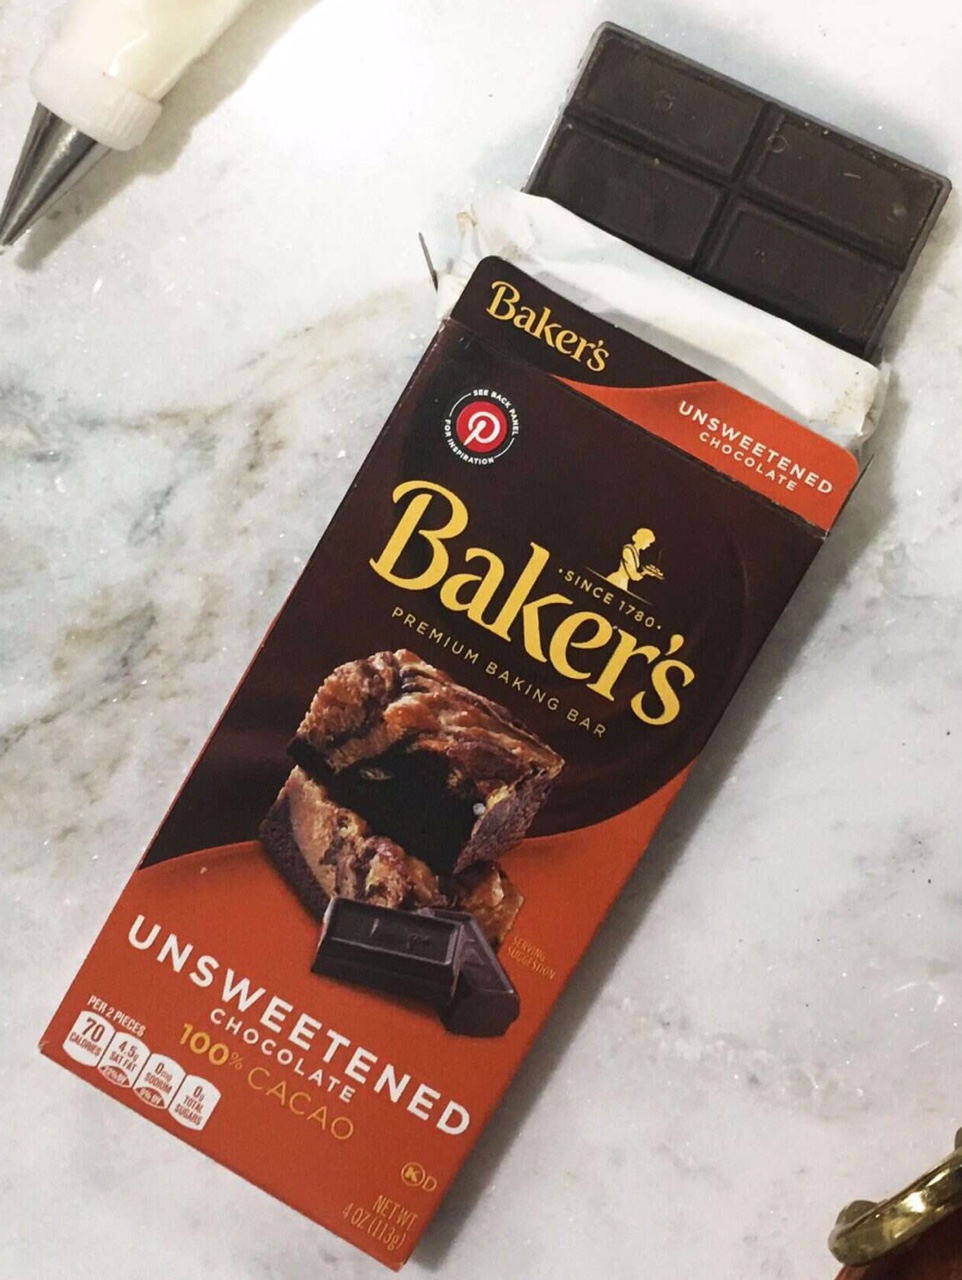
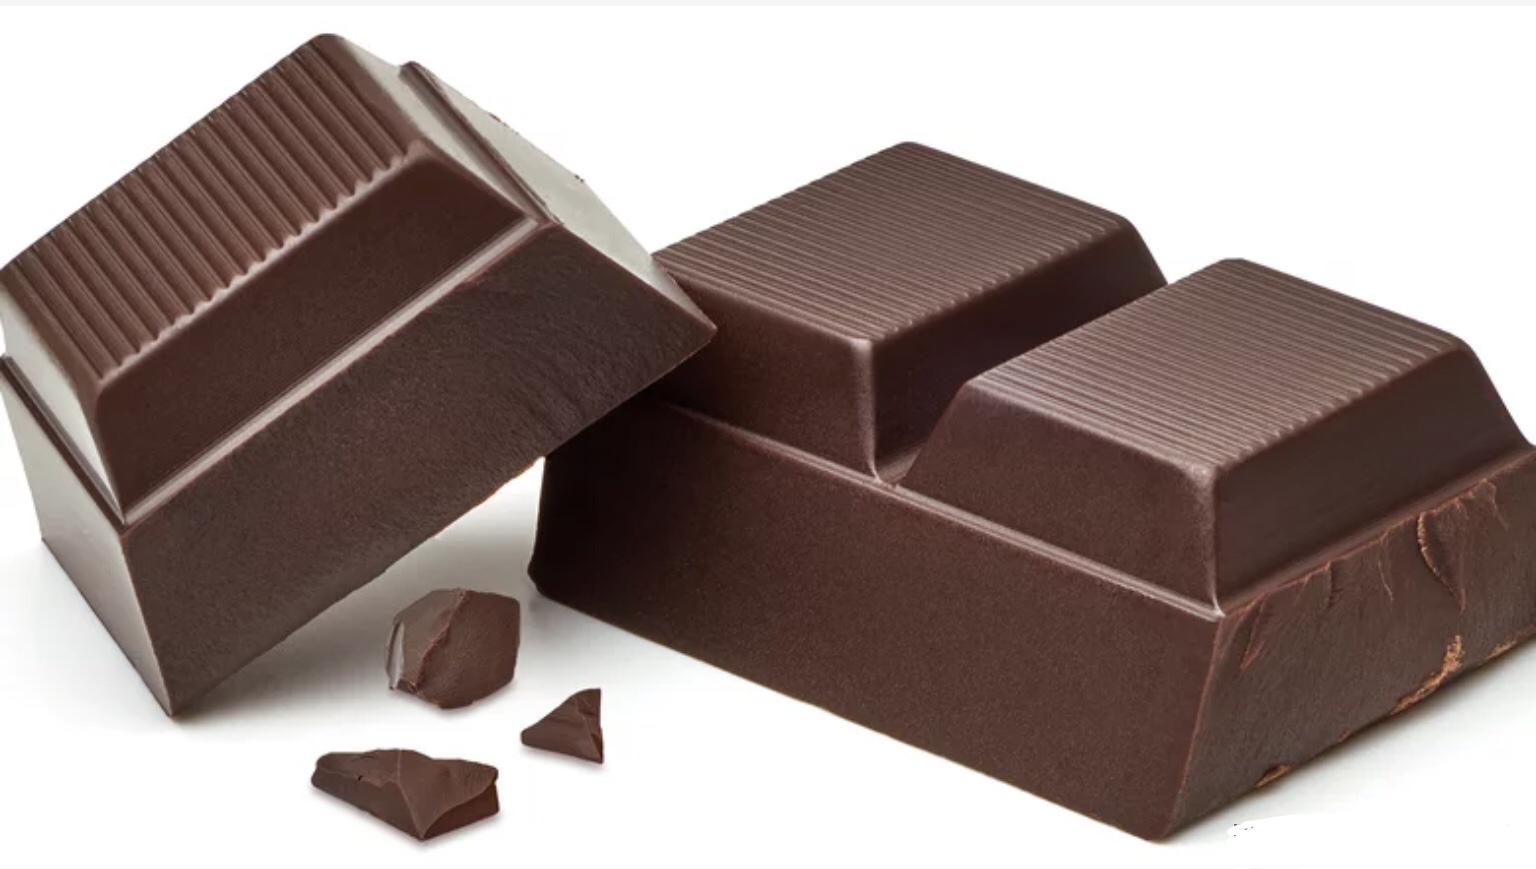
5 ounces roughly chopped dark chocolate (not above 64% cacao)
1 cup heavy cream
1 tablespoon light corn syrup
Pinch of salt

Additional Ingredients:

Homemade Sprinkles (see recipe below) or store-bought, for garnish

• • • • • • •
Directions:

Make the cake
Step 1
Preheat oven to 350°F. Brush bottom and sides of a 9-inch round cake pan with 1 3/4 to 2-inch high sides with olive oil. Line bottom of pan with a parchment paper round and lightly brush with oil.

Step 2
In a large bowl, whisk together flour, cocoa, baking soda, nutmeg, and salt. In a medium bowl, whisk together eggs and sugar. Add coffee, yogurt, vanilla, and 2/3 cup olive oil and whisk until smooth. Pour wet ingredients into dry ingredients and, using a whisk, mix batter until fully combined. Switch to a rubber spatula to scrape down sides of bowl and fold the batter a few more times to fully combine until flour is fully incorporated.

Step 3
Pour batter into prepared cake pan; tap cake pan once on a work surface to release any bubbles. Bake cake until a cake tester inserted into center comes out clean, 30 to 35 minutes; let cool in pan. Run a small offset spatula or a table knife around edge of pan to release cake. Invert cake onto a plate and peel off parchment paper.

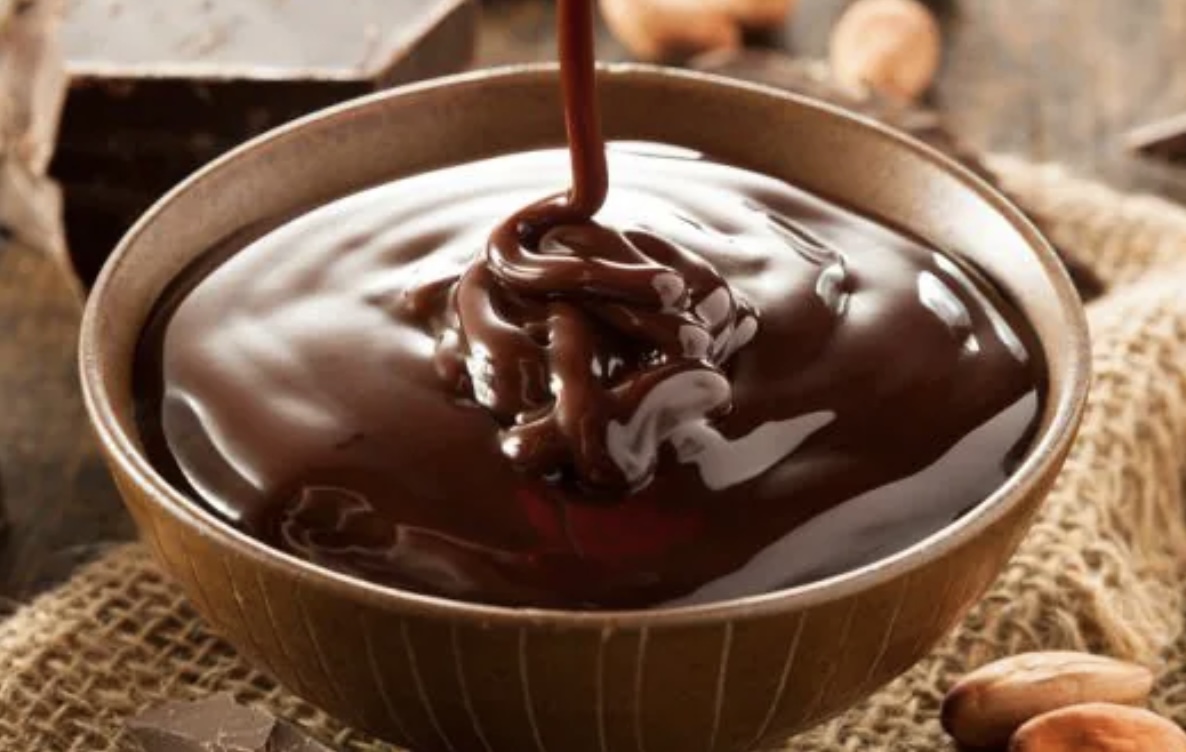
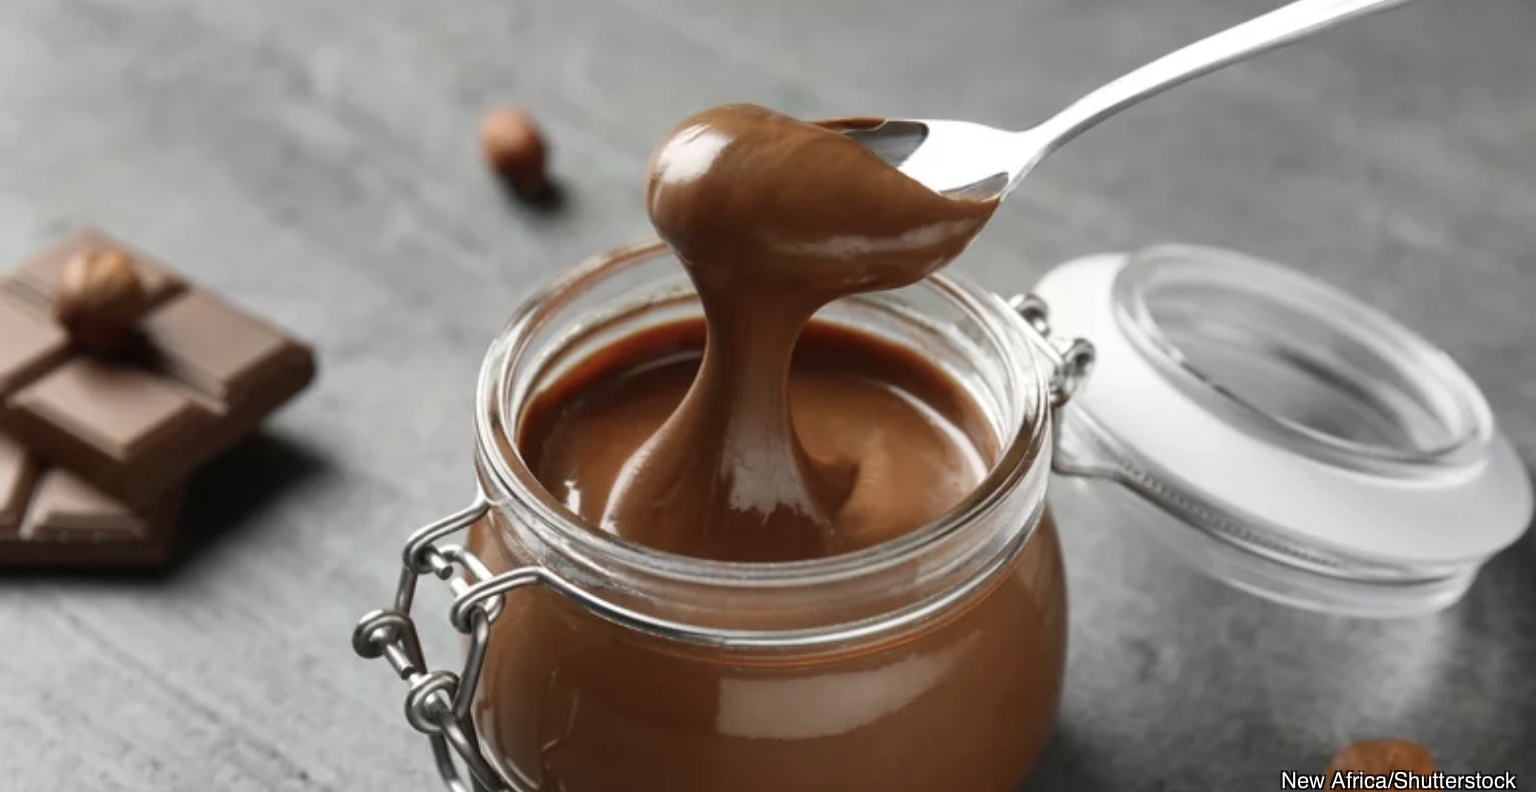
Meanwhile, make the chocolate ganache
Step 4
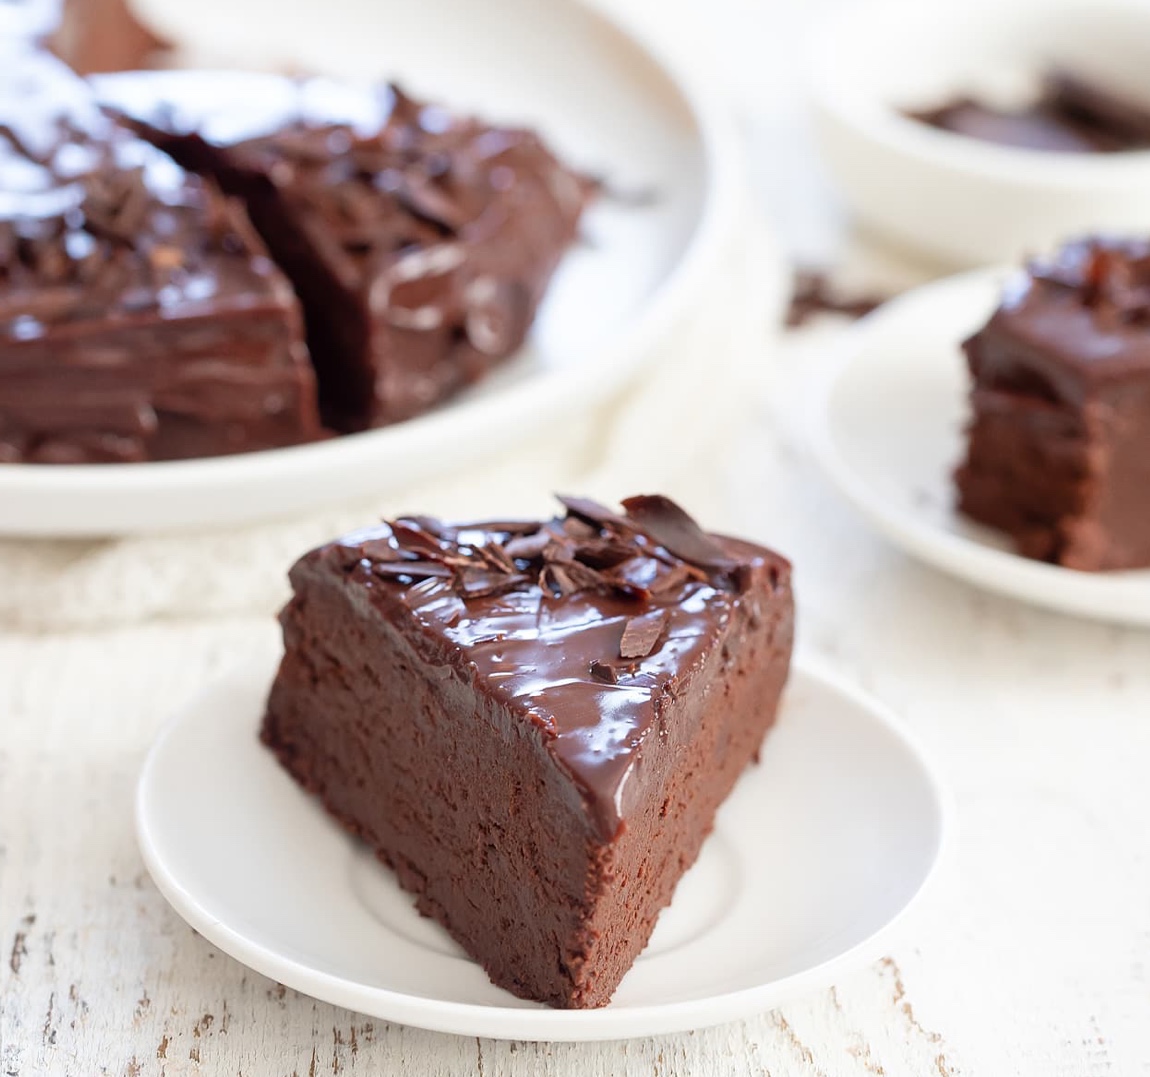
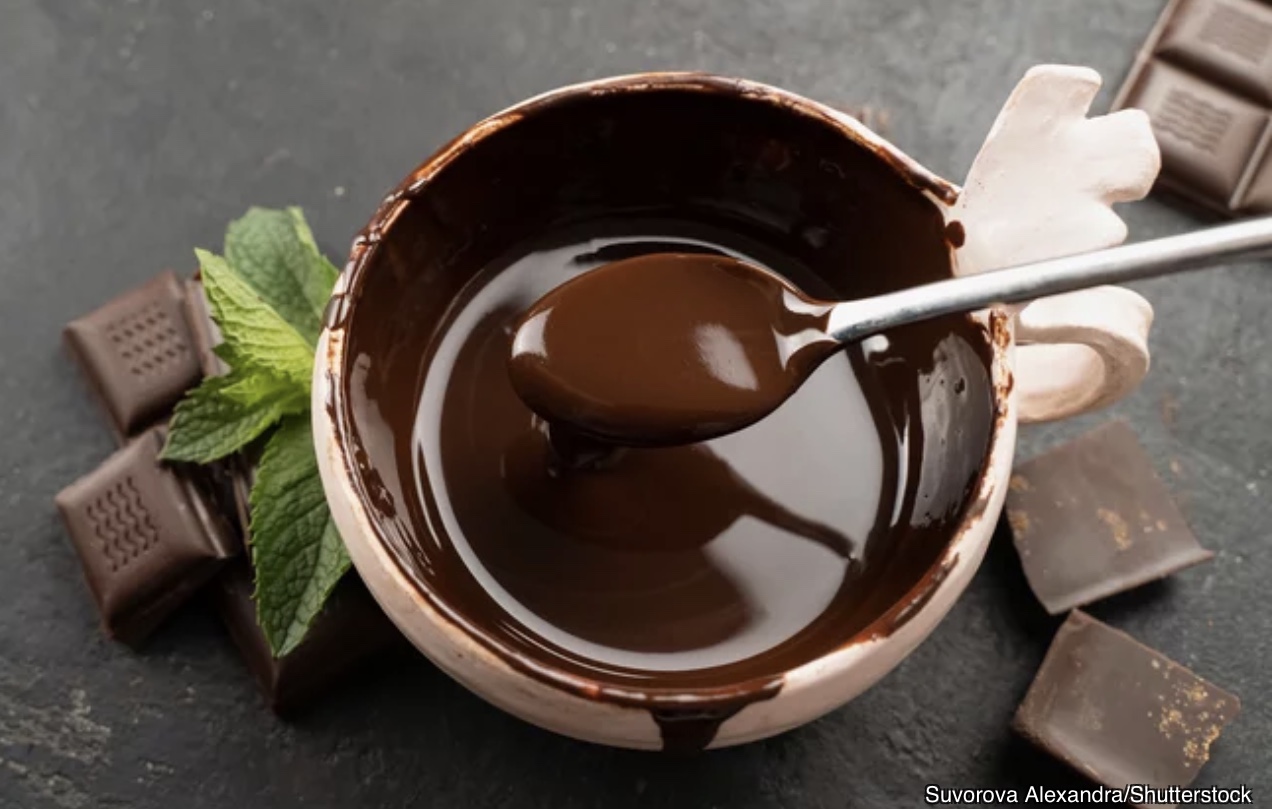
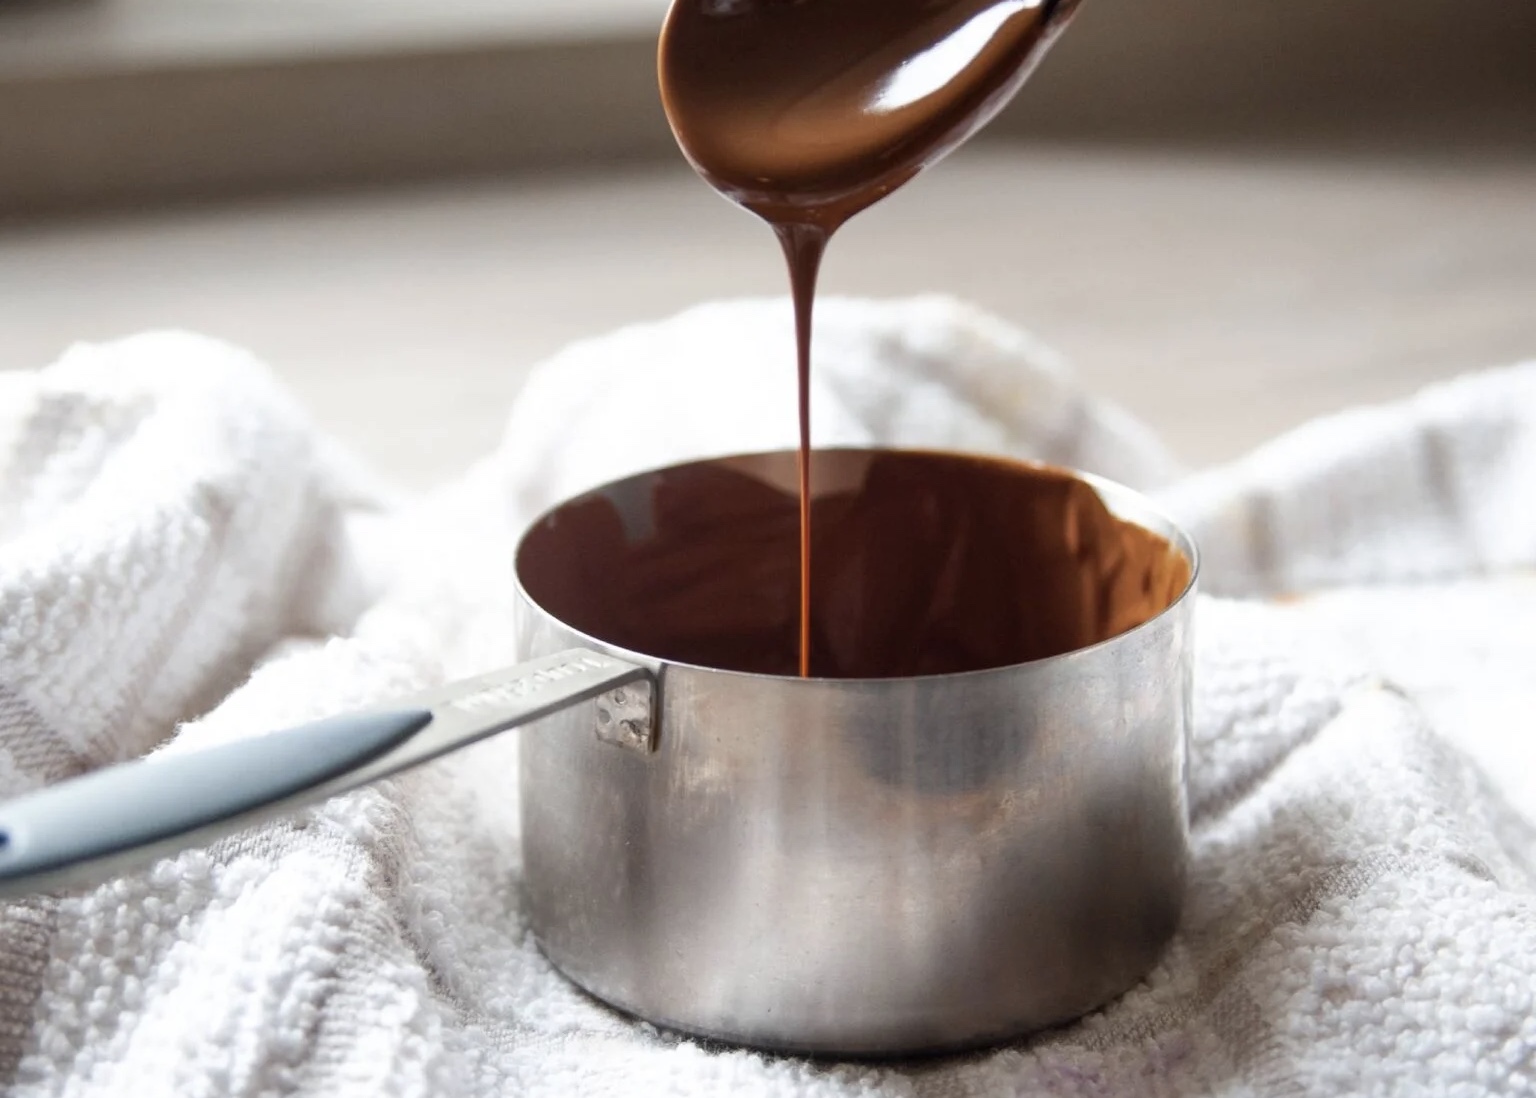
Place chocolate in a medium mixing bowl; set aside. In a medium saucepan, combine cream, corn syrup, and salt; heat, stirring occasionally, until just starting to simmer and is warm to touch; pour cream mixture over chocolate and let stand for 1 minute. Whisk to create a smooth chocolate ganache; let stand at room temperature until ganache thickens into a shiny, pudding-like frosting, about 30 minutes.
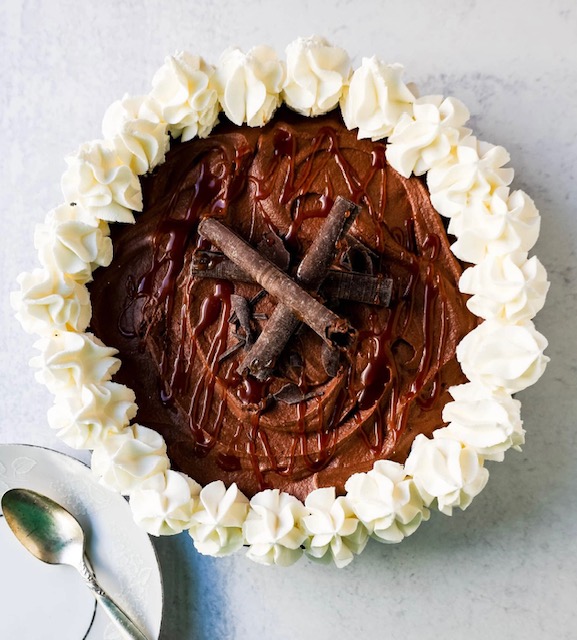
Step 5
When ready to serve, spread ganache over top of cake and decorate with sprinkles, if desired. Cut slices with a knife dipped in warm water and wiped dry.
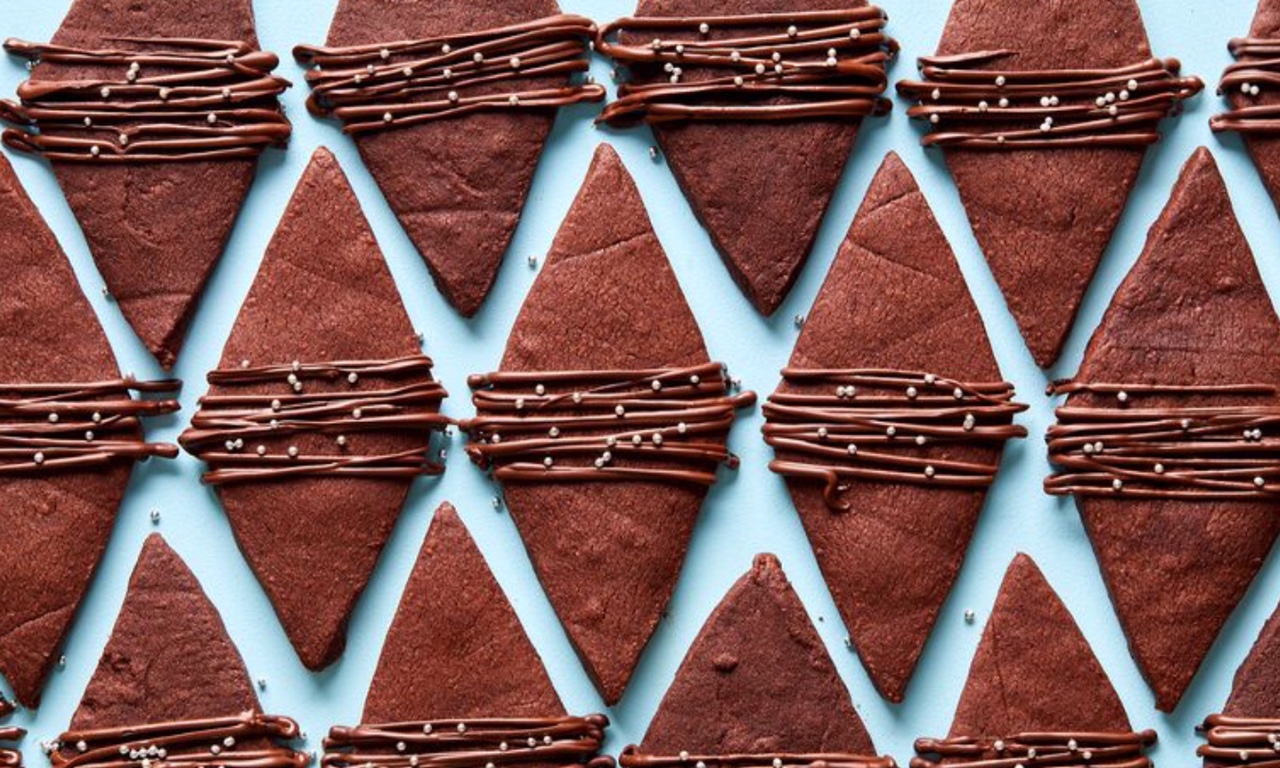
Homemade Sprinkles
To make your own sprinkles for the cake, start one day in advance, and be sure to have access to a cool, dry place to dry the sprinkles. Use cocoa powder to color and flavor chocolate sprinkles or omit the cocoa powder and use natural food coloring for rainbow sprinkles.

2 cups confectioner’s sugar; 2 tablespoons unsweetened cocoa powder (optional); 1 ½ tablespoons meringue powder; 3 tablespoons water, or more; Natural food coloring (optional)

1. Sift confectioner’s sugar and cocoa powder (if using) into a large bowl. Whisk in meringue powder. Using a hand mixer on medium speed, gradually beat in water, tablespoon by tablespoon, until a smooth, shiny, and spreadable texture is achieved. Stir in desired food coloring, if using. Add mixture to a piping bag and cut off 1/16-inch from tip to create a very small hole, equivalent to the tip of a pencil.

2. On a parchment paper-lined baking sheet, pipe long strands lengthwise. Allow to dry at room temperature until hardened, about 24 hours. Once fully dried, break apart with hands to create 1- to 2-inch shards.

Recipe posted on FoodAndWine.com

Posted on Leave a comment

2-Ingredient Chocolate Fudge

Chocolate fudge

Making fudge with just two ingredients: chocolate and dates. It’s a soak, melt and blend situation. Joy Bauer prefers using semi-sweet chocolate chips for a sweeter fudgy experience, but if you’re a dark chocolate fan, you can use chips with a higher percentage of cacao (she recommends 60 to 70%). Choose to be a purist and leave the treat plain or add extra flair by incorporating all sorts of goodies to the batter — from roasted, chopped nuts (walnuts, peanuts, pecans) to swirled nut butter to shredded coconut — you’re the judge of your fudge.

Ingredients:

2 cups semi-sweet chocolate chips
1 heaping cup Medjool pitted dates (about 6 ounces or 12 dates)

Preparation:
1.Line an 8- by 4-inch loaf pan with parchment paper, leaving an overhang on each side for easy removal, and set aside.

2.Soften the pitted dates by soaking them in 2 cups boiling water for 15 minutes (making sure the dates are fully submerged). Remove dates from water and add to a blender, along with 3/4 cup of the leftover soaking water. Puree in the blender until the consistency is a smooth paste (remove any hard pieces, as sometimes a few small pit remnants remain, and they can really hurt your teeth).

3.While dates are soaking, melt the chocolate chips in the microwave, stopping and stirring every 20 seconds until they are velvety smooth (about 2 minutes total).

4.Add the pureed dates to the melted chocolate and combine. Pour evenly into the prepared loaf pan and smooth the top using the back of a spoon or rubber spatula. Sprinkle optional sea salt over the top, if preferred. Freeze for 1 to 2 hours. Remove and slice into 15 to 18 pieces (three rows lengthwise and five to six horizontally). Store in fridge for up to a week.

TECHNIQUE TIP: Buy “pitted” dates for convenience, as it saves the step of manually removing the pits by hand.

SWAP OPTION: You can add preferred extras into the batter or on top, such as chocolate chips, roasted-chopped nuts, shredded coconut, a swirl of nut butter, etc.

As posted on Today.com.

Posted on Leave a comment

How to melt chocolate chips on the stovetop or in the microwave

melting chocolate

Melted chocolate can be used in a variety of delicious recipes and it’s easy to melt chocolate chips at home with a microwave or on the stove. Dark, milk, and white chocolate have slightly different melting points depending on the amount of cocoa solids, but all chocolate has relatively low melting points so you’ll want to err on the side of caution and lower heat to avoid burning your chocolate.

In the Microwave:

The microwave method is the easiest and most convenient way to melt chocolate without causing a mess. With this method, be sure to use microwave-safe tools. A clear indication that the bowl is safe to use is by looking for the microwave-safe symbol at the bottom of the bowl.

Start melting your chocolate chips in 20 to 30 second intervals. Stir between each interval.
Shorten the melting intervals to 10 to 20 seconds once the chocolate starts melting. This happens when individual chips aren’t distinctly visible anymore, and the chocolate melts into one mass. “Be sure to stir between each interval,” Yoon says. “You need to keep stirring the chocolate, or it can risk burning in the center.” If your chocolate is burning, darker spots will appear and you’ll be able to smell it, or even see smoke. Burned chocolate also turns grainy.
Stop microwaving once 80% of the chips are melted, and let sit. “You can let the residual heat melt the rest of the chocolate by resting it on the counter,” Yoon says. This is the best strategy to prevent scorching chocolate.
Remember: Microwaves tend to have hot and cold spots due to frequency and wavelength. “If you microwave chocolate for an extended period without stirring, the center will usually burn,” Yoon says. Stir frequently to ensure the chocolate chips melt evenly.

On the Stovetop:

Melting chocolate on the stove might sound a little more intimidating, but it’s still pretty easy to do and results in a silky smooth consistency that’s harder to replicate in the microwave. You’re also less likely to burn chocolate on the stovetop. On the stove, you can use a double boiler or make your own by nestling a stainless steel bowl on top of an even-edged pot.

Fill the bottom pot of your double boiler with water. Bring the water to a boil and then turn off the heat.
Set the stainless steel bowl of chocolate on top of the pot. The residual heat will slowly and gently melt the chocolate.
Stir often and be patient. This method will prevent you from burning the chocolate on the stove.
If the chocolate does not melt completely, gently heat the pot of water again. Turn off the heat and repeat.

Remember: “Water is chocolate’s worst enemy!”. “It can seize the chocolate, and the chocolate can also get grainy.” When taking the bowl off the pot, make sure you use a towel to wipe any excess water below the bowl.

For the full article and more tips, as posted on Insider.com, click, HERE.

Posted on Leave a comment

Hint of salt makes these bittersweet chocolate cookies sing

bittersweet chocolate cookies

The little twist of the salt grinder really brings out the flavor in these cookies. The richness of the bittersweet chocolate combined with brown sugar and the aromatic flavor of toasted pecans is just perfect for chocolate lovers. For those who love a cakey cookie, the extra flour helps keep them tall and firm, but crisp at the same time. They are delicious and gooey right out of the oven, but if you have time to bake them ahead of time, they freeze really well. Just thaw them out about 10 minutes before serving.

Double Dark Chocolate Toasted Pecan Cookies
(Makes 24 Cookies)

INGREDIENTS:
3/4 cup unsalted butter, softened to room temperature
1/2 cup granulated sugar
3/4 cup light brown sugar
1 teaspoon vanilla
1 egg, beaten
1/4 cup cocoa powder (we love Valrhona Dutch-processed cocoa powder, but use your own favorite)
1 teaspoon baking powder
1 teaspoon baking soda
1/4 teaspoon salt
1 3/4 cups all-purpose flour
1 cup bittersweet chocolate chips
3/4 cup pecans, chopped and toasted (buy pre-toasted or toast in 400 F oven for 6-8 minutes, keeping your eye on them so they don’t burn!)
Pink Himalayan or Sea Salt for topping

DIRECTIONS:
Line a baking sheet with parchment paper. Preheat oven to 350 F.
In a mixing bowl, cream together butter with brown and granulated sugar with an electric beater until fluffy. Stir in vanilla. Add beaten egg and stir into mixture until very well incorporated.
In a separate bowl, whisk together all dries: flour, cocoa powder, baking powder, baking soda, and salt.
Add dries to the butter-egg mixture and beat until well mixed. Stir in chocolate chips and pecans.
With an ice cream scoop, make rounds of dough and place on a prepared baking sheet, 12 at a time.
Grind a dash of salt over each cookie and bake for 11-12 minutes, until set in the center.
Remove from oven and cool. Eat right away, while nice and gooey, or store in an airtight container for several days. You can also freeze the cookies and thaw just before eating.

As posted on Lamorindaweekly.com.

Posted on Leave a comment

Celebrate your summer garden harvest by baking double chocolate zucchini bread

Chocolate zucchini bread

The double chocolate zucchini bread is a favorite, as its super moist and not too chocolatey, as the name would imply. The double chocolate comes from the use of both cocoa powder and chocolate chips in the recipe. It also is a great way to get picky kids to eat zucchini and also a great way to use up extra zucchini.

DOUBLE CHOCOLATE ZUCCHINI BREAD
(Recipe courtesy of King Arthur Baking)

INGREDIENTS:

2 large eggs

1/3 cup honey

1/2 cup vegetable oil

1/2 cup brown sugar, packed

1 teaspoon vanilla extract

1 teaspoon salt

1/2 teaspoon baking soda

1/2 teaspoon baking powder

1/2 teaspoon espresso powder, optional (adding it makes the chocolate flavor stand out more)

1/3 cup unsweetened cocoa

1 2/3 cups flour

2 cups shredded, unpeeled zucchini, gently pressed

1 cup chocolate chips

DIRECTIONS:

Preheat the oven to 350 F; lightly grease an 8 1/2-by-4 1/2 inch loaf pan.

In a large mixing bowl, beat the eggs, honey, oil, sugar, and vanilla until smooth.

Add the salt, baking soda, baking powder, espresso powder, cocoa, and flour, mixing until well combined.

Stir in the zucchini and chocolate chips.

Pour the batter into the prepared pan.

Bake the bread for 65 to 75 minutes, until the loaf tests done (a toothpick or cake tester inserted into the center will come out clean, save for perhaps a light smear of chocolate from the melted chips).

Remove the bread from the oven, and let it cool for 10 to 15 minutes before turning it out of the pan onto a rack.

Cool completely before slicing; store well-wrapped, at room temperature.

As posted on BershireEagle.com.

Posted on Leave a comment

This mint chocolate chip ice cream recipe gets the subtle, refreshing herb flavor just right

Mint chocolate chip ice cream

The mint flavor in this custard-based ice cream can be subtle or vibrant, but Krista Kern Desjarlais, chef-owner of Bresca and the Honeybee in New Gloucester, Maine, says you want to avoid a toothpaste-strong mint flavor. You can use fresh mint leaves (which yield a more subtle, very refreshing flavor) or mint extract.

Make Ahead: The custard needs to be refrigerated overnight before being churned in an ice cream machine and, to properly firm up, will require at least 4 hours of freezing time before serving.

Storage Notes: The ice cream can be frozen in an airtight container for up to 1 month. It’s best to place a piece of parchment paper or wax paper directly on its surface to prevent freezer burn.

Ingredients:
2/3 cup (133 grams) granulated sugar
6 large egg yolks
Pinch fine sea salt
2 1/4 cups (540 milliliters) heavy cream
3/4 cup (180 milliliters) whole milk
1/4 vanilla bean, scraped (or 1/2 teaspoon vanilla extract)
1 1/2 teaspoons organic mint extract, plus more to taste (may substitute with 1 packed cup fresh mint leaves)
2/3 cup (115 grams) bittersweet chocolate chips (preferably 64 percent), finely chopped (may substitute with about 4 ounces/115 grams finely chopped bittersweet chocolate bar)

Step 1
In a large bowl or a large measuring cup with a spout, whisk together the sugar, egg yolks and a pinch of salt until thoroughly combined.

Step 2
In a medium saucepan over medium heat, heat the cream, milk and vanilla until you see steam rising from the surface; do not bring the mixture to a boil. If using fresh mint leaves, add to the cream and milk; if using mint extract do not add at this stage. Remove from the heat and let it steep for 5 to 10 minutes.

Step 3
Prepare a large bowl with ice water. Using a ladle in one hand and a whisk in another, slowly drizzle the liquid mixture into the sugar-yolks mixture and whisk to incorporate. Continue to whisk the liquid to the sugar-yolks mixture until you’ve added about half of the dairy, then pour the egg-dairy mixture into the saucepan with the remaining dairy.

Step 4
Lower the heat to medium-low. Stir continuously with a heatproof spatula or a wooden spoon until the custard thickens slightly and reaches 175 degrees on an instant-read thermometer, 10 to 15 minutes. Dip the spatula or spoon into the custard and hold it horizontally, then run a finger across the custard on the spatula — if the path stays open, your custard is ready.

Step 5
Remove from the heat and pass the custard through a fine-mesh strainer set over a large measuring cup. Place the measuring cup in the prepared ice bath, stirring until you can comfortably insert your pinkie in the mixture (the custard should register about 115 degrees on an instant-read thermometer), about 5 minutes. If using mint extract, add half and taste the custard. It should have a defined mint flavor but not be overwhelming. Add the remaining extract, if desired. Transfer the custard to a quart-size container, cover and refrigerate overnight.

Step 6
When ready to churn the ice cream, pour the custard into an ice cream machine and churn according to manufacturer’s instructions until the ice cream is the consistency of soft serve. Depending on your ice cream maker, this could take 20 to 40 minutes, so start checking at 20 minutes and then every 5 minutes thereafter. Fold in the chocolate chips and churn until the ice cream has thickened slightly, an additional 5 to 10 minutes.

Step 7
Transfer to a quart-size container, cover with a sheet of parchment or wax paper and cover with a lid. Freeze until firm, at least 6 hours.

When ready to serve, let the ice cream soften on the counter for a few minutes until scoopable, then scoop into bowls and serve.

Nutrition Information
Per serving (1/2 cup), based on 8

Calories: 428; Total Fat: 36 g; Saturated Fat: 21 g; Cholesterol: 233 mg; Sodium: 71 mg; Carbohydrates: 27 g; Dietary Fiber: 2 g; Sugar: 21 g; Protein: 5 g

From Krista Kern Desjarlais, chef-owner of Bresca and the Honeybee in New Gloucester, Maine, as published on WashingtonPost.com.


Posted on Leave a comment

Black Chocolate Cake

Black chocolate cake

Calling all chocolate cake lovers. This decadent, chocolatey bundt cake gets its rich color from black cocoa powder (we like using King Arthur Baking Company’s cocoa). To make this cake the perfect Halloween dessert, top with green icing and vibrant flowers for plenty of festive flair.

Black Chocolate Cake

Ingredients:
2 1/3 c. all-purpose flour
1 c. granulated sugar
1/3 c. dark brown sugar
1/2 c. unsweetened black cocoa powder, or Dutch process cocoa powder
1/2 tsp. baking powder
3/4 tsp. baking soda
1/2 tsp. kosher salt
1/2 c. (1 stick) unsalted butter, melted
1/2 c. vegetable or canola oil
1 c. ice water
3 large eggs
1 c. sour cream, divided
1 1/2 tsp. pure vanilla extract
1 c. confectioners’ sugar, sifted
Green food coloring, optional

Directions:
Heat oven to 350°F and spray 12-cup Bundt cake pan with nonstick cooking spray.
In large bowl, sift together flour, granulated sugar, brown sugar, cocoa powder, baking powder, baking soda and salt.
In second large bowl, using electric mixer fitted with whisk attachment, whisk together butter and oil. Add iced water and whisk until well combined, about 1 min. Reduce mixer speed to low and add eggs, 1 at a time, mixing until incorporated. Mix in 1/2 cup sour cream and vanilla. With mixer running, gradually add flour mixture.
Pour batter into prepared pan. Bake until wooden pick inserted into center comes out clean, 40 to 45 min. Let cool on wire rack 10 min., then remove from pan and let cool completely.
While cake cools, add remaining 1/2 cup sour cream to large bowl and whisk in sifted confectioners’ sugar until completely smooth, then tint green if desired. Drizzle over top of cake.

As published on GoodHousekeeping.com.

Posted on Leave a comment

Banana Coconut Chocolate Cream Pie

Banana coconut chocolate cream pie

When it comes to desserts, we simply shouldn’t have to choose. This banana coconut and chocolate cream pie is a nod to three classic Southern cream pies and is perfect for the person who wants a nibble of each. Here, a standard pie crust is filled with layers of bananas, coconut cream and rich chocolate cream filling before being topped with extra whipped topping. The flaky crust holds all three flavors together and offsets the sweetened custards with just enough salt. If you happen to be baking this weekend, consider this banana coconut and chocolate cream pie – the perfect dessert for all ages.

Banana Coconut Chocolate Cream Pie

Prep time: 45 minutes

Cook time: 45 minutes

Total time: 1 hour and 30 minutes

Ingredients

1/2 recipe for Perfect Pie Crust
1 cup sugar
6 tablespoons flour
1/2 teaspoon salt
2-2/3 cups milk
4 egg yolks, slightly beaten
3 tablespoons butter
1-1/2 teaspoons vanilla
1/2 cup shredded sweetened coconut (You can use unsweetened in a pinch)
3 ounces semisweet chocolate, melted
2 tablespoons heavy cream
1 large banana

Instructions

Preheat oven to 350 degrees. Roll out pie dough into a standard 9-inch pie pan. (Note: This recipe will not fill a deep-dish pan). Crimp edges and blind bake your crust in the oven for about 20 minutes or until the edges and bottom of crust have turned golden brown. If your edges brown before the bottom is baked, make a pie collar from aluminum foil to protect them from further cooking. Allow to cool completely prior to filling crust.
In a medium saucepan, combine sugar, flour and salt, whisking to combine. Slowly add the milk. Turn heat to medium temperature and stir constantly until the mixture is bubbling and has thickened substantially. Continue to cook for an additional 2 minutes.
Slowly drizzle a small amount of the cooked mixture into the beaten egg yolks, whisking all the while. Once about a cup of the mixture is incorporated, pour all of the egg yolk mixture back into the original saucepan and place back on the heat. Cook an additional 1-2 minutes while continuing to stir.
Add the butter and vanilla, stirring until incorporated. Pour half of the cooked pudding mixture into a separate bowl and stir in the coconut. In the remaining half of pudding mixture, stir in the chocolate and heavy cream until incorporated. Allow to cool slightly at room temperature for about 20 minutes.
When ready to assemble the pie, arrange banana slices evenly on the bottom of the pie crust. Top with the chocolate mixture and smooth over the top evenly. Spoon the coconut filling on top of the chocolate filling and smooth. Cover with a piece of plastic wrap and allow to rest in the fridge overnight or for at least 6-8 hours. When ready to serve, top with whipped cream and enjoy.
Notes

To blind bake a pie crust, either use pie weights or place a piece of parchment paper inside of the pie crust and fill with 1-1/2 cups of dried beans. This will weigh the pie crust down and prevent it from puffing. If you do not have access to either of these options, prick the bottom of the crust with a fork.
This pie is very adaptable. If you prefer all coconut, remove the chocolate and cream and double the amount of coconut. Same goes for the chocolate.
The oatmeal cookie crust from my oatmeal cookie banana cream pie would work splendidly. Give it a shot if you don’t prefer traditional pie crust.
A refrigerated or frozen pie crust can be substituted.

As published on AlabamaNewsCenter.com. Kate Wood’s recipes can be found on her Wood and Spoon blog and on Facebook, Instagram and Pinterest.