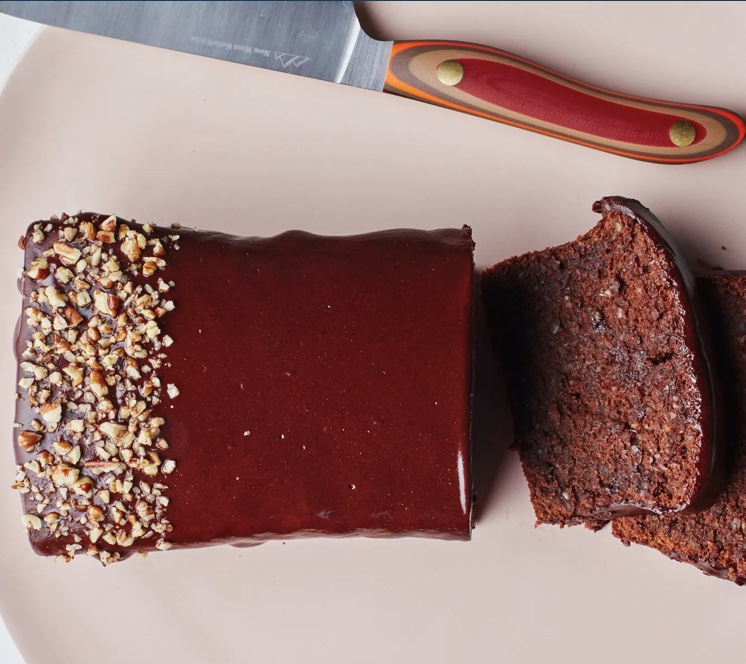
Posted on Leave a comment

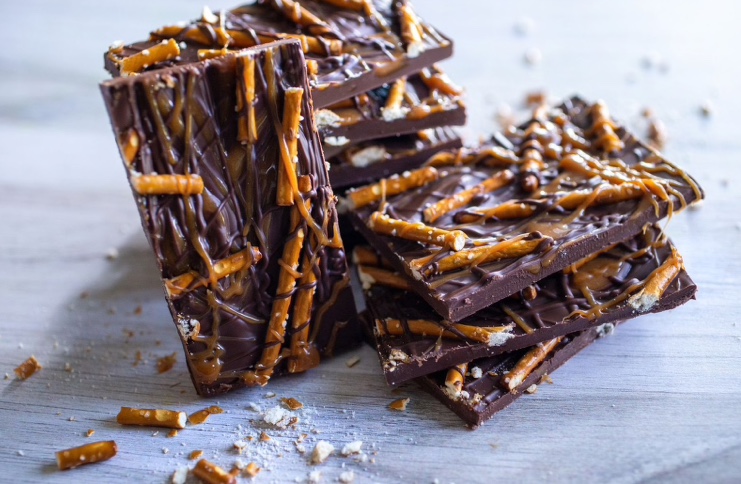
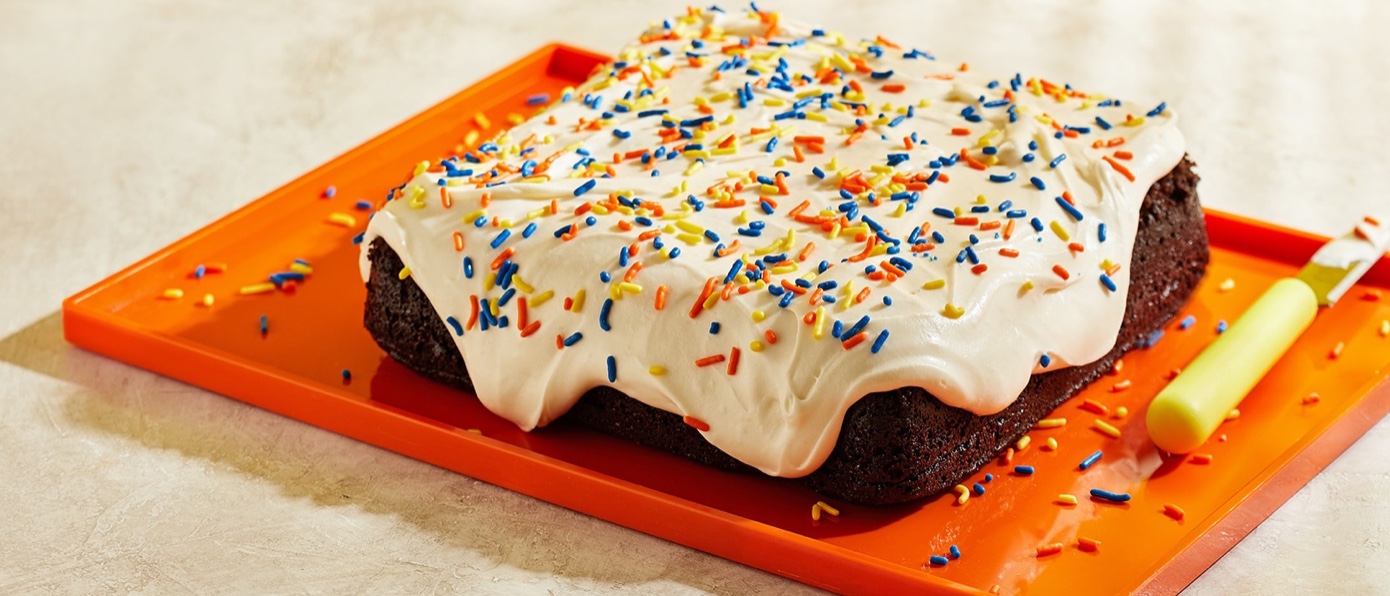
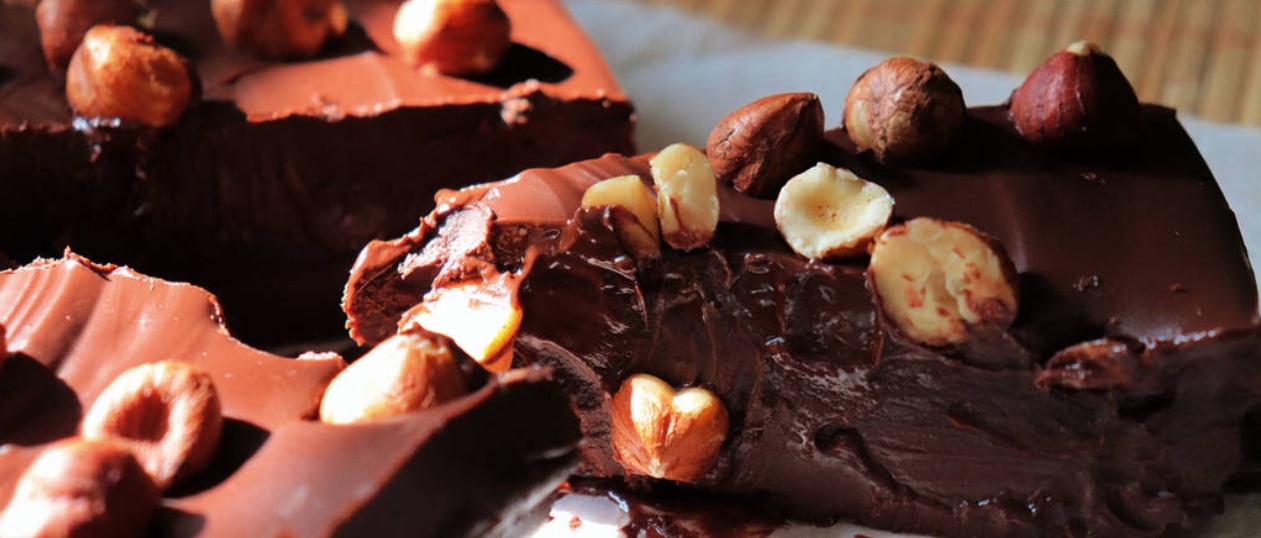
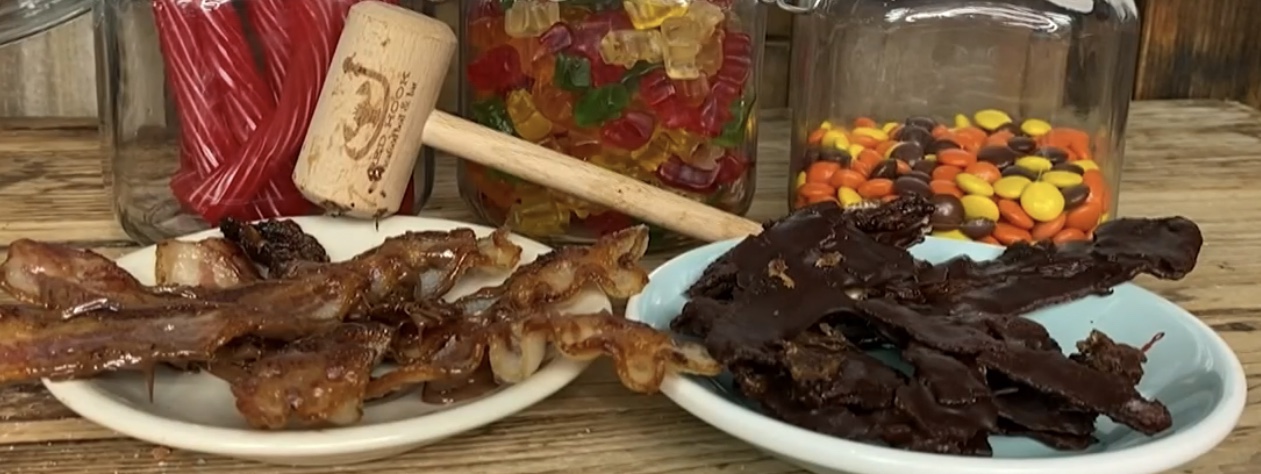
Chocolate Bacon Bark

Chocolate covered bacon

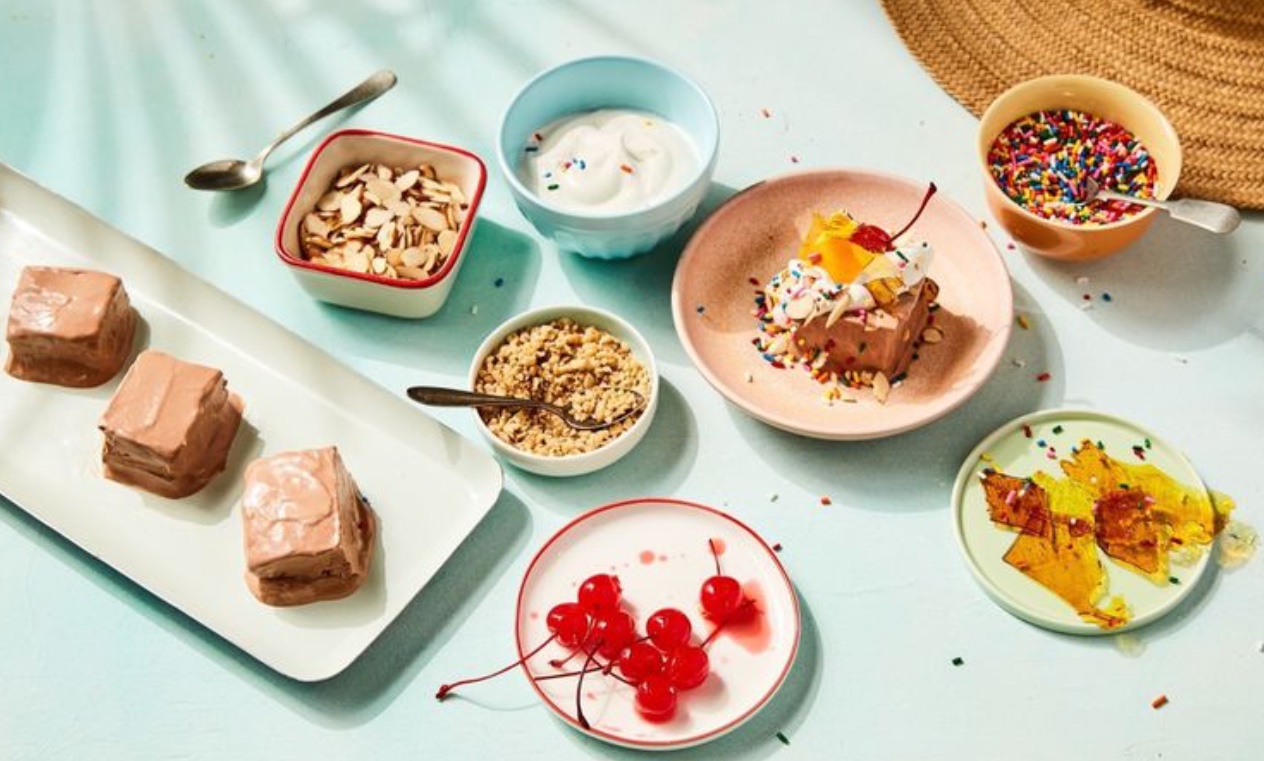
Gabriel Armentano from RHK shows Tina Redwine how to make chocolate bacon bark and create an over-the-top ice cream treat that is impossible to resist. To see the video, click HERE.

INGREDIENTS:
– Tempered chocolate (melted Lindt, 72% cacao dark chocolate bars)
– Your favorite bacon

INSTRUCTIONS:
Bake bacon at 375 for 20-25 minutes on a large baking sheet on parchment paper. Make sure bacon is evenly spaced out with a half-inch gap in between. Once crispy, remove from oven and place on a new baking sheet with parchment paper.
Tempered chocolate is made next using a double boiler (or a pan that is rested on top of another pan with boiling water at 110-115F – usually low on a stovetop). Place chocolate in top pan and stir until melted. Evenly pour the melted chocolate over the bacon.
Place in freezer and let cool for 1 hour minimum. Remove from freezer and break the bark with a mallet or rolling pin.

Posted on Leave a comment

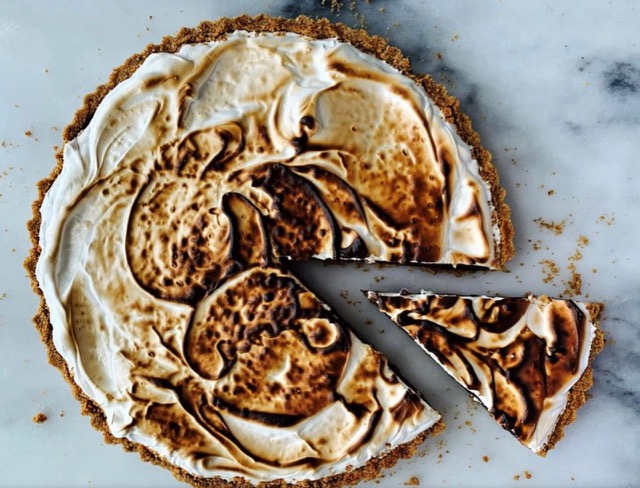
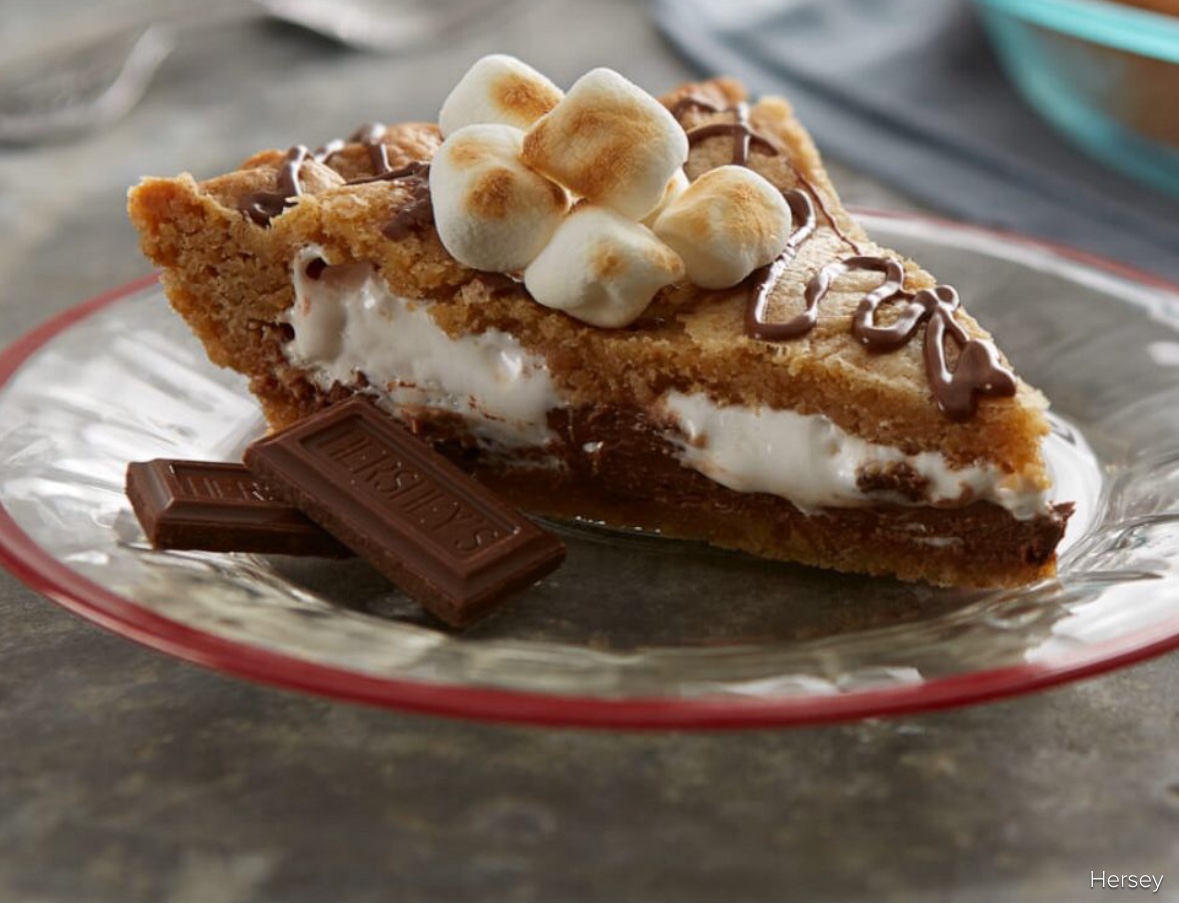
This chocolate s’mores tart with toasted marshmallow will get you invited back to the cabin

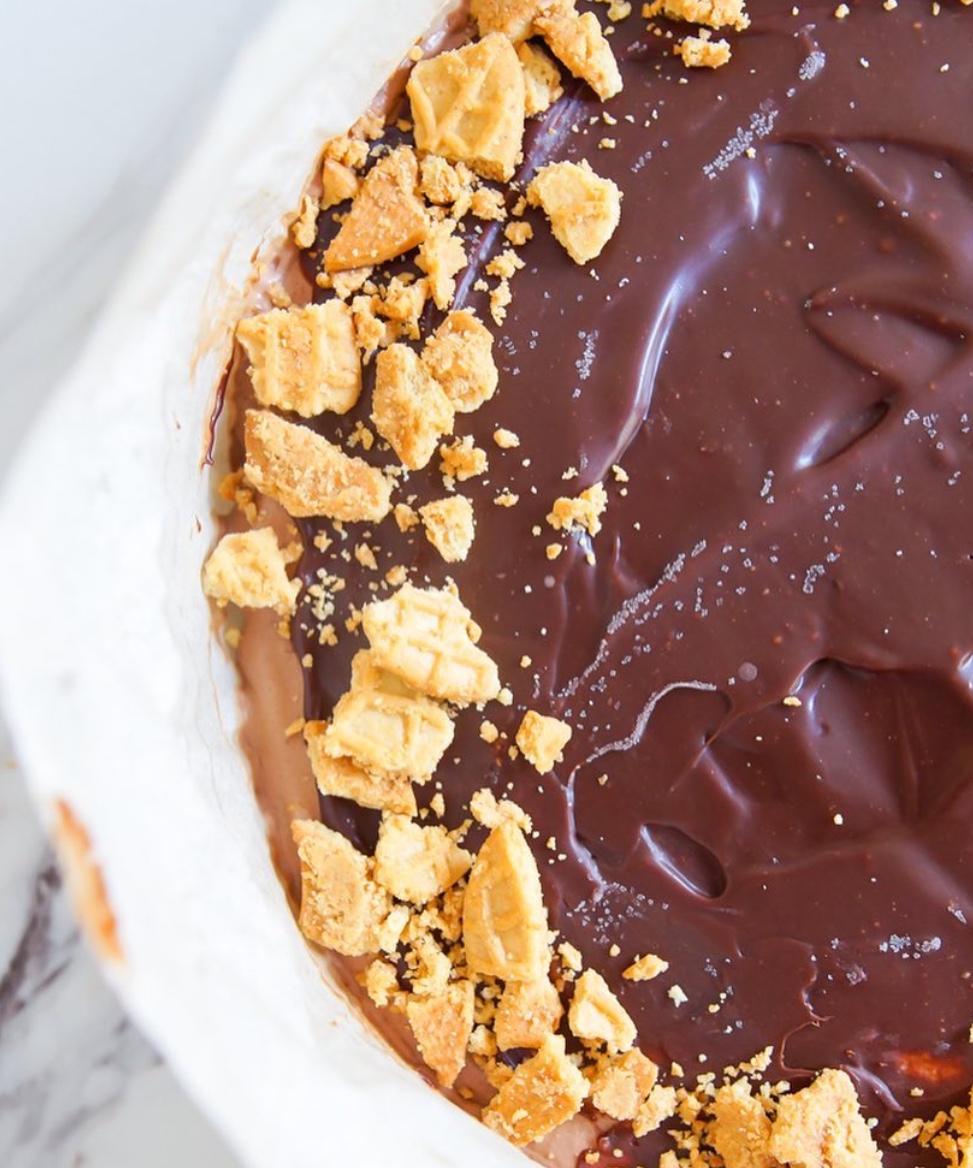
S'Mores chocolate tart

The crust and filling are easy enough, and while the marshmallow topping is a bit of work, the end result is totally worth the effort.

Chocolate S’mores Tart with Toasted Marshmallow

Ingredients:

Graham cracker crust:

1 3/4 cups graham cracker crumbs

1/4 cup packed brown sugar

1/2 tsp ground cinnamon

pinch salt

7 tbsp melted butter

Chocolate ganache filling:

1 1/4 cups whipping cream

300 g dark chocolate (60 — 70 per cent cocoa) chopped into small pieces

1 tsp pure vanilla extract

Marshmallow topping:

1/2 cup cold water, divided

1 1/2 tsp unflavored gelatin powder

3/4 cup granulated sugar

1/4 cup corn syrup

1 tsp pure vanilla extract

Directions:

To make the crust preheat the oven to 350ºF. In a medium bowl, combine the graham cracker crumbs, brown sugar, cinnamon and salt. Pour in the melted butter and stir until thoroughly combined. Spoon the crumbs into a 10-inch tart pan fitted with a removable bottom. Press firmly into an even layer on the bottom and up the sides of the pan. The flat bottom of a measuring cup works great for this. Place on a rimmed baking sheet and bake for 10 minutes, until lightly browned. Remove from the oven and let cool completely on a wire rack.

To make the ganache filling pour the cream into a heavy-bottomed medium saucepan. Bring to a simmer over medium heat. When you see bubbles form around the edges, remove from the heat and stir in the chopped chocolate. Wait for a couple of minutes then gently stir until the chocolate is smooth and creamy. Stir in the vanilla.

Pour the chocolate filling into the bottom of the prepared graham cracker crust. Smooth the top with an offset spatula and refrigerate for at least two hours.

To make the marshmallow topping pour 1/4 cup of the water into the bowl of a stand mixer fitted with the whisk attachment. Sprinkle the gelatin on top of the water and allow it to bloom while you proceed with the recipe.

As published, including video, in The StarPhoenix.com

Posted on Leave a comment

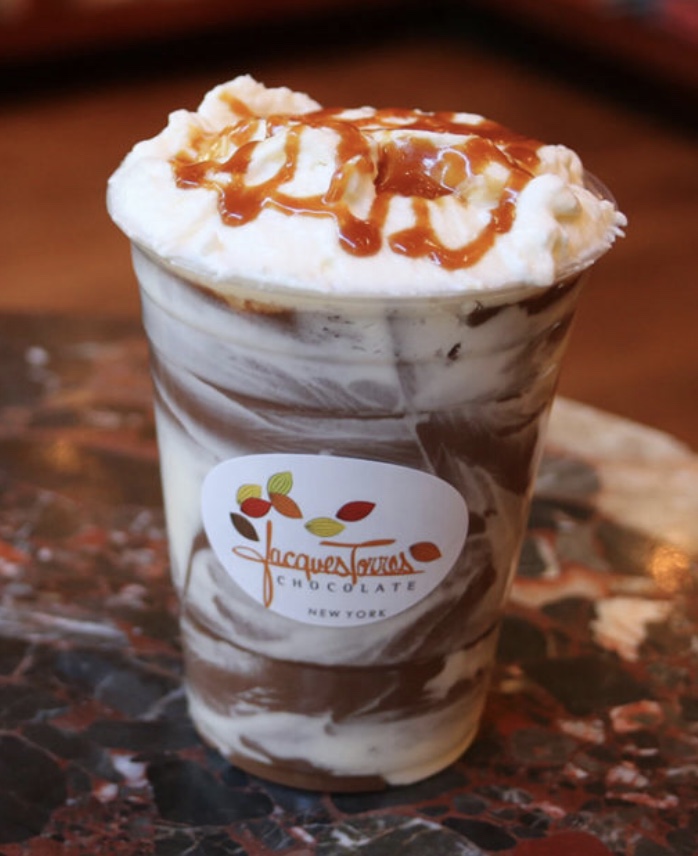
Jacques Torres shows how to make famous Frozen Hot Chocolate

Frozen Hot Chocolate

Jacques Torres’ hot chocolate is known for its rich, decadent taste, and is a staple during the New York winter season. As the weather heats up during the summer, the beverage cools down. Although it is only available in-store, you can still cool down with Jacques’ Frozen Hot Chocolate by creating it on your own.

Frozen Hot Chocolate

Ingredients:

1 cup of whipping cream
1 tbsp of sugar
1 cup of milk
1/2 cup of Jacques’ Classic Hot Chocolate Mix
1 cup of ice

Directions:

Pour whipping cream into a medium mixing bowl, whip lightly for 30 seconds and store in a freezer for 5 minutes.
After 5 minutes, take the bowl out, add sugar and whisk the cream vigorously until it is the consistency of marshmallow fluff. Store the whipped cream in the refrigerator while making the hot chocolate.
Bring milk to boil over medium-high heat in a small saucepan.
Add hot chocolate mix and whisk until completely dissolved. Set aside until the hot chocolate has completely cooled to room temperature.
Once the hot chocolate has cooled, add the mixture and ice into a blender and blend until smooth.
In a serving cup, add whipped cream to the bottom of the cup. Pour the hot chocolate mixture over the top. Top with a large scoop of whipped cream and enjoy!
Tips

For the marble effect shown in our picture, lightly swirl the whipped cream that was poured at the bottom of the cup around the edges of the cup before pouring in the frozen hot chocolate.
This recipe makes very rich and thick hot chocolate. If you want a thinner drink, add more milk.
For a sweeter and creamier result, substitute half of the ice for ice cream.
You can add rum, vodka, or anything you like to spike it.

As published in Bake Magazine.

Posted on Leave a comment

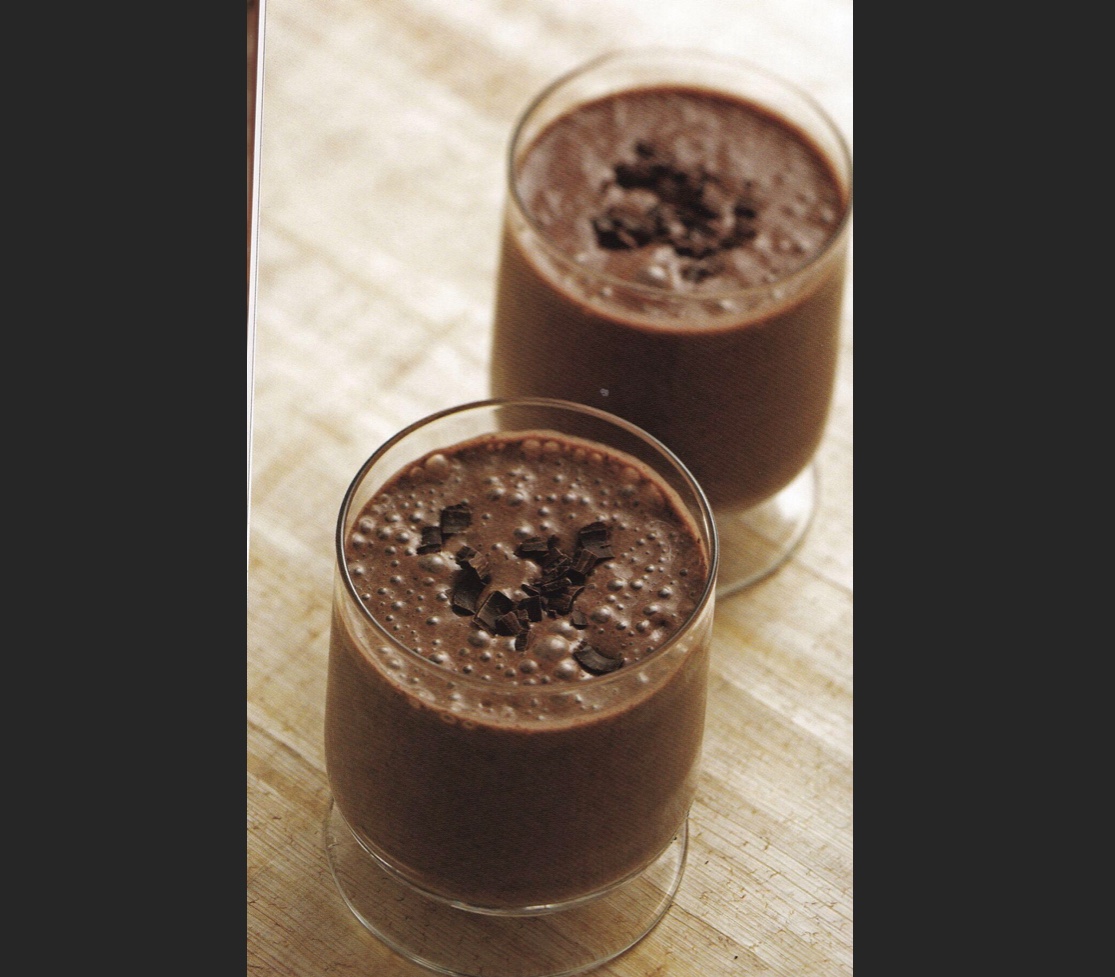
Guilt-free Banana Chocolate Smoothie is a great way to tame chocolate cravings

Banana Chocolate smoothie

Chocoholics often feel that nothing beats a rich piece of chocolate, a sumptuous slice of chocolate cake or a creamy serving of chocolate ice cream. Chocolate contains four times the amount of catechins as tea, and it contains the same heart-healthy flavonoids as red wine. However, the way chocolate is prepared can affect its potential health benefits. For those who want a healthy, low-fat chocolate option that’s easier on the waistline, smoothies may be the way to go. This recipe for “Guilt-Free Banana Chocolate Smoothie” from Ellen Brown’s “Super Smoothies: 100 Recipes to Supercharge Your Immune System” (Crestline) is one way to get a full dose of delicious chocolate (in two forms). This smoothie is chock-full of other ingredients, including a potassium-rich banana, that are part of a healthy, balanced diet. When the kids are indulging in ice cream, this smoothie offers parents the same texture and taste without all the guilt.

Makes 4 1-cup servings

Ingredients:

1½ cups chocolate soy milk
3 ounces chopped dark chocolate
3 tablespoons cocoa powder, preferably Dutch-processed
2 tablespoons bee pollen
2 tablespoons flaxseed oil
2 cups sliced banana
1 cup chocolate frozen yogurt
2 tablespoons shaved chocolate for garnish (optional)

Preparation:

Combine soy milk, chopped chocolate, cocoa powder, bee pollen, flaxseed oil, and banana in a blender or smoothie maker. Blend on high speed for 45 seconds or until mixture is puréed and smooth. Add frozen yogurt, and blend on high speed again until mixture is smooth. Serve immediately, garnished with chocolate shavings, if desired.

As published in GwinettDailyPost.com

Posted on Leave a comment

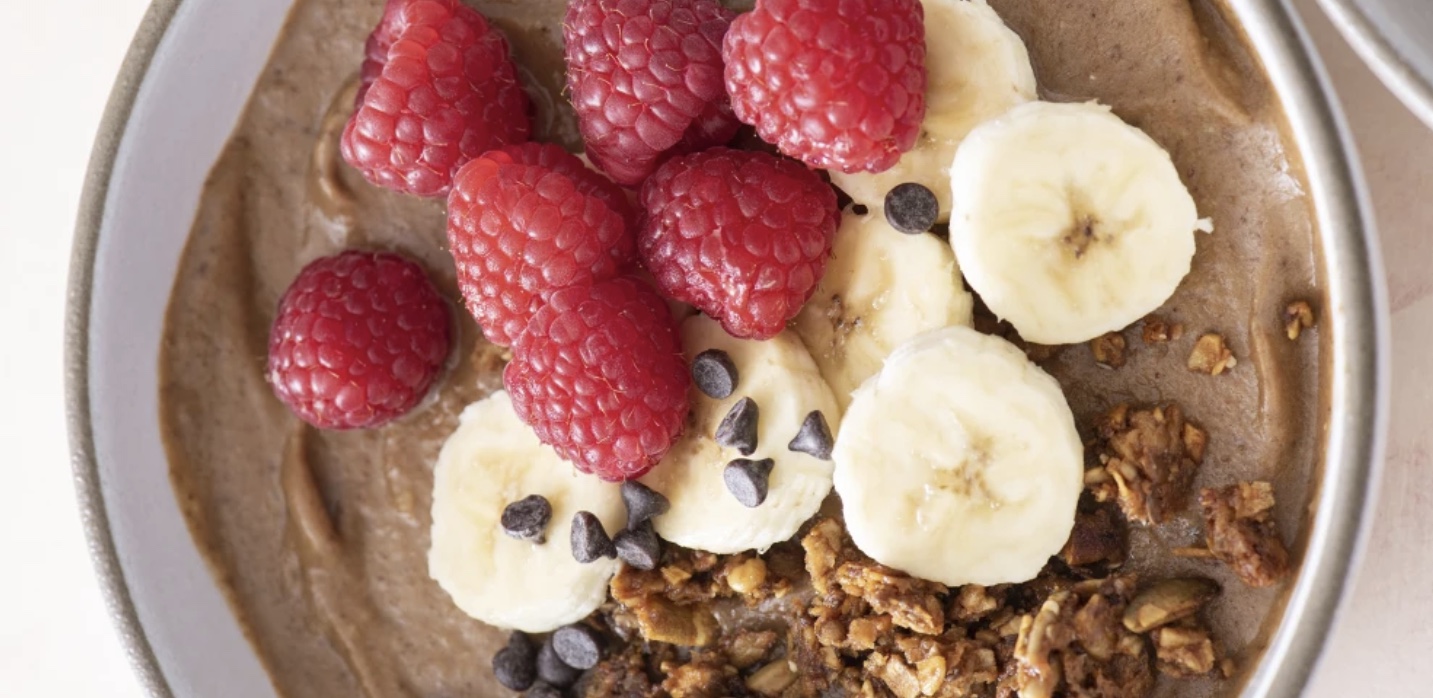
Double-Chocolate Smoothie Bowls

Chocolate smoothie bowl

Even though they look like dessert, these double-chocolate smoothie bowls are actually good for you. You can enjoy it for breakfast, lunch, as a snack or even for dessert. The best part is that you can make them with regular or dairy free chocolate chips or even cocoa nibs, which have no added sugar.

Ingredients:

3 large bananas, peeled and frozen
1 cup frozen cauliflower rice or florets
2 tablespoons pure cocoa powder
2 tablespoons chocolate chips, carob chips or cocoa nibs
1/3 cup milk of choice
optional toppings: chocolate chips, granola, dried coconut, fresh fruits, hemp seeds or chia seeds

Preparation:

Place ingredients in a blender. Use a tamper to force the mixture to purée and add a little more milk, if needed.

Place in two bowls and serve with desired toppings.

As shown on TODAY show. For more details, click HERE.

Posted on Leave a comment

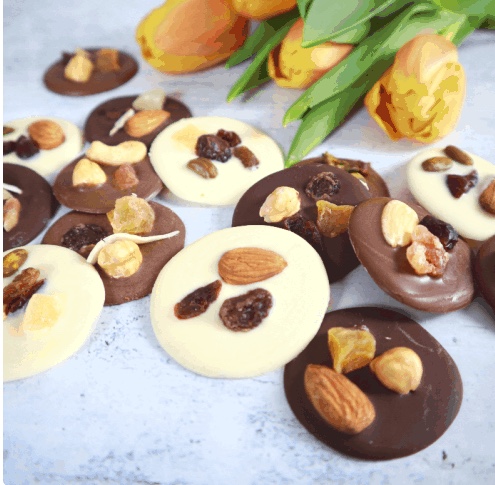
French Chocolate Mendiants

French chocolate mendiants

It’s almost Easter, and apart from enjoying traditional chocolate Easter eggs, we think that chocolate mendiants should also be part of this festive day. Making mendiants requires some technical skills but with our instructions, you should find it straightforward to transform plain chocolate into an elegant dessert. It is surely a perfect gift for every chocolate lover. For the recipe and complete directions, with photos, click HERE. ENJOY!!!

Posted on Leave a comment

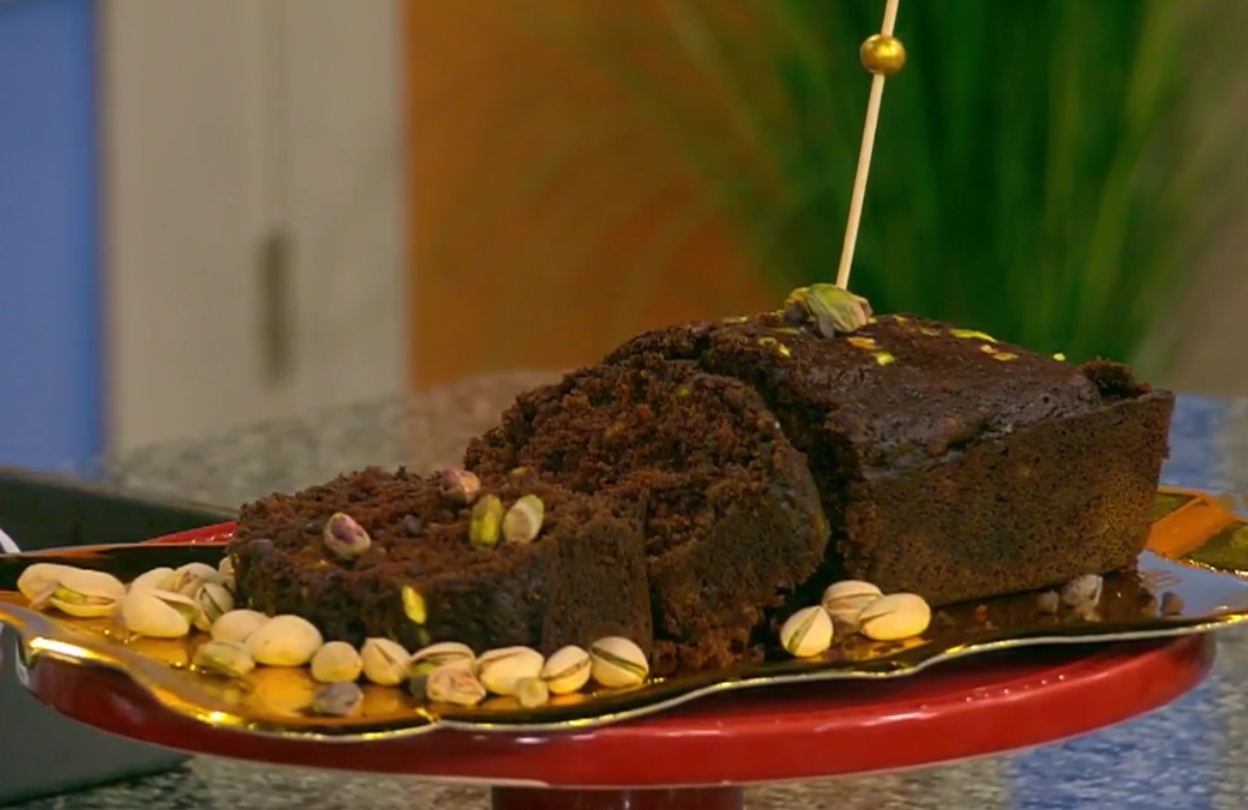
Flourless Chocolate Cake With Café de Olla Ganache

Flourless Chocolate cake

Tamar Fasja Unikel, co-owner of Masa Madre bakery in Chicago, grew up in a tight-knit Jewish community in Mexico City where Passover was a very big deal. One of her aunts, Adela, started making this cake 35 years ago and it’s now a part of Unikel’s holiday table too. At Masa Madre she and her partner Elena Vazquez Felgueres pay homage to their Mexican heritage by frosting the cake with ganache enriched with the flavors of café de olla, a combination of ground coffee, piloncillo, and cinnamon. This cake gets better throughout the week, whether cold from the fridge or warmed before serving. It can be made parve/dairy-free by subbing in margarine or vegan butter for the butter and cream.

Ingredients:

CAKE
7 Tbsp. plus 1½ tsp. unsalted butter, plus more for pan
1 cup (150 g) semisweet chocolate, chopped
1¼ cups (125 g) raw pecans, plus chopped for serving
1 cup plus 2 Tbsp. (125 g) almond flour or meal
½ tsp. Diamond Crystal or ¼ tsp. Morton kosher salt
6 large eggs
¾ cup (150 g) granulated sugar

GANACHE AND ASSEMBLY
1½ cups (150 g) semisweet chocolate, chopped
¾ cup heavy cream
1 Tbsp. light corn syrup
1 Tbsp. finely ground espresso or other dark roast coffee
½ tsp. cinnamon, preferably Ceylon
½ tsp. grated piloncillo or light or dark brown sugar
1 Tbsp. unsalted butter
Pinch of kosher salt

Preparation:

CAKE
Step 1
Place a rack in middle of oven; preheat to 325°. Lightly butter a 9×5″ loaf pan; line with parchment paper, leaving a generous overhang on long sides. Butter parchment. Combine chocolate and remaining 7 Tbsp. plus 1½ tsp. unsalted butter in a medium bowl and set over a large saucepan of simmering water (do not let bottom of bowl touch water). Heat chocolate and butter, stirring occasionally, until melted and smooth. Remove bowl from heat and set chocolate mixture aside.

Step 2
Pulse pecans in a food processor until somewhat finely ground (it’s okay if there are some coarser pieces). Pulse in almond meal and salt; set aside.

Step 3
Beat eggs in the bowl of a stand mixer fitted with the whisk attachment on medium-high speed until fluffy, about 2 minutes. With the motor running, gradually stream in sugar and beat until mixture is very pale and nearly doubled in volume, about 1 minute. Stream in reserved chocolate mixture and beat until no streaks remain. Remove bowl from mixer and fold in reserved pecan mixture with a rubber spatula, making sure to scrape bottom of bowl, until well incorporated. Pour batter into prepared pan and tap pan on counter to remove any air bubbles.

Step 4
Bake cake, rotating pan halfway through, until a tester inserted into the center comes out with just a few moist crumbs attached, about 1 hour. Transfer to a wire rack and let cool in pan.

GANACHE AND ASSEMBLY
Step 5
As soon as the cake is almost cool, place chocolate in a medium bowl. Bring cream, corn syrup, coffee, cinnamon, and piloncillo in a small saucepan to a faint simmer over medium heat. Pour over chocolate, whisking constantly until melted and smooth. Add butter and salt and whisk until butter is melted and ganache is shiny and smooth. Let cool until thickened slightly, 15–30 minutes.

Step 6
Turn cake out onto a large plate or cake stand and turn right side up. Pour ganache over (it should flow over the sides but not quite hit the plate). Scatter chopped pecans over as desired; chill until ganache is set, 10–15 minutes.

As published in BONAPPETIT.COM
Posted on Leave a comment

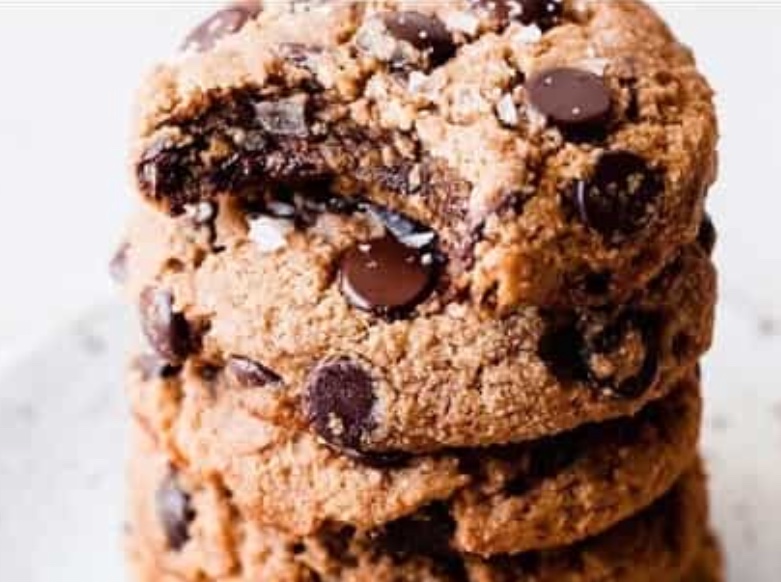
Got sourdough discard? Use it to make Sourdough Chocolate Chip Cookies

Sourdough chocolate chip cookies

What’s better than paleo chocolate chip cookies? Well, it has to be Sourdough Chocolate Chip Cookies made from sourdough discard as they are gluten-free, dairy-free and vegan.

Ingredients:

½ cup (100g) refined coconut oil, softened, similar in texture to softened butter

⅔ cup (96g) coconut sugar

1 flax egg (see Notes) or regular egg, room temperature

½ cup (125g) mature gluten-free sourdough starter, unfed (see Notes)

1 teaspoon pure vanilla extract

½ teaspoon baking soda

½ teaspoon sea salt

2 cups + 2 tablespoons (204g) blanched almond flour

1 cup (6 ounces) chocolate chips

Flaky sea salt, to sprinkle on top, optional

Method:

Mix together the coconut oil and coconut sugar until smooth and lightened slightly in color. Add the flax egg (or regular egg), vanilla extract, and sourdough discard, and mix until smooth.

Add the almond flour, salt, and baking soda to the wet ingredients. Mix until well incorporated. Fold in the chopped chocolate. Cover and refrigerate for at least an hour (or up to 48 hours).

When you’re ready to bake, preheat the oven to 350ºF. Use a cookie scoop (using this size will give you 12 cookies, using this smaller size will give you about 20) to form cookies and place on a parchment-lined baking sheet; press down slightly.

Sprinkle with flaky sea salt if desired. Bake for about 10 or until just beginning to turn golden brown around the edges. Store leftover cookies in an airtight container at room temperature or in the refrigerator for up to 3 days.

For the discard: don’t use discard that is from a super new starter – it should be smelling good and at least a week old. The starter does not need to be active, and should be fed with about 100% hydration.

(Recipe: Rachel Conners, Instagram/bakeritablog as published in HINDUSTANTIMES.COM)


Posted on Leave a comment

Chocolat Chaud (Hot Chocolate)

Hot chocolate

The secret to David Lebovitz’s Parisian-style hot chocolate is whole milk and plenty of high-quality dark chocolate. The optional addition of raw or brown sugar lends a wonderful toasty toffee flavor. Mr. Lebovitz recommends making the drink a day or two in advance and storing it in the refrigerator, then rewarming it: The drink gets thicker the longer it sits. Serve it in small tea cups, the way the French do, as this intense hot chocolate packs a punch. To give the hot chocolate a nice frothy texture, zap it with an immersion blender for a few seconds before pouring it into your cup—a technique recommended by both chocolate/cacao scholar Maricel Presilla and Wonderbon Chocolate Co. co-owner Maury Rubin. It’s a worthwhile extra step that gives the drink a light, airy mouthfeel, and it works well with packaged cocoas, too.

Ingredients:

– 2 cups whole milk or neutral plant-based milk, such as Oatly Barista Edition
– 5 ounces bittersweet or semisweet chocolate, chopped
– 1-2 tablespoons raw or light brown sugar (optional)
– Whipped cream or marshmallows, for garnish (optional)

Directions:

In a medium saucepan over medium heat, warm milk and chocolate, whisking occasionally until chocolate is melted.
Bring mixture almost to a boil, paying close attention. (If it comes to a full boil, it will quickly boil over.) Reduce heat to lowest setting and gently simmer hot chocolate, whisking constantly, 3 minutes. Remove pan from heat.
When chocolate is cool enough to sip, add sugar to taste, if using. To serve, pour hot chocolate into cups and top with whipped cream or marshmallows, if using.

—Adapted from “Drinking French” by David Lebovitz (Ten Speed Press) as published in WSJ.

Posted on Leave a comment

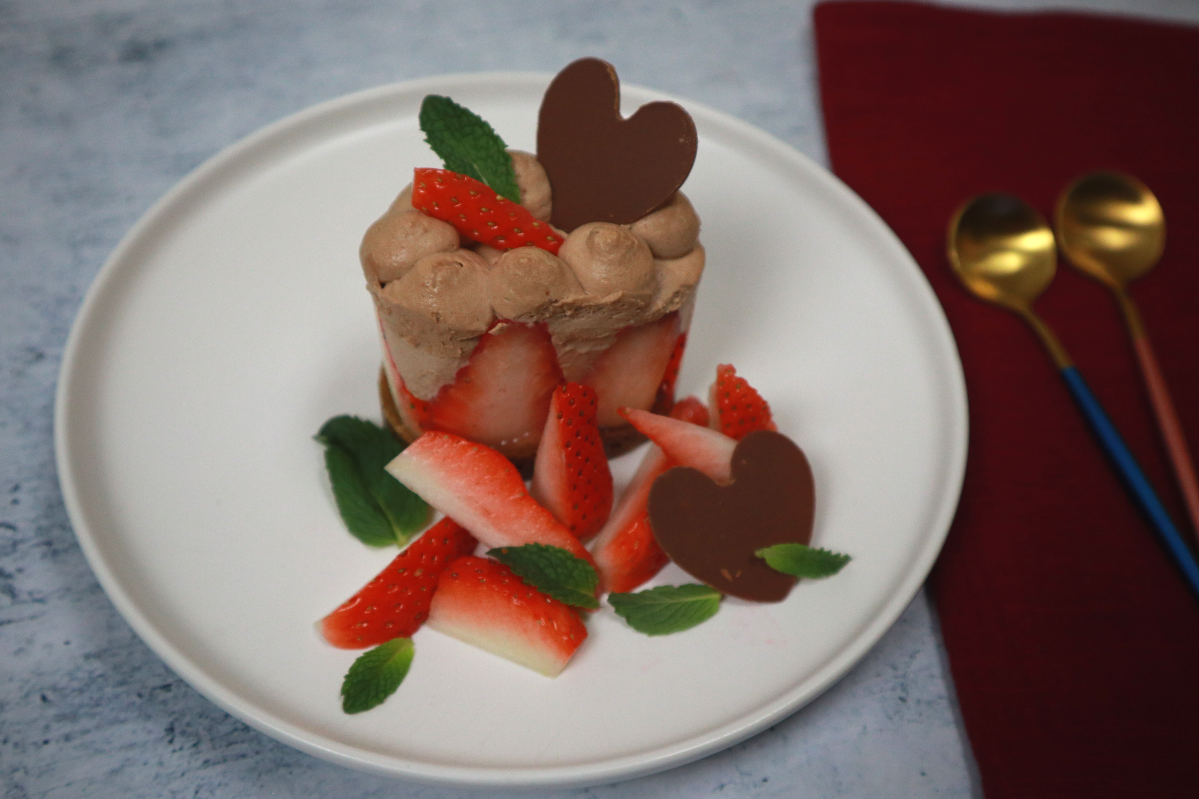
A Sweet Valentines Strawberry & Chocolate Delight

Strawberry chocolate dessert

Chocolate and strawberries – it is a classic combination and the perfect finish after a great dinner. This dessert combines both and is the ultimate dessert for your upcoming Valentines dinner (or any time of the year!). The recipe is easy, but you need to organize ahead of time as the recipe requires preparation over 2 days. It is all well worth it for this delight! You can choose to buy chocolate decorations instead of making them, which makes the preparation less long. Click, HERE, to see the step-by-step preparation and to find more intriguing recipes to try!

Ingredients:

For the crust:
50 gr speculoos
30 gr butter

For the filling:
90 gr milk chocolate pistoles
½ tbsp honey
60 gr cream
180 gr cream cold (day 2)

For the compote:
150 gr fresh strawberries
25 gr coconut sugar
1 pc gelatine leaf
1 pinch freshly ground pepper
1 tbsp chopped fresh mint

For the garnish:
Fresh strawberries
120 gr milk chocolate optional

Method:
Day 1
• Prepare the ganache:
Bring 60gr of cream with the honey to a boil and pour it over the chocolate to create chocolate Chantilly. Leave it 3 minutes before stirring to combine and obtain a smooth and shiny texture. Place a cling film on top then refrigerate overnight.
• Prepare the crust:
Process the speculoos to crumbs with the help of a food processor. Add the butter and blend together to combine.
Arrange this mixture into a mould, press it down and bake at 150°C for 8 minutes. Allow to cool and refrigerate in the mould.
• Prepare the chocolate decoration: (optional)
Place the chocolate in the microwave on high for 30 seconds, then stir. Repeat until the chocolate is half melted, half solid; then quickly stir to melt the milk chocolate completely.
Pour the chocolate on a plastic sheet and cover with a second sheet. With a rolling pin spread the chocolate to a thin layer and let it set. Cut the forms of your choice and refrigerate for 5 minutes. Transfer the chocolate decoration into a sealed container and keep below 24 degrees.

Day 2
• Prepare the strawberry compote:
Clean and cut the strawberries and keep 8-10 calibrated pieces to garnish the mould. Place the remaining in a saucepan with the sugar and cook over a medium heat for 3 minutes.
Stir in the freshly ground pepper and the soaked gelatine leaf and dissolve.
Remove from the stove, cool down and add the fresh mint.
• Prepare the filling:
Pour the remaining 180 gr of cream over the firm chocolate ganache from day 1 and gently whip until combined. Speed up the whipping at the end until the Chantilly cream has soft peaks. Transfer the fluffy filling into a piping bag.
• Finish the cake:
Arrange the halved strawberries around the mould. Spoon the strawberry compote on the bottom of the tart and fill the center with the milk chocolate chantilly.
Refrigerate for 2 hours before serving. The milk chocolate ganache must firm up before unmolding.

NOTES
• Speculoos can be replaced with shortbread biscuits, Oreo, palet Breton biscuits.
• Chocolate starts melting in the centre, which is why microwaving it shouldn’t exceed 30 seconds at the time.
• When you temper chocolate, you are heating and cooling the chocolate in a specific way. When it’s done correctly, the chocolate is shiny, firm at room temperature and has a sharp snap when you bite into it.

For full recipe with detailed instructions and pictures, go to CulinaryAmbition.com (click, HERE).  You will also find many other delicious recipes!

Posted on Leave a comment

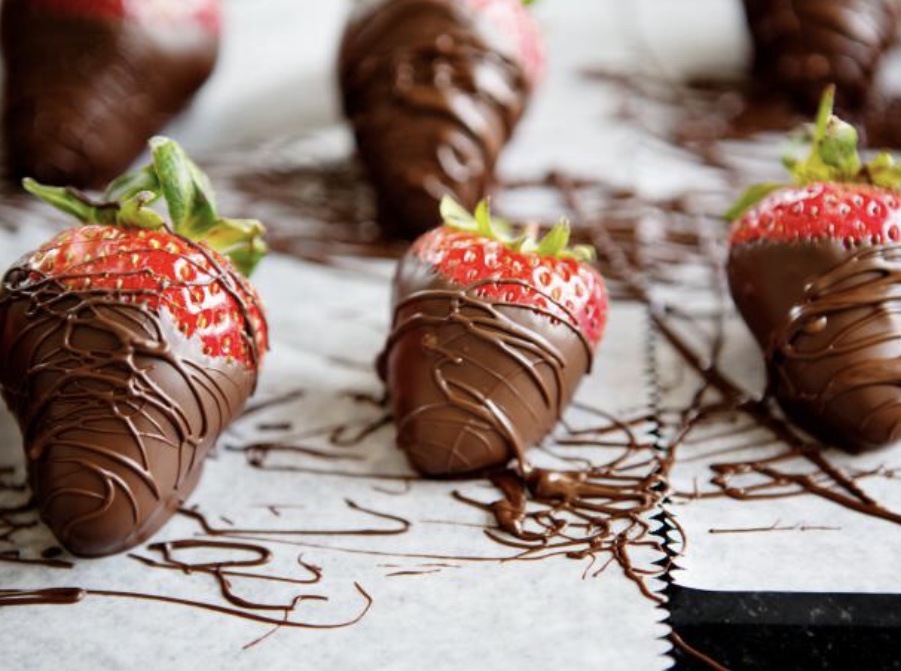
How to Keep Chocolate Covered Strawberries Fresh

Chocolate covered strawberries

Chances are, if you’re reading this article you’ve mastered how to make chocolate covered strawberries, or you’ve received a chocolate covered strawberry delivery (lucky you). Now that you’ve got the strawberries, you need to figure out how to keep those beauties fresh.

For all your answers, from the best way to store, to how long, etc., take the advice from the Food Network Kitchen, and click HERE.

Posted on Leave a comment

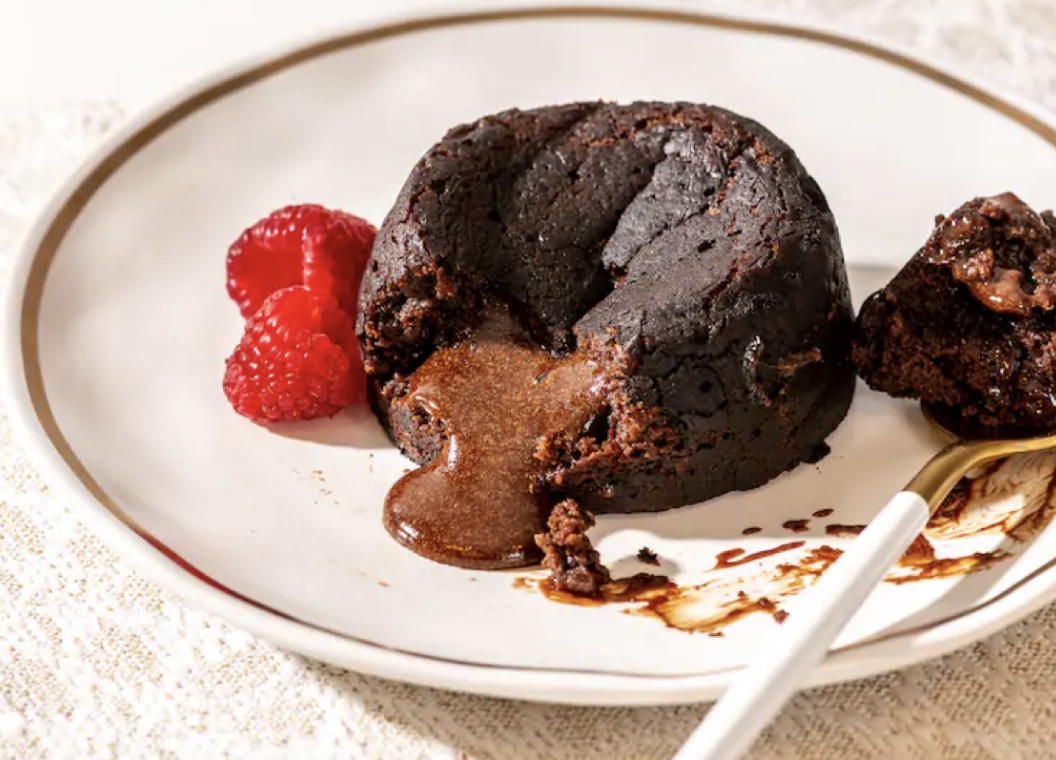
If loving a piping hot chocolate lava cake is wrong, I don’t want to be right!

Lava cake recipe

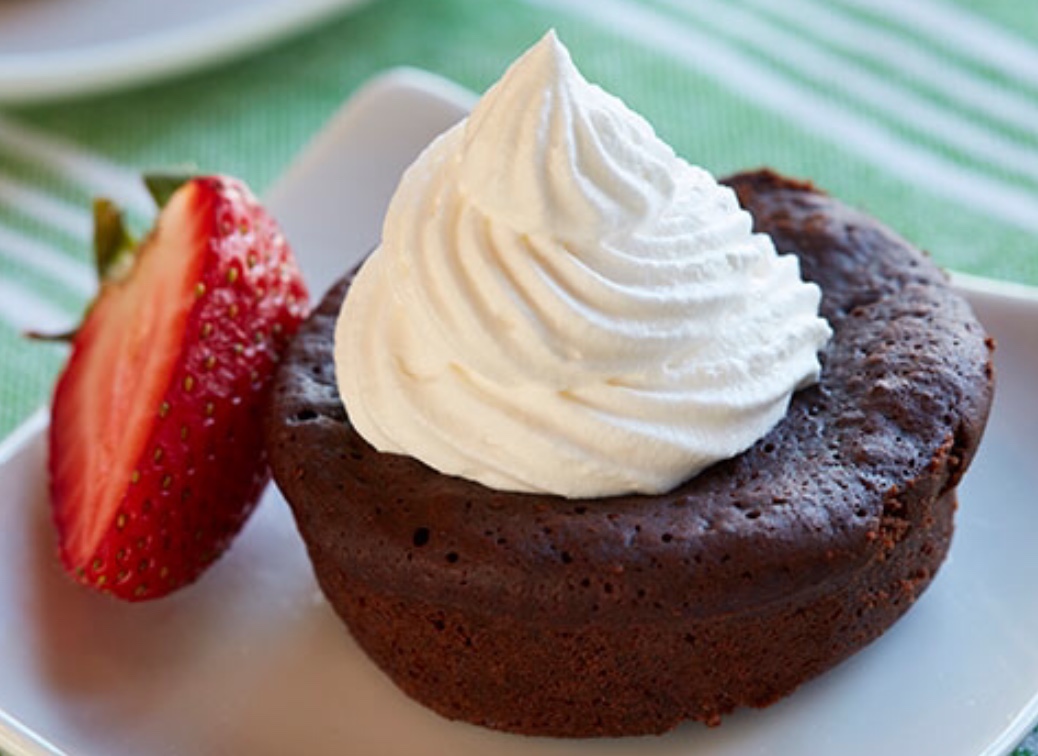
Enjoy a personal chocolate cake that comes with a built-in sauce, that can be whipped up and on the table in less than an hour. And made with pantry staples. And is ideal for a special date night at home (this is a rich, once-in-a-while treat, though feel free stretch each cake to 2 servings if you happen to have four people around to eat them!).

Ingredients:

– 4 tablespoons (2 ounces/57 grams) unsalted butter, cut into 1/2-inch pieces, plus more for greasing the molds
– Cocoa powder, for dusting (natural or Dutch process)
– 2 ounces (57 grams) bittersweet chocolate, chopped
– 1 large egg, plus 1 large egg yolk
– 2 tablespoons granulated sugar
– 1 teaspoon all-purpose flour

Directions:

Step 1
Position the rack in the middle of the oven and preheat to 450 degrees.

Generously butter and dust two 4-ounce molds, custard cups or ramekins with cocoa powder, tapping out the excess.

Step 2
Combine the butter and chocolate in a heatproof bowl set over a pan with a few inches of simmering water, ensuring the bottom of the bowl doesn’t touch the water, and stir until the chocolate is almost completely melted. (Alternately, you may heat them together in a microwave, starting with 1 minute on HIGH, then stirring, and finishing in short bursts on 50 percent power as needed until almost melted. Stir together until thoroughly combined.) Remove the bowl from the pan.

Step 3
While the chocolate and butter are melting, in a medium bowl, using a whisk or handheld mixer on medium-high, beat together the egg, yolk and sugar until light, thick and pale yellow.

Step 4
Finish stirring together the chocolate and butter; it should be quite warm. Gradually whisk the chocolate mixture into the egg mixture, then quickly beat in the flour by hand, just until combined.

Step 5
Divide the batter between the molds. (At this point you can refrigerate the desserts for up to several hours. Bring them back to room temperature before baking.)

Step 6
Transfer the molds to a baking sheet to make them easy to move in and out of the oven (and contain any possible overflow). Bake for 7 to 10 minutes — the longer you bake, the less “sauce” there will be. The center will still be quite soft and slightly dipped, but the sides will be set. Let rest for about a minute.

Step 7
Place an overturned plate on top of the mold and, holding onto the mold in one hand with a potholder, mitt or dish towel, invert the plate and the mold. (If you have a lightweight pot rest or trivet, you can set the ramekin on top of that and use it to help you invert as well.) Let sit for about 10 seconds. Unmold by lifting up one side of the mold; the cake will fall out onto the plate. It’s okay if you have to tap or gently shake the ramekin to nudge it out. Serve immediately.

Adapted from “Jean-Georges: Cooking at Home with a Four-Star Chef,” by Jean-Georges Vongerichten and Mark Bittman. As published in The Washington Post.

Posted on Leave a comment

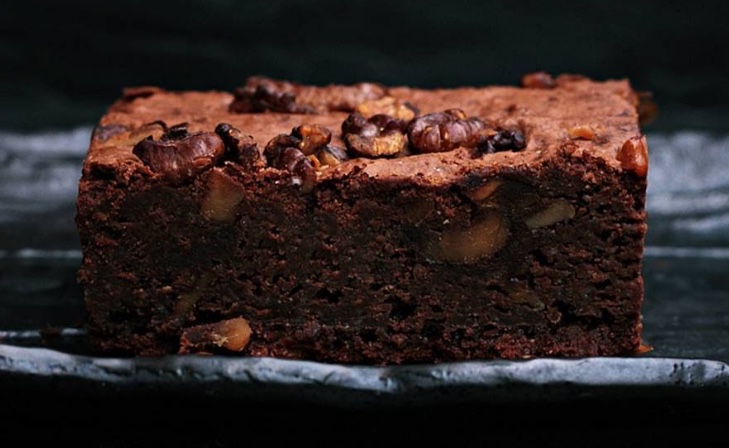
Make this chocolate walnut brownie in just one minute!

1 minute walnut brownie

Mug cakes became a popular trend during the pandemic. They are not only hassle-free but can also be whipped up in just a few minutes. If you are craving cake, all you need to do is to procure the required ingredients, mix them in a mug and microwave, and your cake is ready. MasterChef runner-up Neha Deepak Shah recently shared a simple one-minute mug recipe for making chocolate walnut brownie, using simple ingredients.

Ingredients:

2 tbsp – Chopped chocolate
2 tbsp – Butter / ghee
2 tbsp – Powdered sugar
2 tbsp – Maida (all-purpose flour) / atta
1 tbsp – Cocoa powder
¼ tsp – Baking powder
Lots of chopped walnuts

Directions:

* In a cup, add chopped chocolate and ghee or melted butter.
* Microwave for 15 seconds.
* Now add powdered sugar, all-purpose flour, cocoa powder, baking powder, and water. Mix all the ingredients.
* Add chopped walnuts and some chopped chocolate.
* Microwave for one minute.
* Serve with ice cream.

As published on IndianExpress.com

Posted on Leave a comment

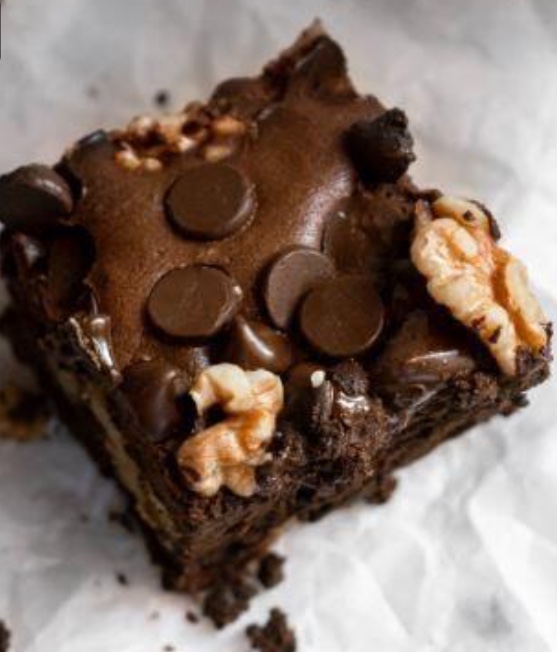
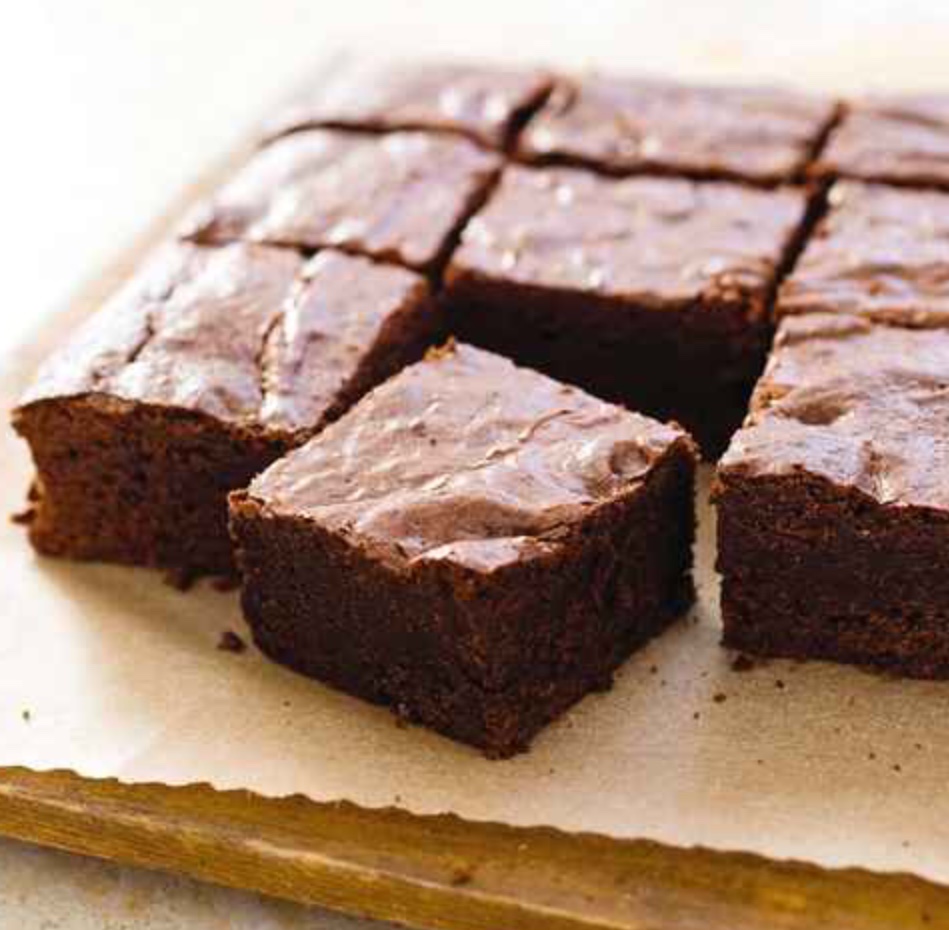
Stout and chocolate chunk brownies: You read that right. We’re making beer brownies!

Beer brownie

Chocolate lovers, rejoice! These brownies are dark, deep and rich – this is for serious chocoholics. The recipe is incredibly easy, light on sugar and made deliciously complex with the addition of stout beer. Yes. There’s beer in these brownies!

Stout and Chocolate Chunk Brownies

Ingredients:

1 ⅓ cup all-purpose flour
1 cup unsweetened cocoa
1 tsp salt
1 cup unsalted butter, room temperature
1 cup brown sugar
4 eggs, room temperature
½ cup sorghum
1 tsp vanilla extract
1 cup stout beer
1 cup semi- or bittersweet chocolate chunks, divided
½ cup chopped walnuts, optional

Directions:

Preheat oven to 350 degrees. Prepare a 9-by-9-inch pan with butter and flour.

Sift together the flour, cocoa and salt in a small bowl. In a large bowl, beat the butter, brown sugar and eggs until light, then add sorghum, vanilla and beer, mixing thoroughly to combine. It will be lumpy – that’s normal! Add the dry ingredients in stages, mixing just until combined.

Pour half of batter into prepared pan, then sprinkle in half of the chocolate chunks and the walnuts. Top with remaining batter and then sprinkle top with remaining chocolate and more nuts if you’d like.

Bake brownies for about 40 minutes, until a toothpick inserted into the center comes out with just a bit of batter and crumbs. Allow to cool on a rack and turn the brownies out on a flat surface to cut into squares. Garnish with a dusting of powdered sugar if you like!

Recipe by Emmy-winning host Catherine Neville, publisher of Feast Magazine and producer of tasteMAKERS, as published in Wire.Lee.net.

Posted on Leave a comment

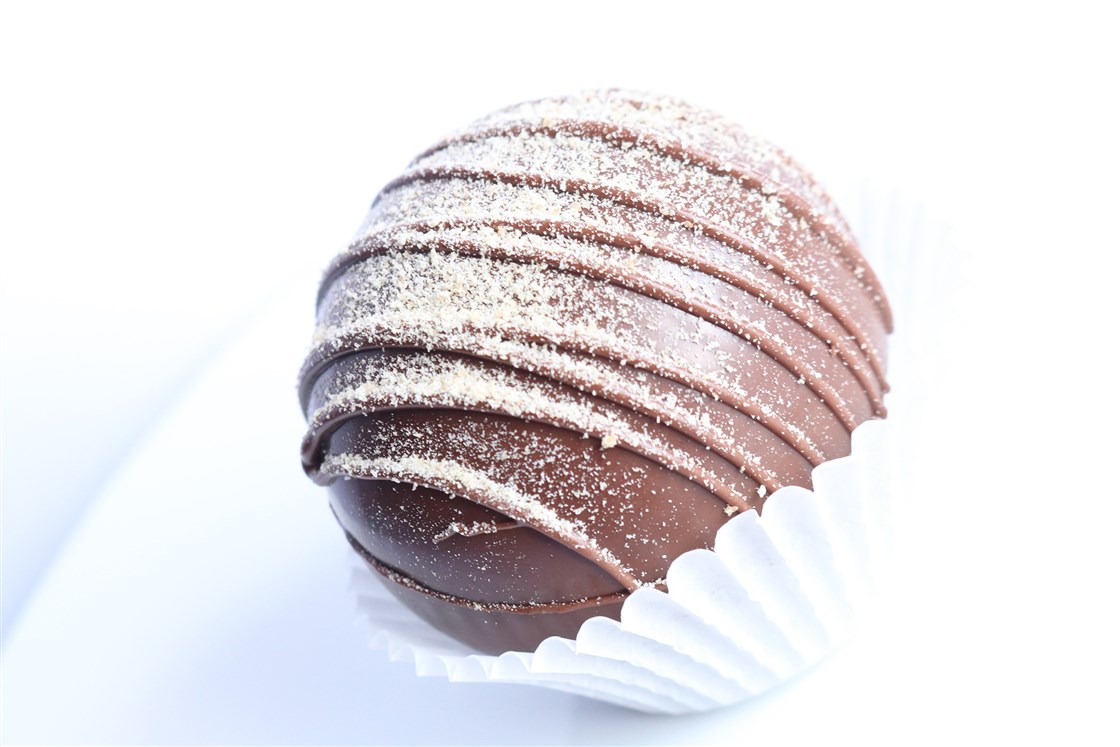
S’mores Hot Chocolate Bomb

S'mores hot chocolate bomb

Hot chocolate bombs are the new way to enjoy the beverage — here’s how to make them! Move over coffee ice! TikTok has given the world another hot, new trend and this time, it’s the tastiest way to usher in cooler weather! Social media enthusiasts are ditching cocoa powder mixes and taking hot cocoa to the next level this season with hot chocolate bombs. But what exactly are they? Hot chocolate bombs are pretty simple. Each bomb is a hollow chocolate sphere that’s filled with mini marshmallows and cocoa mix. You put the chocolate orb into an empty mug and pour hot milk on top until the chocolate begins to melt. When the chocolate shell begins to melt into the milk, the marshmallows from the interior float to the surface. After a quick stir, you’ve got yourself the perfect sweet treat! Here’s a recipe for “S’mores Hot Chocolate Bomb! Click, here, for other recipes for “The Bomb”!

Cathy Ortiz’s S’mores Hot Chocolate Bomb

Ingredients:

Compound chocolate
Graham crackers
S’mores hot cocoa mix
Mini marshmallows

Instructions:

Melt your compound chocolate in a bowl (if you’re an expert, you can also temper the chocolate).
Brush your silicone mold with two coats of chocolate and let it dry.
After they’ve dried, remove the hardened halves from their mold and heat the edges of one side with a hot plate so the rim is melted and even.
Put a tablespoon of s’mores hot cocoa mix inside that half of the sphere along with as many marshmallows as you can fit (toasting optional, but recommended).
Heat the rim of the second half on a hot plate and connect both halves together so it forms a complete sphere.
Melt more of the chocolate compound and put it into a piping bag. Drizzle chocolate on top of the dried hot cocoa bomb and top off with some finely grated graham crackers for the full s’mores effect.

As published on TODAY.COM.


Posted on Leave a comment

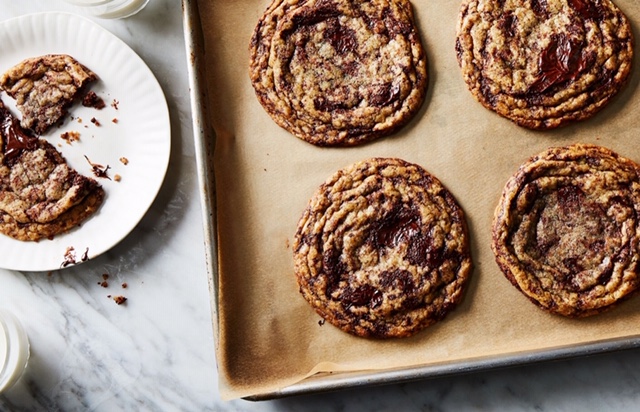
Ultimate Bakery-style Chocolate Chip Cookies

Bakery style chocolate chip cookies

This recipe is the result of weeks of testing and countless bags of chocolate chips to produce what is thought to be the ultimate chocolate chip cookie! If you want a cookie that’s thick, chewy, filled with chocolate chips and big, this is it! Crispy on the exterior but gooey on the inside. And the perfect combo of sweet and salty, too.

Prep time: 20 minutes

Cook time: 13 minutes

Chilling time: 30 minutes

Servings: 9 cookies

Ingredients:

1 cup cold, unsalted butter, cut into small cubes
1/2 cup white sugar
1 cup firmly packed light brown sugar
2 large eggs
3 cups White Lily All-Purpose Flour*
1 teaspoon baking soda
1 1/2 teaspoons cornstarch
1 teaspoon salt
1 (12-ounce) bag semi-sweet chocolate chips
1 (10- to 12-ounce) bag mini-semi-sweet chocolate chips
flaky/kosher salt

Instructions:

Combine the cold, cubed butter, white sugar and brown sugar in a large bowl and use a mixer to combine — 3 to 5 minutes — or until completely mixed. Add the eggs, one at a time, beating well after each addition.
In another large bowl, measure 3 cups of flour by spooning it into a dry measuring cup and leveling it off before adding it to the bowl. Add the baking soda, cornstarch and 1 teaspoon salt and whisk to combine.
Add the dry ingredients to the butter/sugar mixture all at once. Mix until just combined. Do not overmix. Add the chocolate chips and mix until just combined. Cover and refrigerate the dough for 30 minutes.
Preheat the oven to 400 degrees and line a light-colored cookie sheet with parchment paper.
After the dough has chilled, use a food scale to measure out 6 ounces of dough for each cookie. Place 2 to 3 dough balls 6 to 8 inches apart on the prepared pan and sprinkle with a generous pinch of coarse or flaky salt. Bake 12 to 15 minutes or until the cookies are golden brown around the edges and just set. Allow the cookies to cool on the pan for 5 minutes before moving the entire piece of parchment, with the cookies on it, to a wire rack to cool. Work in batches to bake the remaining dough, being sure to keep it refrigerated until it gets baked.
Store the cookies in an airtight container for up to three days. For warm cookies, reheat in the microwave for about 15 seconds.
Notes

White Lily All-Purpose Flour is important to the success of this recipe because of its low protein content. If you can’t find it in your area, see notes above, which suggest an acceptable replacement.
This recipe originally appeared on SouthernBite.com and published recently on AlabamaNewsCenter.com.

Posted on Leave a comment

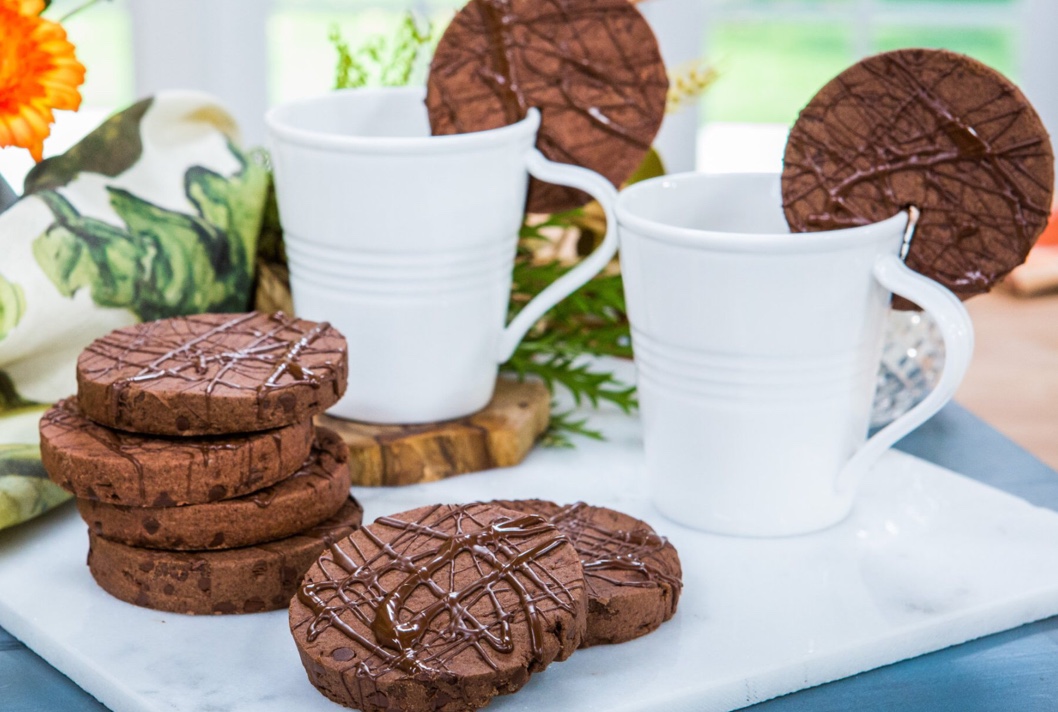
Triple Chocolate Mocha Shortbread Cookies

Triple chocolate mocha shortcake cookies

Celebrate National Homemade Cookies Day and International Coffee Day with these coffee cookies from Maria Provenzano (or make them any time of the year!).

TRIPLE CHOCOLATE MOCHA SHORTBREAD COOKIES

INGREDIENTS :

1 cup unsalted butter, room temperature
3/4 cup powdered sugar
1/2 teaspoon of vanilla
1/2 teaspoon salt
2 cups all purpose flour
1/4 cup dutch processed cocoa powder
2 teaspoons instant coffee granules
1/2 teaspoon cinnamon
3/4 cup mini semi sweet chocolate chips

DRIZZLE:

1 cup semi sweet chocolate chips
1 teaspoon coconut oil

DIRECTIONS:

In the bowl of a stand mixer add in the butter and sugar and mix together until well combined and lighter in texture.
Stir in the vanilla.
In another bowl whisk together the flour, cocoa powder, instant coffee granules, cinnamon, and salt.
Slowly add the flour mixture to the butter mixture and continue to mix until well combined being careful not to over mix. It’s ok if it looks crumbly as long as it comes together when you squeeze it in your hands.
Stir in the chocolate chips.
Separate the dough evenly and half and form two balls. Roll each fall in between parchment paper to about 1/3-1/2 inch thick.
Place in the refrigerator for about 30-60 minutes or until the dough is easy to work with.
Use a circle cookie cutter that is about 3 inches, or any shape you desire, and place on a baking sheet lined with parchment paper.
Use a sharp knife to cut a rectangle shape in the cookie as the slit of the cookie that will sit on the side of the mug; make sure you know how thick your mug is prior to cutting.
Bake about 18-20 minutes, depending on thickness and how cold the dough is.
Once the cookies have cooled, make the chocolate to drizzle on top.
Melt together the chocolate chips with the coconut oil either in a double boiler or in the microwave and drizzle it over top of the cookies.

As published on HallmarkChannel.com.

Posted on Leave a comment

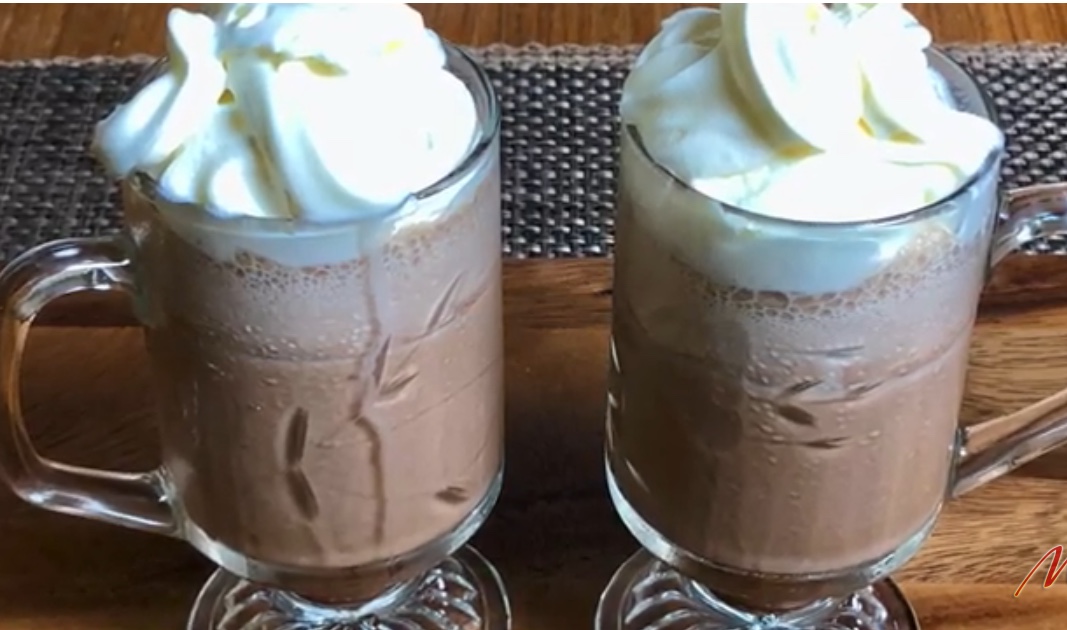
Frozen Hot Chocolate

Frozen hot chocolate

Love Hot Chocolate? Make this icy cold version! This frozen cold chocolate or Frappuccino is so refreshing that you’ll excuse “the weather Gods” for not bringing winters in sooner. After trying it once, you would want to make it again and again to enjoy its delicious and creamy taste.

Frozen Hot Chocolate

To make the creamy and frothy cold chocolate, mix sugar, cocoa powder, chocolate chips and cinnamon powder together and pour hot milk over it to make a smooth paste. Then blend the chocolate paste with milk and ice together till the ice is crushed. Remember, the milk should be hot, not just-boiled. And that’s it, just top the drink with whipped cream; you can also decorate it with grated chocolate, and refresh yourself. (Watch the video detailed instructions, HERE).


Posted on Leave a comment

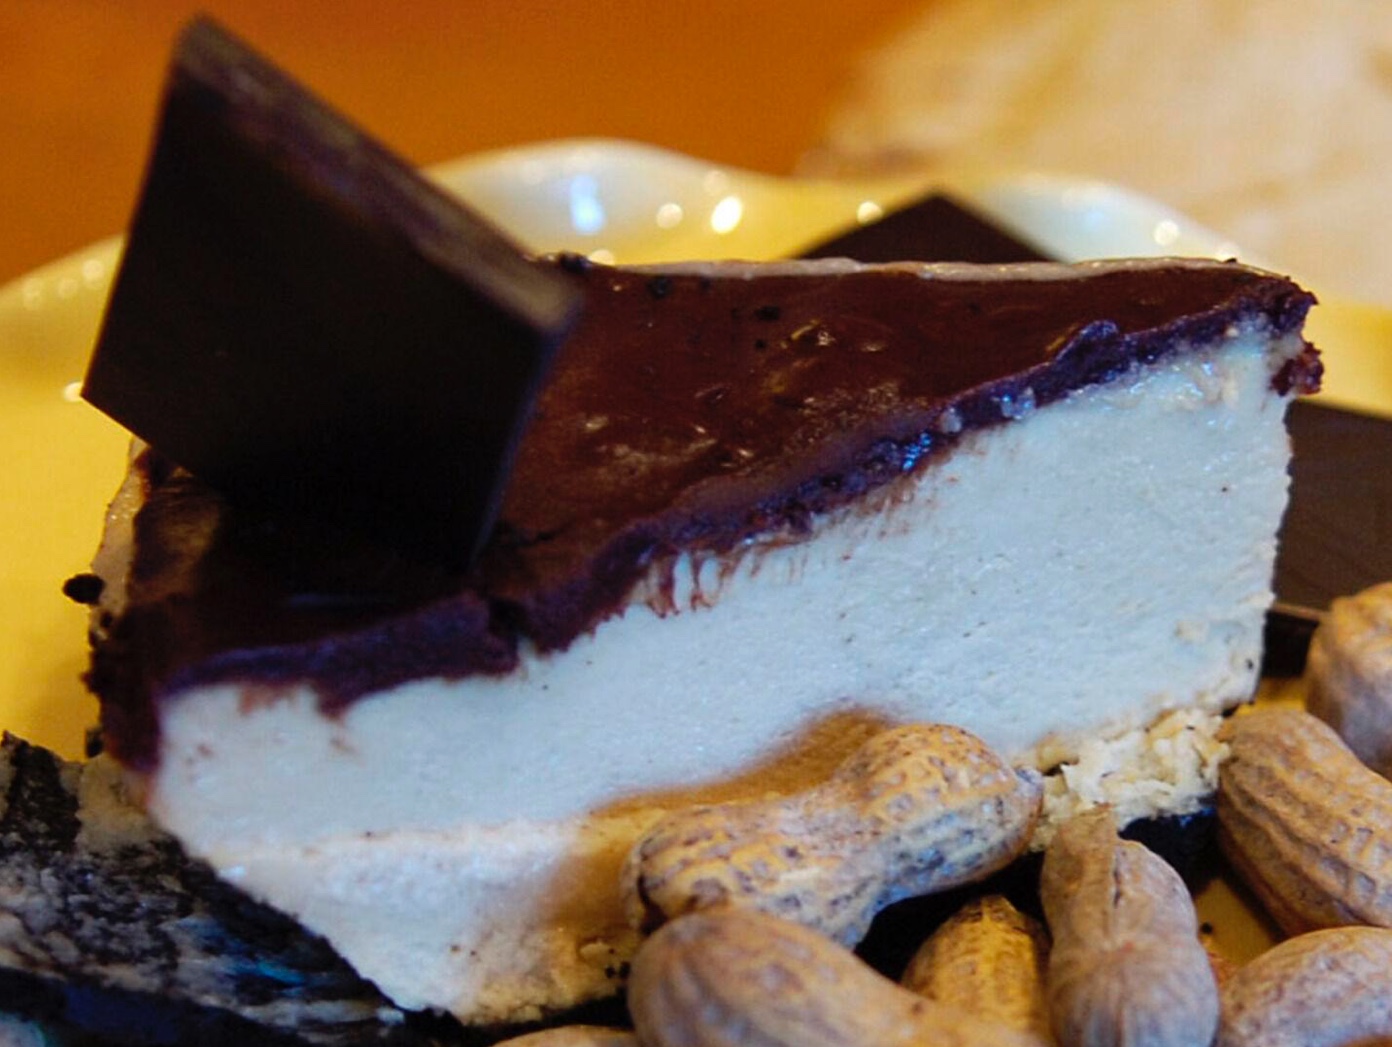
Chocolate and Peanut Butter Pie

Chocolate and peanut butter pie

Chocolate and peanut butter come together in a most excellent pie. Those Reese’s folks got it right. There’s nothing better than a good peanut butter/chocolate combo. And, when it comes in pie form, well that’s just about the top of the PB/chocolate mountain. The filling is poured into a pre-made chocolate cookie crust, so, really, it comes together in no time flat.

Chocolate and Peanut Butter Pie

Makes 1 9-inch pie.

Ingredients:

1 cup creamy peanut butter

8 ounces cream cheese, softened

1 cup sugar

1 teaspoon vanilla extract

¾ cups whipping cream

1 (9-inch) chocolate cookie pie shells

½ cup semisweet chocolate chips

1-2 teaspoons coconut oil

Directions:

1. With an electric mixer, beat peanut butter and cream cheese until creamy, scraping the bowl occasionally. Add sugar and beat until fluffy. Blend in the vanilla.

2. Beat the whipping cream in a chilled bowl until soft peaks form. Fold the whipped cream into the peanut butter mixture and spoon evenly into the pie shells. Freeze for 30 minutes or longer.

3. Mix the chocolate chips and coconut oil in a small bowl. Heat in microwave in 30-second intervals until smooth. Spread chocolate mixture on frozen pie. Freeze until serving time.

As published in TheAdvocate.com.

Posted on Leave a comment

Chocolate Swiss Meringue Buttercream Icing

chocolate buttercream icing

A cake without frosting is like spaghetti without sauce or a hot dog without a bun. You can separate them, sure. But why would you want to? So try this recipe for your chocolate cake.

TOTAL TIME: 35 minutes
MAKES: About 2½ cups, or enough frosting for 1 (10-inch) round cake or 18 cupcakes.

Ingredients:

16 tablespoons (2 sticks) unsalted butter, softened
3 egg whites, at room temperature
1 cup granulated sugar
¼ teaspoon cream of tartar
¼ teaspoon salt
½ teaspoon pure vanilla extract
2 tablespoons unsweetened Dutch-process cocoa, sifted

Directions:

Cut butter into tablespoons. Fill a medium saucepan with 1½ inches water, bring to a boil, and lower heat to maintain a gentle simmer.
Place egg whites, sugar, cream of tartar and salt in a metal mixing bowl. (Use the bowl of a stand mixer if you have one.) Place bowl on saucepan, making sure bottom doesn’t touch water. Whisk constantly until sugar dissolves and mixture is opaque and bubbly and reads 160-165 degrees on a candy thermometer, about 4 minutes. Remove bowl from saucepan.
Use an electric mixer with whisk attachment to beat mixture on high speed until it is white and fluffy with stand-up peaks and bowl is no longer warm, 4 minutes. With mixer running, add butter a tablespoon at a time, scraping down sides with a spatula. Beat in vanilla and cocoa until fully incorporated. If buttercream looks soupy, ingredients are too hot. Set bowl in refrigerator to cool and beat again. If it looks dense or curdled, ingredients are too cold. Put bowl back over simmering water until it starts to melt at edges. Beat until it comes back together. Frosting can be frozen in an airtight container. Bring to room temperature and beat until smooth.
—Adapted from “Simple Cake” by Odette Williams, as published in The Wall Street Journal.


Posted on Leave a comment

Chocolatey Chocolate Cake – without icing!

Chocolate cake without icing

This Chocolate Cake Recipe Is So Good, It Needs No Frosting!

TOTAL TIME: 50 minutes
MAKES: 1 (10-inch) round cake or (12-by-4-by-3-inch) loaf cake.

Ingredients:

Butter, for greasing pan
1¾ cups all-purpose flour
½ cup unsweetened Dutch-process cocoa powder
1 ½ teaspoons baking powder
1½ teaspoons baking soda
½ teaspoon salt
1 ½ cups granulated sugar
2 eggs, at room temperature
1 cup whole milk
½ cup grapeseed oil or neutral oil
½ teaspoon pure vanilla extract
1 cup boiling water

Directions:

Preheat oven to 350 degrees. Grease a 10-by-3-inch round pan (not springform) or a 12-by-4-by-3-inch loaf pan with butter, line bottom and sides with parchment paper and grease paper.
Sift flour, cocoa, baking powder, baking soda and salt together into a mixing bowl. Whisk in sugar.
In another large bowl, whisk together eggs, milk, oil and vanilla. Gradually add wet ingredients and whisk until smooth, with no lumps. Stir in boiling water to combine.
Pour batter into prepared pan. Bake in center of oven until a wooden skewer inserted in center of cake comes out clean and cake bounces back when lightly pressed, about 50 minutes for round pan, 35 minutes for loaf pan.
Remove cake from oven and let stand 10 minutes. Run a butter knife around cake to gently release. Peel parchment from sides. Invert cake onto a wire rack and peel off bottom piece of parchment.
—Adapted from “Simple Cake” by Odette Williams, as published in The Wall Street Journal.


Posted on Leave a comment

Lisa Donovan’s Chocolate Chess Pie

Lisa Donovan Chocolate chess pie

Makes Two 10” Pies, One for your hostess, One for your holiday hangover breakfast.

INGREDIENTS:

2 prepared, unbaked and frozen pie shells (see Lisa’s Pie Dough Recipe)

12 Medium or Large Eggs

6 cups Sugar

2/3 cups all-purpose flour

2 tsp salt

3 Tbsp Cocoa Powder

8 oz Butter

4 oz Finely Chopped Bittersweet Chocolate

1/2 Vanilla Bean

3 cups Buttermilk

INSTRUCTIONS:

Preheat oven to 425 degrees.

Scrape the seeds out of the vanilla bean and place in a medium saucepan with the butter and chocolate. Over low heat, melt the chocolate mixture until the chocolate is completely melted and combined with the butter. Remove from the heat and set aside.

Whisk all the dry ingredients together, breaking up all lumps.

Whisk eggs and buttermilk together and combine with the dry ingredients, whisking until well combined.

Slowly whisk in the butter/chocolate mixture until well combined.

Pour the batter into a frozen pie shell. Place in oven bake for 10 minutes. After 10 minutes, turn the oven down to 375 degrees. Bake until set, about 40 minutes.

As published in The Splendid Table.

Posted on Leave a comment

Triple Chocolate Mousse Cake

This chocolate cake is made with mayo. And it comes to us via the brand new Duke’s Mayonnaise Cookbook, created by author, recipe developer and food stylist Ashley Strickland Freeman. This recipe is a bit more detailed and takes a little more time than most recipes, but the extra effort is absolutely worth it. Y’all are going to love it! Ganache frosting can be used as-is or whipped with a mixer to make it lighter. (Stacey Little/Southern Bite)

Triple Chocolate Mousse Cake

Prep time: 1 hour

Cook time: 24 minutes

Serves: 10

Ingredients

For the cake

2 cups all-purpose flour
1/2 cup sifted cocoa powder, plus more for dusting
1-1/4 teaspoons baking soda
1/4 teaspoon baking powder
Pinch of salt
1 cup Duke’s Mayonnaise
1 cup granulated sugar
3 large eggs
1 1/4 cups water
1 teaspoon vanilla extract

For the ganache frosting

8 ounces bittersweet chocolate, chopped
3/4 cup heavy cream
1-1/2 tablespoons corn syrup

For the chocolate mousse filling

1-1/2 teaspoons unflavored gelatin
1 tablespoon cold water
1 tablespoon boiling water
6 ounces bittersweet chocolate, chopped
1-1/2 cups heavy cream, divided
2 tablespoons granulated sugar

Instructions

For the cake

Preheat the oven to 350 degrees. Grease two (8-inch) round cake pans (I use vegetable shortening) and dust with cocoa powder.
Stir together the flour, cocoa powder, baking soda, baking powder and salt in a medium bowl.
Beat the mayonnaise and sugar with an electric mixer until creamy. Add the eggs, one at a time, until combined. Add the flour mixture alternately with the water, beginning and ending with the flour mixture. Beat at medium-low speed for 1 minute. (Batter will be thin.) Stir in the vanilla.
Pour the batter evenly into the prepared pans. Bake the cakes at 350 degrees for 21 to 24 minutes, until a toothpick inserted in the center comes out clean. Remove to wire racks. Let cool in the pans for 5 minutes. Run a knife around the edges and turn out onto wire racks to cool completely. Once cooled, split each layer in half.
Make the ganache frosting and the chocolate mousse filling.
Place one cake layer on a cake plate or stand. Top with one-third of the chocolate mousse filling; repeat the process twice. Place the remaining layer on top. Spread the ganache frosting on the top and sides of the cake before slicing.

For the ganache frosting

Place the chocolate in a medium bowl. Heat the cream and corn syrup in a small saucepan until the cream is hot. Pour over the chocolate. Let stand for 1 minute, then stir until smooth.
For a shiny look, let stand until spreadable (20 to 30 minutes), stirring occasionally. For fluffy chocolate frosting, beat the mixture with an electric mixer until fluffy.

For the chocolate mousse filling

Sprinkle the gelatin over the cold water in a small bowl. Let stand until the gelatin softens. Stir in the boiling water to dissolve the gelatin.
Place the chocolate in a medium bowl. Heat 1/2 cup of the cream and the sugar in a small saucepan over medium heat until the sugar dissolves and the cream is steaming. Pour over the chopped chocolate; add the gelatin and stir until smooth.
Beat the remaining 1 cup of cream with an electric mixer until stiff peaks form. Fold a small amount of the whipped cream into the chocolate; gently fold in the remaining whipped cream until combined. Use immediately. (The mixture will firm up as it stands.)

This cake is for the true chocoholic who loves a dark, rich chocolate flavor. Those who might want a little more sweetness should consider using semisweet or milk chocolate rather than the bittersweet called for in the recipe.

This recipe originally appeared on SouthernBite.com. For more great recipes, visit the website or check out ”The Southern Bite Cookbook.” You can find this post at AlabamaNewsCenter.com.

Posted on Leave a comment

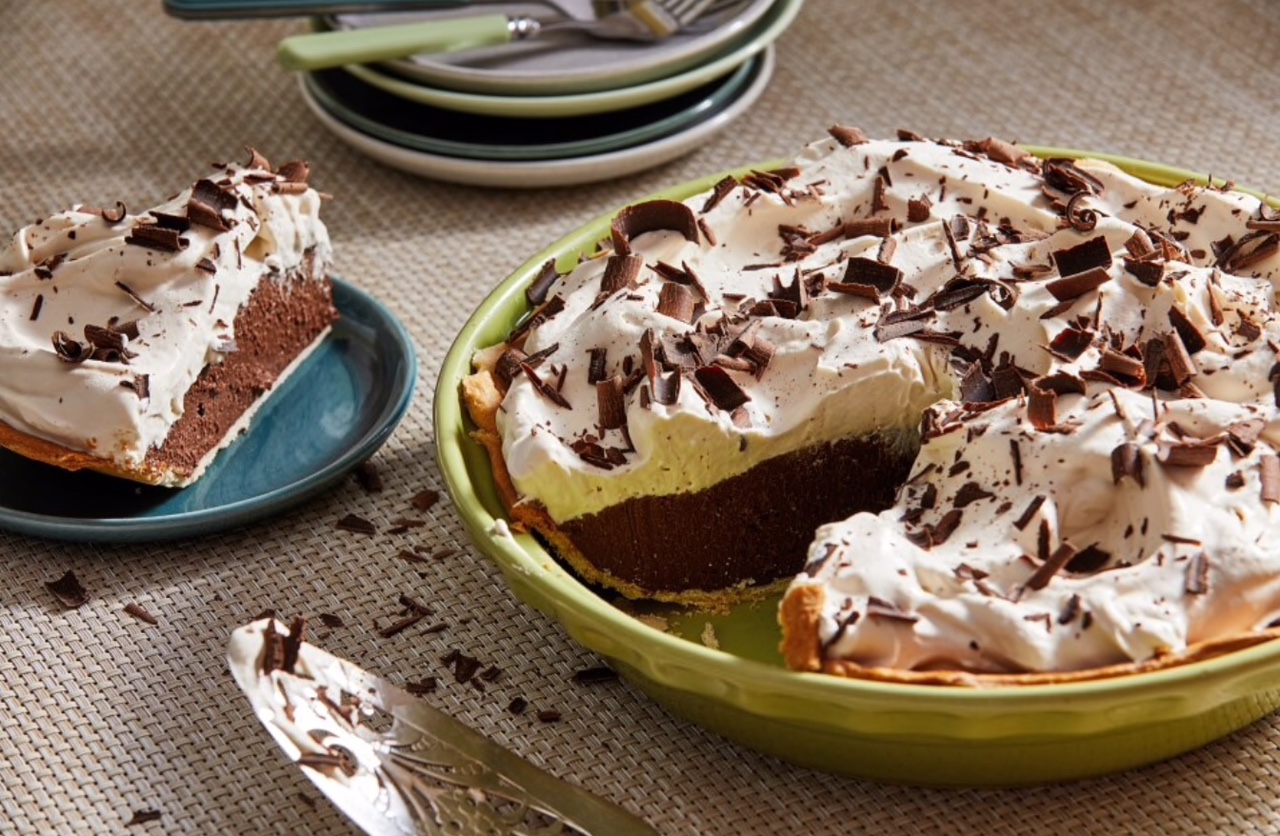
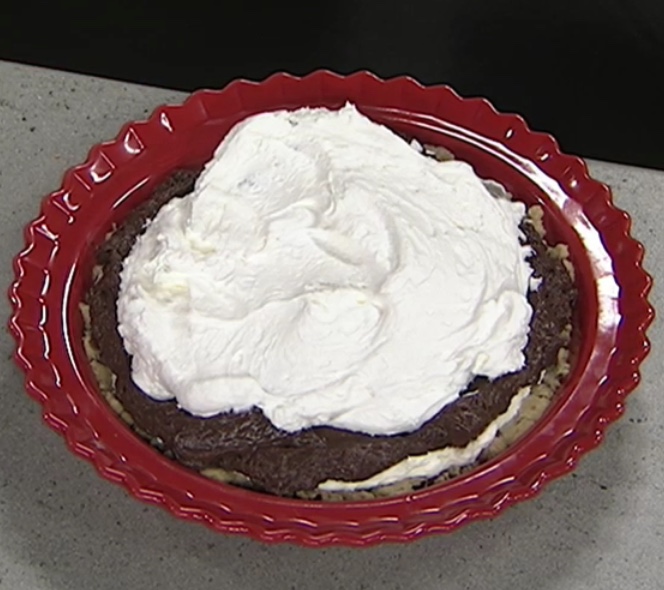
Chocolate Cream Pie

chocolate cream pie

This pie is only as good the chocolate you use. And if you’re going to treat yourself to a chocolate cream pie, why hold back? Buy the kind you most enjoy savoring, be it semisweet or dark. Similarly, if you’re not making your own pie crust, spend a few extra dollars on a pre-made one that’s all-butter. This pie is meant to be indulgent.

You may have leftover pudding and/or whipped cream once you have assembled the pie.

Make Ahead: The pie crust can be made and kept at room temperature up to 1 day in advance. The pudding can be made ahead and refrigerated up to 4 days. If making the pudding in advance, place a piece of plastic wrap on top of the pudding to prevent skin from forming.
Storage Notes: Leftover pie may be covered and refrigerated for up to 3 days. The crust may get soggy after 1 day.

Serves 8-10

INGREDIENTS:

FOR THE PIE
• 2 large egg yolks
• 3/4 cup (150 grams) granulated sugar, divided
• 4 cups (946 milliliters) half-and-half
• 1/2 cup (65 grams) cornstarch
• 1/4 cup (25 grams) Dutch process unsifted cocoa powder
• 10 ounces (285 grams) chopped chocolate, preferably semisweet
• 2 tablespoons (30 grams) unsalted butter
• 1 1/4 teaspoons kosher salt
• 1 teaspoon vanilla extract
• 1 blind-baked pie crust, store-bought or homemade (see related recipe), cooled (see NOTE and headnote)

FOR THE WHIPPED CREAM
• 2 cups (480 milliliters) heavy cream
• 1/2 cup (65 grams) unsifted confectioners’ sugar
• 4 ounces (115 grams) mascarpone
• 2 teaspoons vanilla extract
• 1 good-quality chocolate bar, for shaving

DIRECTIONS
Make the pie: In a small bowl, whisk together the egg yolks and 1/4 cup (50 grams) sugar until combined (the mixture should be thick and pale in color as you whisk the ingredients together). Set aside.
In a medium heavy-bottomed saucepan over high heat, whisk together the half-and-half, the remaining 1/2 cup (100 grams) sugar, cornstarch and cocoa powder and cook, whisking constantly until the mixture begins to steam, about 5 minutes. Add the chopped chocolate and continue to whisk until the pudding comes to a boil. The mixture will start to thicken fairly fast.
Reduce the heat to medium and continue to cook, whisking constantly, for 1 minute, then remove from the heat; the mixture should be thick, like pudding. Add the egg yolk mixture and butter and whisk vigorously to combine, for 1 minute. Whisk in the salt and vanilla until combined.
Pour the pudding into the blind-baked pie shell (you do not have to wait for it to cool if you’re pressed for time), cover with a piece of plastic wrap and gently press it to the surface of the pudding. Refrigerate the pie for about 4 hours, until fully set.
Make the whipped cream: At least 15 minutes before you’re ready to serve the pie, in the bowl of a stand mixer fitted with the whisk attachment (or using a handheld mixer and a free-standing large bowl), combine the heavy cream, confectioners’ sugar, mascarpone and vanilla. Beat the ingredients on medium-low until fully mixed, then increase the speed to high and whip the mixture until stiff peaks form, about 2 minutes. Pile the whipped cream on top of the pie, then use a vegetable peeler to shower it with chocolate shavings. Refrigerate until set, about 10 minutes.
Serve cold.
NOTE: To blind-bake a pie crust, position a baking rack in the middle of the oven and preheat to 425 degrees. Gently line your deep-dish pie crust (already fitted into the pie plate, crimped as per your preference, and chilled in the freezer for at least 30 minutes) with foil and weigh it down with pie weights, beans, rice or pennies. Place the pie dish on top of a large, rimmed baking sheet and transfer to the oven. Bake for 15 minutes, then remove the foil with the weights and continue to bake for 5 to 7 minutes, until the pie crust is light golden brown. Transfer to a wire rack and let cool before filling.

From food writer Allison Robicelli, as appeared in the Washington Post.

Posted on Leave a comment

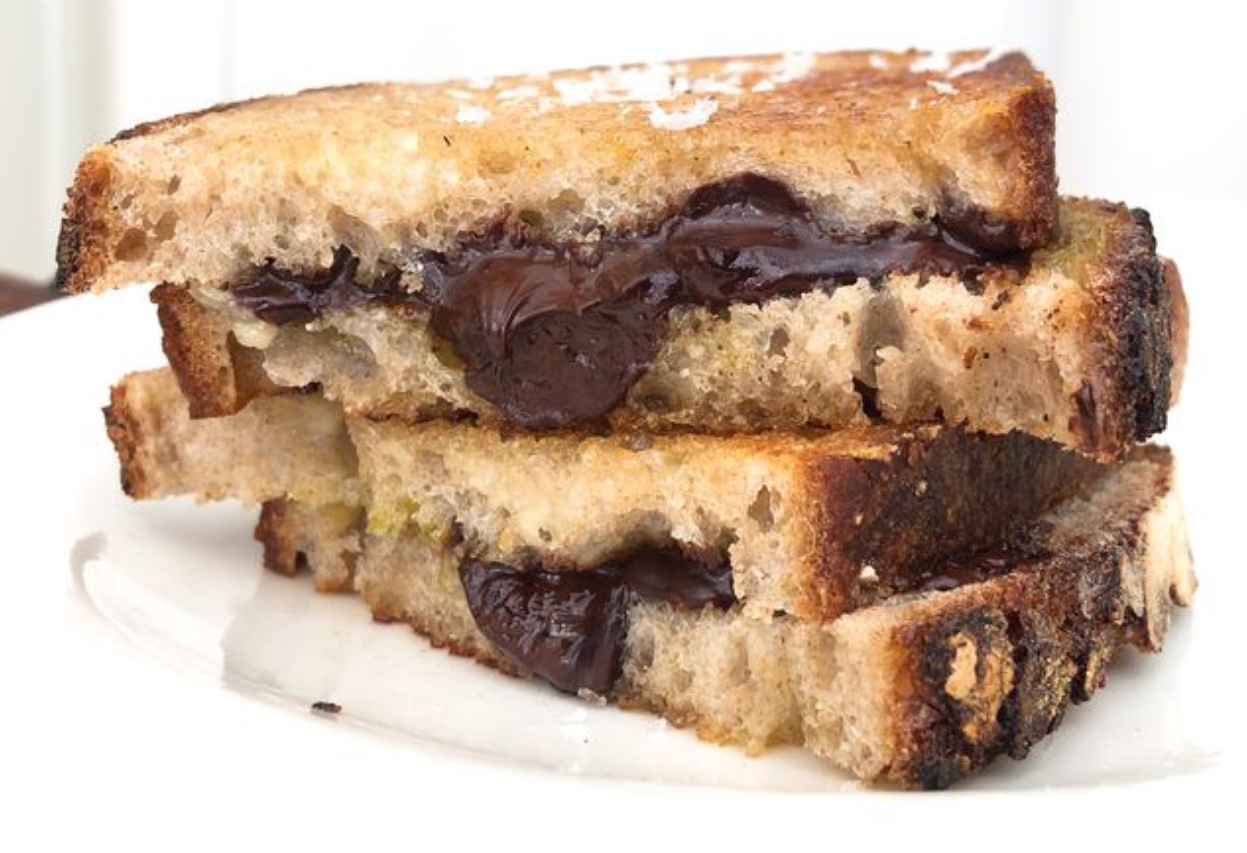
Grilled Chocolate Sandwiches

grilled chocolate sandwich

The following recipe is adapted from Kitchen Remix. It’s a bit messy on your work surface—be warned—but worth the cleanup.
Serves 4

Ingredients:

1/4 cup mayonnaise
½ tbsp. packed light brown sugar
8 (½-inch-thick) slices sturdy white bread
About 2 tbsp. extra-virgin olive oil
4 oz. bittersweet chocolate baking disks (about ¾ cup)
Flaky salt

Directions:
In a small bowl, combine the mayonnaise and brown sugar. Arrange the bread slices on a work surface and spread the tops with the sweetened mayonnaise, to coat. Flip the slices over and brush the other sides with olive oil. Divide the chocolate among four bread slices, drizzle with a bit more olive oil, and sprinkle with a pinch of salt. Cover the four chocolate-topped bread slices with the remaining slices, oil-side down.

Heat a large cast-iron skillet over medium-low heat. Place two of the sandwiches in the hot skillet and cook until the bottoms are golden brown and caramelized, from three to four minutes. Flip the sandwiches and cook until the second sides are golden brown and the chocolate is melted, about three minutes.

Transfer the finished sandwiches to a plate, wipe the pan clean, and cook the remaining sandwiches the same way. Let the sandwiches cool for a couple of minutes before cutting them in half and serving hot.

Posted on Leave a comment

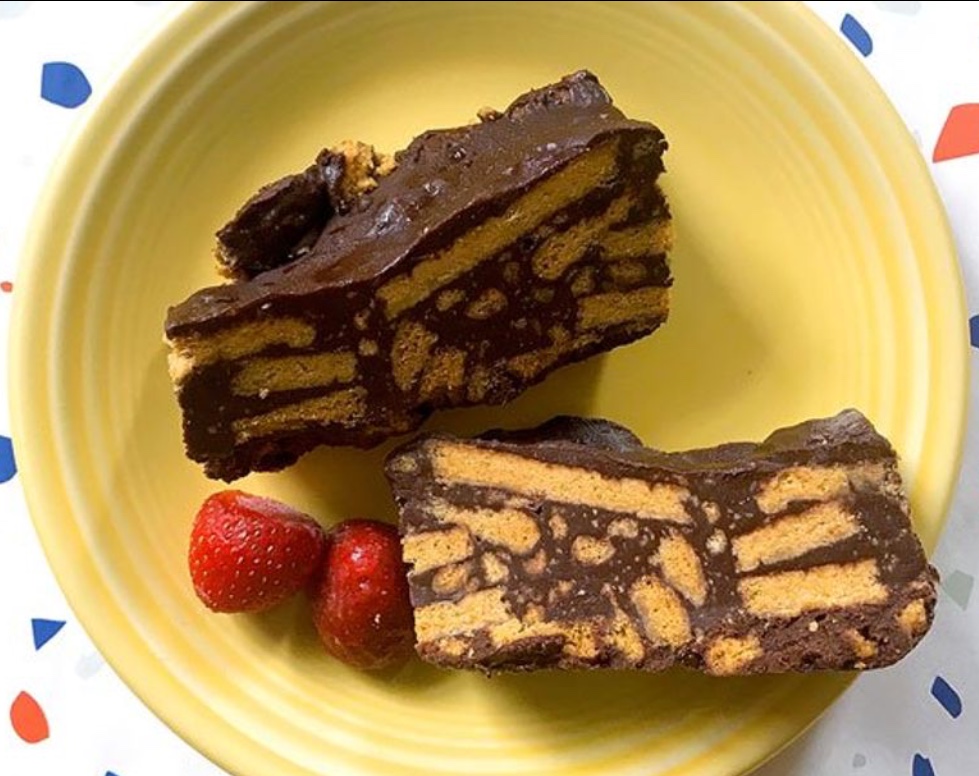
Four-ingredient chocolate fridge cake

Chocolate fridge cake

This four-ingredient chocolate fridge cake is fit for a king, and no baking is required. This easy-to-make chocolate biscuit cake was chosen by Prince William as his wedding cake.

Chocolate Fridge Cake
Serves 8 – 12

Ingredients:
• 8 ounces digestive biscuits or supermarket cookies of your choice
• 4 ounces of butter
• 10 ounces of dark chocolate or chocolate of your choice
• 5 ounces of light corn syrup, honey, or golden syrup

Instructions:
1. Line a loaf pan with parchment paper. (You can also use a spring form pan or 9 inch cake pan.)
2. Put the cookies in a Ziploc bag and break them up with a rolling pin or similar. Stop when you have a mix of differently sized broken pieces — you’re not aiming for crumbs here.
3. In a large pan, melt the butter over medium heat. (Optional: Keep the butter on the heat a few minutes longer, until it has foamed up and browned.)
4. Remove the pan from the heat and add the chocolate and syrup. Stir until well combined.
5. Reserve a few tablespoons of the chocolate mix for your glaze.
6. Add the broken cookies to the pan, stirring until they are well combined and coated.
7. Pour the mixture into your pan, gently pressing down into all sides. The cake will be jagged and lumpy.
8. Drizzle your reserved chocolate glaze on top.
9. Chill at least one hour. Bring to room temperature before unmolding and serving. Ascend to the throne.

Posted by Mary Elizabeth Williams, on Salon.com, adapted from BBC FOOD

Posted on Leave a comment

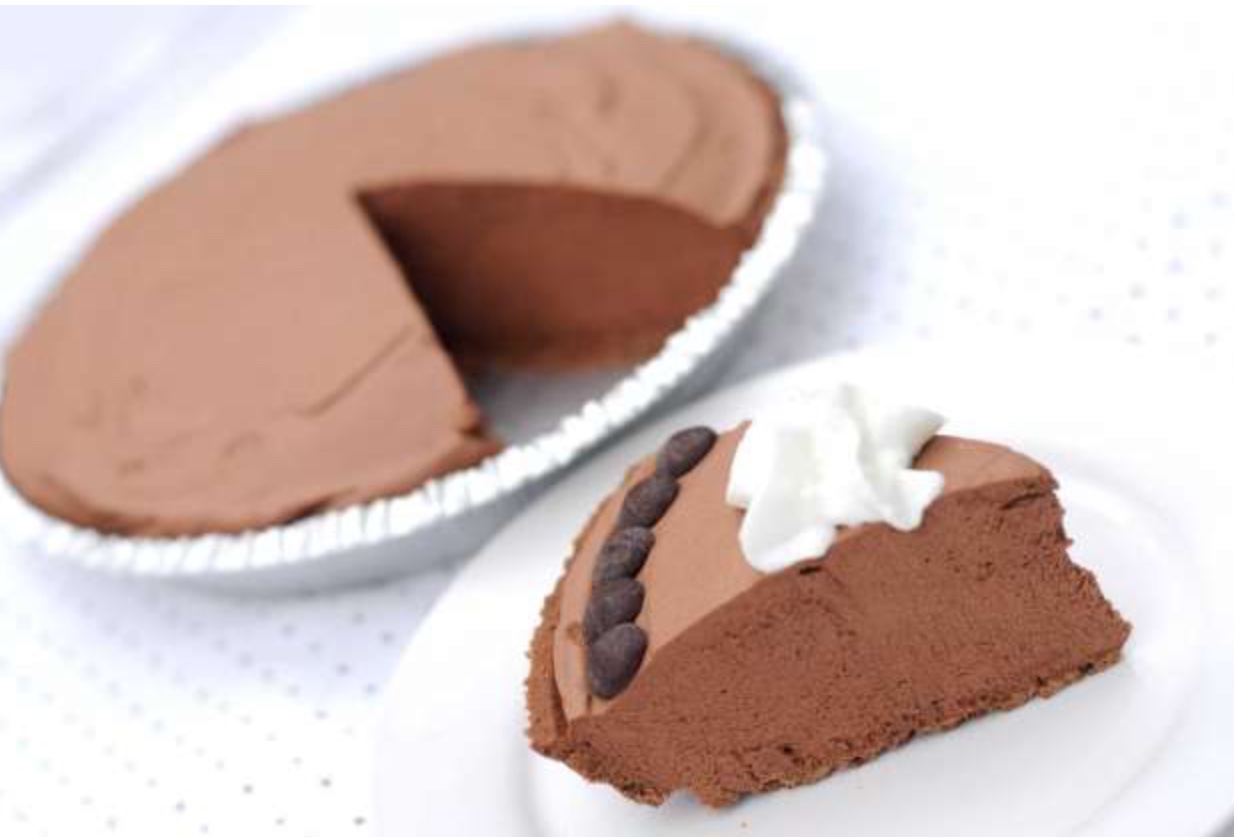
Chocolate Coffee Icebox Pie

chocolate coffee icebox pie

The addition of coffee to a classic chocolate icebox pie gives the finished dessert a complex and slightly bitter edge.

Ingredients:

1/3 cup hot coffee
2 tablespoons cocoa powder
1 1/2 cups bittersweet chocolate chips, plus extra for garnish
1 1/2 cups heavy cream
1 tablespoon sugar
1/8 teaspoon salt
2 tablespoons coffee-flavored liqueur, if desired
1 chocolate graham cracker crust, store-bought or homemade, chilled
Whipped cream, to garnish

Instructions:

Combine the coffee, cocoa and vanilla in a small cup and set aside.
Heat the chocolate in a saucepan set over low heat on the stove, or in the microwave in 30-second bursts. Stir the chocolate until completely melted and let cool for several minutes.
Whip the cream, sugar and salt with a hand or stand mixer until soft peaks form.
Stir the coffee mixture and coffee liqueur, if using, into the melted chocolate. Using a whisk, fold the chocolate mixture into the whipped cream until no white streaks remain.
Spread the filling evenly into the cooled crust. Refrigerate the pie for at least 1 hour before serving, or until the filling is firm. Garnish the pie with whipped cream and chocolate chips as desired just before serving.

Makes 8 servings

Adapted from kingarthurflour.com

Posted on Leave a comment

No eggs, no butter chocolate cake

No egg, no butter chocolate cake

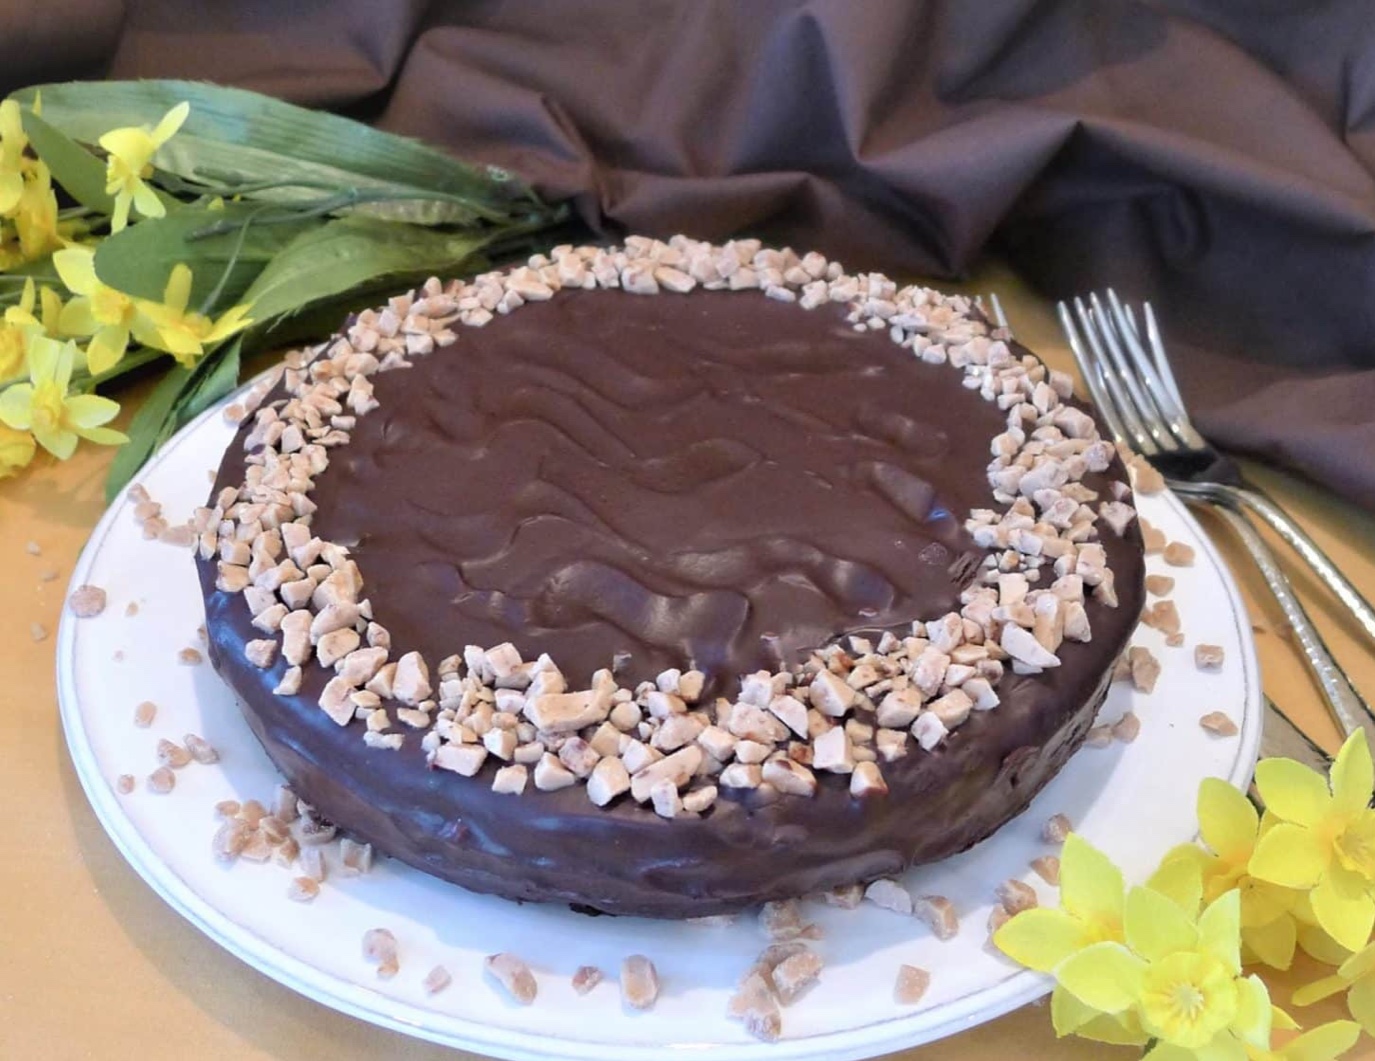
This chocolate cake recipe is perfect for those craving something sweet but don’t have some key baking ingredients. It comes together quickly and easily — just combine the dry ingredients, then the wet ones and blend. The results are a pleasing single-layer cake with a light texture and mildly sweet chocolate taste. The strength of the flavor depends on your cocoa powder, like the richness of Hershey’s Special Dark, but it’ll work with whatever you have on hand. You can use bleached or unbleached all-purpose flour — if you use the latter, reduce the amount by two teaspoons. The halved recipe can be baked in a 7-inch round pan if you prefer a smaller cake. To make one with two layers, double the ingredients. The cake is frosted, in the photo, with a simple chocolate ganache and decorated with a rim of toffee bits.

Cake ingredients
1 3/4 cups all-purpose flour, spoon and level
3/4 cup unsweetened cocoa powder
3/4 cup granulated sugar, preferably superfine
Just under 1/2 teaspoon baking soda
1/4 teaspoon of salt
1 cup sour cream, plain yogurt or buttermilk
1/2 cup plus 2 teaspoons any mild vegetable oil
2 1/2 teaspoons of vanilla

Chocolate ganache ingredients (optional)
1/2 cup heavy cream
4 ounces semisweet chocolate, finely chopped
Toffee bits (optional)

Directions
1. Preheat the oven to 350 degrees with a rack in the center position. Generously grease the pan with a baking spray that contains flour. Line the bottom with a circle of parchment and grease the paper.

2. In a large bowl, combine the flour, cocoa powder, sugar, baking soda and salt and whisk to mix thoroughly. In another bowl or a 4-cup measure, whisk the sour cream (or yogurt or buttermilk), vegetable oil and vanilla until blended. Add the liquid ingredients to the dry ones and whisk or beat with an electric mixer until combined. Don’t overmix.

3. Scrape the batter into the prepared pan and bake until a tester comes out clean and the cake just starts to pull away from the sides of the pan (25-30 minutes). Small cracks may form on the top, which will dome slightly. Don’t overbake or the cake will be dry.

4. Remove the cake from the oven and cool it on a cooling rack for 10 minutes. Run a knife around the edges of the cake, pressing it toward the pan sides. Invert the pan onto the rack, gently remove it and carefully lift off the paper liner. Leave the cake inverted (the bottom is now the top) and let it cool completely. Once it is cooled, frost it (optional) and store it at room temperature for a day, refrigerate it for several days or freeze it for a month.

5. If you’re using the chocolate ganache, heat the cream in a microwave-safe bowl in a microwave oven until it’s steaming and close to boiling. Remove it from the oven, add the chopped chocolate, make sure all of it is submerged in the cream and let the mixture rest for several minutes until the chocolate melts. Stir until the chocolate is completely melted, smooth and shiny. Set it aside until it’s tepid and thickened slightly. Pour it over the cake’s top and spread it with an offset metal spatula. Decorate with toffee bits, if desired.

This cake recipe, by Dr. Vera Dawson, is a variation of one published in Gourmet Magazine and is adjusted for altitudes of 7,800 feet and above and can be found at VailDaily.com.


Posted on Leave a comment

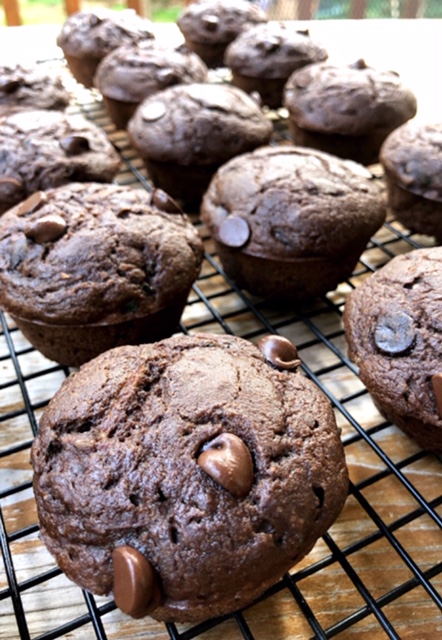
Flourless Chocolate Cupcakes

flourless chocolate cupcakes

Just 5 ingredients: Check out this recipe for flourless chocolate cupcakes!

Ingredients:
4 ounces semi-sweet chocolate chips
1/2 cup butter
2/3 cup packed brown sugar
3 eggs, beaten
3/4 cup unsweetened cocoa powder

Directions:
Preheat oven to 375 F. Butter or spray muffin tin cups with baking spray. In a microwave safe bowl, heat butter and chocolate for 30 to 45 seconds. Stir. Heat another 30 seconds or until just melted. Whisk in brown sugar. Whisk in eggs. Next, whisk in cocoa powder until combined. Fill each muffin cup about half full of batter. Bake about 10 to 14 minutes. Check them at 10 minutes. Do not over bake. They should be fudgy. Cool completely. Great served with fresh whipped cream and berries on top! Makes about a dozen.

Watch it being made, here.

Posted on Leave a comment

Spicy Chocolate Milk-Simmered Chicken

Chocolate milk chicken

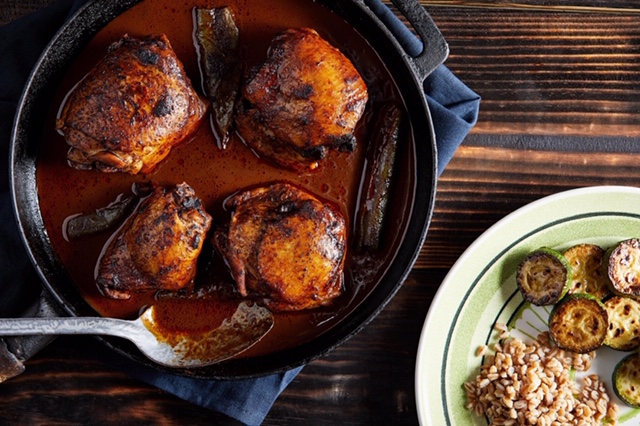
Simmering chicken in chocolate milk sounds strange – turns out, it’s delicious! Tyler Kord’s description in his cookbook: “This chicken may just be one of the most interesting and weird-good things you will make from a cookbook.” As Kord noted: “Chicken and chile and chocolate have a long and beautiful history in the form of mole, from the state of Puebla, Mexico.” One caveat is to buy or make good-quality, full-fat chocolate milk for the cup used in the recipe. The better the chocolate, the better the sauce. The bone-in, skin-on thighs add richness to the sauce, as well, but you could use other pieces. Kord recommends serving the chicken with sauteed zucchini and a grain such as quinoa. Those two mild sides balance the rich, rich sauce. It could be good with boiled potatoes or with long-grain rice, as well. If you have chocolate chicken left over, Kord recommends stuffing some in a corn tortilla or using the chicken to fill out a savory pie. (Recipe adapted from “Food52 Dynamite Chicken: 60 Never-Boring Recipes for Your Favorite Bird” by Tyler Kord. Ten Speed Press, 2019.)

For the chicken:

1 cup whole chocolate milk

2 tablespoons chili powder

2 jalapenos, stemmed and split lengthwise

2 teaspoons kosher salt

4 bone-in, skin-on chicken thighs (about 1 1/2 pounds)

For the zucchini:

2 teaspoons extra-virgin olive oil

2 zucchinis (about 1 pound total), sliced 1/2-inch thick

1/2 teaspoon kosher salt

2 garlic cloves, minced

Cooked grain, such as farro, quinoa or rice, for serving

Cilantro, for garish (optional)

In a saucepan, stir together the chocolate milk, chili powder, jalapenos and 2 teaspoons of the salt until combined. Add the chicken thighs bone side down. Bring the mixture to a boil over high heat, reduce the heat to low, cover and simmer until the chicken is tender, for 35 to 40 minutes.

While the chicken is cooking, in a large saute pan over high heat, heat the oil until shimmering. Add the zucchini and the 1/2 teaspoon of salt and cook, stirring occasionally, until the zucchini begins to caramelize and soften but does not turn to mush, 5 to 7 minutes. Add the garlic and cook for 1 more minute. Remove from the heat and keep warm until ready to serve.

Serve the chicken and zucchini warm over cooked grains, garnished with cilantro, if using.

Yield: 4 servings

Posted on Leave a comment

Easy Chocolate Cake

Easy chocolate cake

This Easy Chocolate Cake Recipe Will Bring Back Childhood Memories (And It Tastes Amazing). Chuck out your Betty Crocker mix, put on your baker’s hat and make the most heavenly chocolate cake recipe from scratch. It’ll be fluffy, it’ll be moist and the icing on top will leave you wanting more. Really though, the icing is the secret to this killer double-layered chocolate cake recipe.

Ingredients for the cake

2 cups flour
1 cup oil
2 cups sugar
3/4 cup cocoa powder
2 tspn baking soda
1/2 tspn salt
2 eggs
1 cup milk + 2 tspn vinegar (mixed)
1/2 vanilla essence
1 cup hot coffee
Ingredients for the icing

1 cup cocoa powder
1 1/2 cup butter (unsalted, softened)
3/4 tspn salt
4 cups icing sugar
1/4 cup milk
3/4 cup cream
2/3 cup Ovaltine (classic) or Horlicks (classic) — this is THE SECRET ingredient
1/2 tspn vanilla

Method for making the cake

In a mixing bowl, add flour, cocoa powder, baking soda and salt (make sure to sift your dry ingredients).
Use an electric whisk to combine the dry mixture. Just a few pulses should do the trick.
In a separate bowl, mix eggs, milk, oil and vanilla.
Pour the liquid ingredients into the dry mix and whisk for 4-5 minutes on medium speed.
With the mixer still running, add the hot coffee to the batter and then turn it off. Do not beat a lot after adding the coffee.
Line and grease 2×9-inch pans with butter or parchment paper.
Pour the batter into the pans, smooth the surface and tap to get rid of any air bubbles. Bake in a pre-heated oven (165 degree Celsius) for 25-30mins.
Once the cake is out, let it cool in the pan until the top feels firm. Then transfer it to the cooling rack to cool fully.

Method for making the icing

In a bowl, add cocoa powder, salt, milk and butter. Whisk on medium speed for 2-3 minutes. Scrape the sides.
Gradually add the icing sugar and continue beating until fully combined.
In a bowl, add cream and Horlicks/Ovaltine and combine. Add this to the mixture above and beat on high speed for 3-4 minutes until its light and silky.

How to assemble your cake

Once your sponges have cooled, sandwich the two layers with some icing
Cover the top and sides with the remaining icing
Cut up a massive slice for yourself and enjoy

You can watch @yum_by_amna’s highlights for a step-by-step visual guide to recreating her delicious chocolate cake.

Posted on Leave a comment

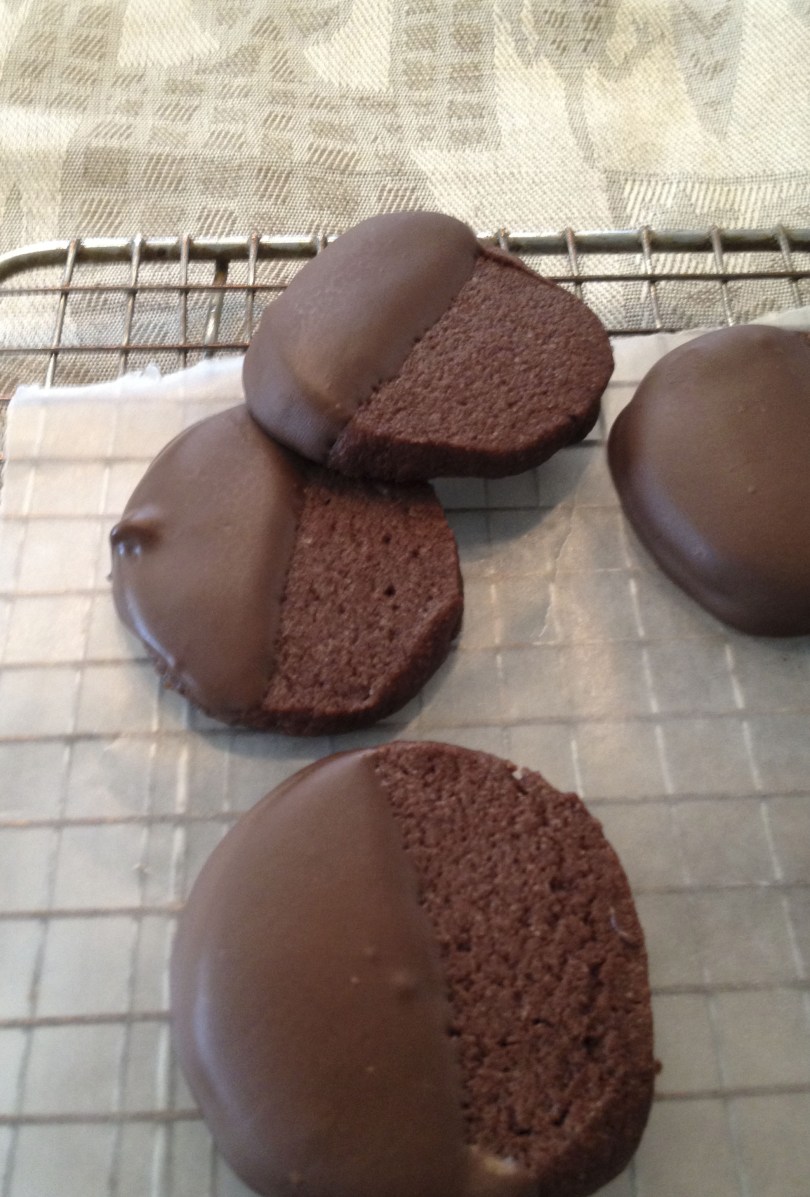
Chocolate Icebox Cookies

According to “The Joy of Cooking” by Irma S. Rombauer, Marion Rombauer Becker and Ethan Becker (Scribner, 1997, $30), what Irma Rombauer called “icebox cookies” in the 1931 edition, were renamed “refrigerator cookies” in the ’50s by Marion Becker. But “Joy,” along with many other cookbooks, returned to the original nomenclature. Icebox harks back to a bake-from-scratch, bygone era. Somehow it seems homier. The recipe originally called for mint chocolate chips.

Yield: About 3 1/2 dozen

INGREDIENTS

1 1/2 cups all-purpose flour

3/4 cup unsweetened cocoa powder

1/4 teaspoon salt

3/4 cup (1 1/2 sticks) unsalted butter, room temperature

Optional: 1 1/4 teaspoons peppermint extract

1 teaspoon vanilla extract

1 cup sugar

1 egg

Garnish: 6 ounces coating chocolate or semisweet chocolate, chopped, or mint chocolate chips

PROCEDURE
1. Whisk flour, cocoa powder, and salt in medium bowl to blend.

2. Using electric mixer, beat butter in large bowl until smooth. Beat in peppermint extract (if using) and vanilla extract. Beat in sugar in 3 additions. Add egg and beat until blended. Add dry ingredients and beat just until blended (dough will be sticky).

3. Divide dough between 2 sheets of plastic wrap or wax paper. Using plastic wrap or wax paper as aid, form dough on each into 2-inch-diameter log. Refrigerate dough until well chilled, at least 2 hours.

4. Position 1 rack in center and 1 rack in top third of oven; preheat to 350 degrees. Line 2 baking sheets with parchment paper. Unwrap cookie dough logs; roll briefly on work surface to form smooth round logs. Cut logs crosswise into 1/4-inch-thick rounds. Place rounds on prepared baking sheets, spacing 1 inch apart. Bake cookies until tops and edges are dry to touch, about 15 minutes. Transfer baking sheets with cookies to racks; cool completely.

5. Stir chocolate in top of double boiler set over simmering water until melted and smooth. Remove from over water. Chocolate should only be warm enough to melt, not hot. You can either dip half of each cookie in the white or dark chocolate (and allow to harden on a sheet of wax paper) or place melted white chocolate in a pastry bag fitted with a small, plain tip and pipe polka dots or zigzags on the top of each cooled cookie. Refrigerate cookies on baking sheets until chocolate is set, about 10 minutes. If you use coating chocolate (such as Candiquik ) it will harden at room temperature and no refrigeration is needed.

Source: Adapted from “Bon Appetit Desserts” by Barbara Fairchild

Posted on Leave a comment

DoubleTree Chocolate Chip Cookie Recipe

Doubletree chocolate chip cookies

YUM! DoubleTree reveals its official chocolate chip cookie recipe! For the first time ever, DoubleTree by Hilton is sharing the official bake-at-home recipe for the brand’s beloved and delicious chocolate chip cookie, so at-home bakers can create the warm and comforting treat in their own kitchens. The warm chocolate chip cookie welcome is synonymous with DoubleTree hotels worldwide, and travelers look forward to receiving one, fresh from the oven, upon their arrival.

Makes 26 cookies

Ingredients:

• ½ pound butter, softened (2 sticks)
• ¾ cup + 1 tablespoon granulated sugar
• ¾ cup packed light brown sugar
• 2 large eggs
• 1 ¼ teaspoons vanilla extract
• ¼ teaspoon freshly squeezed lemon juice
• 2 ¼ cups flour
• ½ cup rolled oats
• 1 teaspoon baking soda
• 1 teaspoon salt
• Pinch cinnamon
• 2 ⅔ cups Nestle Tollhouse semi-sweet chips chocolate chips
• 1 ¾ cups chopped walnuts

You’ll also want a large mixing bowl, standing mixer (a hand mixer will also work), parchment paper, baking sheet, baking spatula and a spoon or scoop.

Directions:

Preheat oven to 300°F.

Cream the butter, sugar and brown sugar in the bowl of a stand mixer on medium speed for about 2 minutes.

Add eggs, vanilla and lemon juice, blending with mixer on low speed for 30 seconds, then medium speed for about 2 minutes, or until light and fluffy, scraping down bowl.

With mixer on low speed, add flour, oats, baking soda, salt and cinnamon, blending for about 45 seconds. Don’t overmix.

Remove bowl from mixer and stir in chocolate chips and walnuts.

Portion dough with a scoop (about 3 tablespoons) onto a baking sheet lined with parchment paper about 2 inches apart.

Bake for 20 to 23 minutes, or until edges are golden brown and center is still soft.

Remove from oven and cool on baking sheet for about 1 hour.

Cook’s note: You can freeze the unbaked cookies, and there’s no need to thaw. Preheat oven to 300°F and place frozen cookies on parchment paper-lined baking sheet about 2 inches apart. Bake until edges are golden brown and center is still soft.

You can find the full, original recipe on Hilton’s website.

Posted on Leave a comment

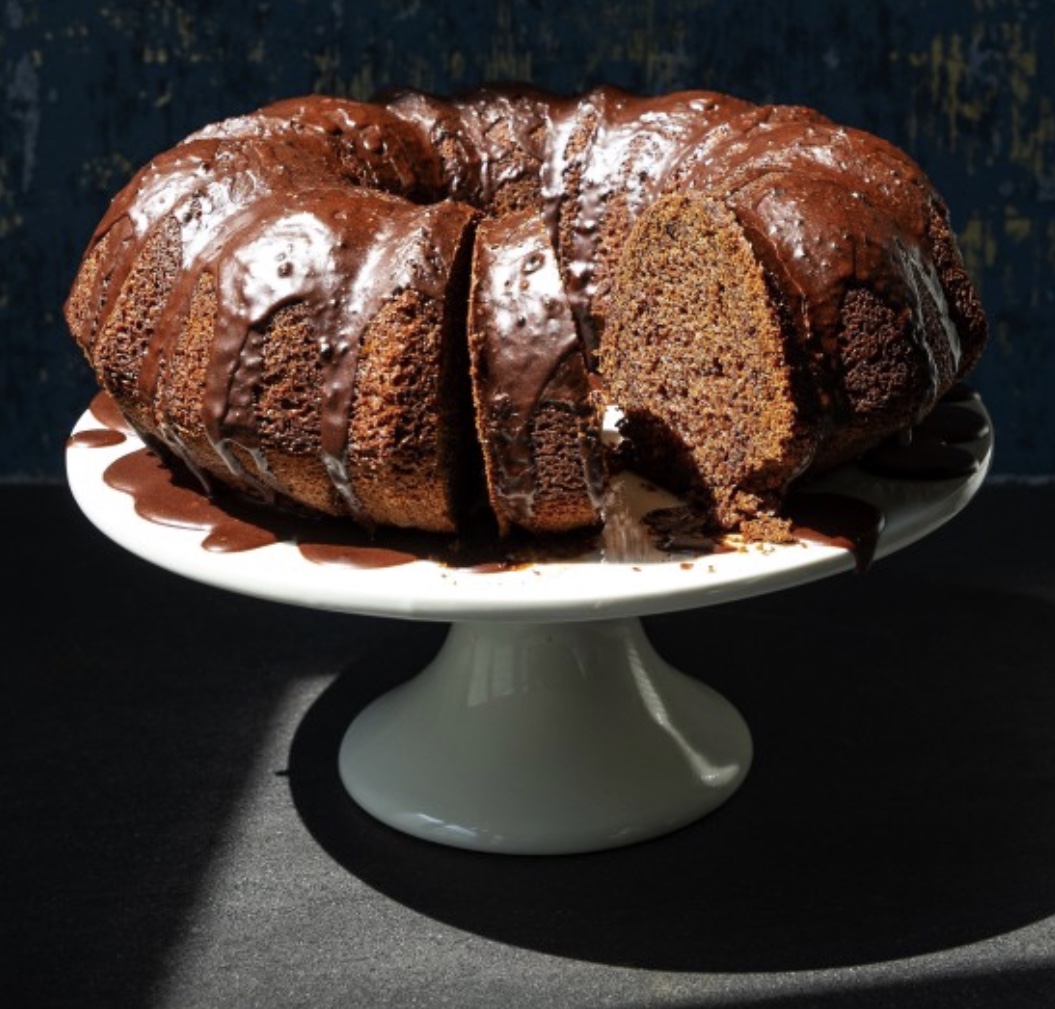
Glazed Orange Blossom and Chocolate Olive Oil Bundt Cake

Glazed Orange Blossom and Chocolate Olive Oil Bundt Cake

Olive oil keeps this fine-crumbed cake fresh and moist even after it sits out for days. Its flavor — cocoa and orange blossom, amplified and echoed by urfa, a spice with the aroma of chocolate and citrus — is as complex as it is instantly agreeable. And anyone intimidated by baking will appreciate this no-fail batter that’s mixed by hand.

3 hours, largely unattended. Serves 10 to 12.

Ingredients:

Spice Blend

• ½ cup plus 1 tablespoon unsweetened cocoa powder
• 1 tablespoon plus 2 teaspoons ground cinnamon, preferably Vietnamese
• 1 tablespoon plus 1 teaspoon urfa pepper

Cake

• Nonstick pan spray, oil or butter, for the pan
• 1¾ cups all-purpose flour
• 1 cup granulated sugar
• 1½ teaspoons baking powder
• 1¼ teaspoons baking soda
• ½ teaspoon kosher salt
• ¾ cup extra-virgin olive oil
• ⅔ cup whole milk
• 2 large eggs
• 1 tablespoon orange blossom water
• 1 orange

Glaze

• 1 cup powdered sugar
• 3 to 6 tablespoons whole milk

Instructions:

1. To make the spice blend: Stir together the cocoa, cinnamon and urfa. Reserve one-third of the mix (¼ cup) for the glaze.
2. To make the cake: Heat the oven to 375 degrees. Grease a small (10-cup) Bundt pan. Set the pan in a roasting pan in case any batter spills over (it shouldn’t) and to prevent the cake bottom from browning too much.
3. Whisk together the flour, sugar, baking powder, baking soda, salt and remaining spice blend until well mixed. In another bowl, combine the oil, milk, eggs and orange blossom water. Using a microplane grater, zest the orange directly into the bowl. Halve the orange, squeeze ¼ cup of juice (57 grams), and add to the bowl with the liquids. Whisk until smooth.
4. Pour the wet ingredients into the dry. Start whisking slowly from the center of the bowl, gradually drawing in the dry ingredients to prevent them from clumping. Once all the dry ingredients are incorporated, whisk just until smooth. The thick batter should drip off the whisk. Pour into the prepared bundt pan.
5. Bake, rotating the pan 180 degrees once halfway through, until a wooden skewer inserted into the center comes out clean, about 45 minutes.
6. Cool in the pan on a wire rack for 10 minutes. Unmold and cool completely on the rack.
7. To make the glaze: Mix the reserved spice blend with the powdered sugar. Add 3 tablespoons milk to make a thick glaze, adding up to 3 more tablespoons if necessary. Pour the glaze over the cooled unmolded cake and set aside until the glaze sets up, about 45 minutes.
Make ahead
The glazed cake can be kept at room temperature in an airtight container for up to 3 days.

Excerpted from Mastering Spice by Lior Lev Servarz and Genevieve Ko.

Posted on Leave a comment

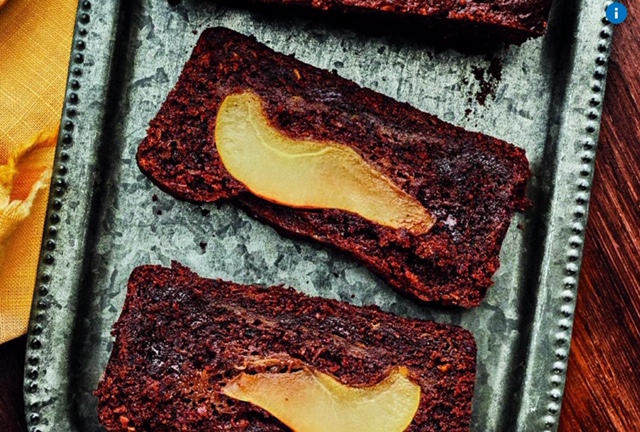
Chocolate and Pear Cake

Chocolate and Pear Cake

Chocolate and pears combine for a yummy dessert.

Ingredients:

1 ¼ cups (190 g) unbleached all-purpose flour
¼ cup (25 g) cocoa powder
2 tsp baking powder
½ tsp baking soda
½ tsp ground cardamom
½ cup (115 g) unsalted butter, softened
¾ cup (160 g) brown sugar
1 tsp (5 mL) vanilla
1 egg, at room temperature
¼ cup (60 mL) milk
4 oz. (115 g) 54% to 64% dark chocolate, chopped
2 pears, unpeeled, seeded and grated (1 cup (250 mL)/250 mL)
1 pear, unpeeled, halved, seeded and cut into 10 slices, ¼ inch (½ cm.) thick

Directions:

With the rack in the middle position, preheat the oven to 350°F (180°C). Butter a 9 x 5-inch (23 x 13 cm.), 6-cup (1.5 litre) bread tin. Line with a strip of parchment paper, letting it hang over two sides.
In a bowl, combine the flour, cocoa powder, baking powder, baking soda, and cardamom.
In another bowl, cream the butter, brown sugar and vanilla with an electric mixer. Add the egg and whisk until smooth. Add the dry ingredients, alternating with the milk. Add the chocolate and the grated pears and mix to combine. Pour the batter into the prepared tin. Place the pear slices down the center of the cake, rounded side up, pressing them into the batter until covered almost halfway.
Bake for 1 hour or until a toothpick inserted in the center of the cake comes out clean. Let cool completely before unmolding.

Ricardo Larrivée, a Montreal-based television food writer, as published in The Star.

Posted on Leave a comment

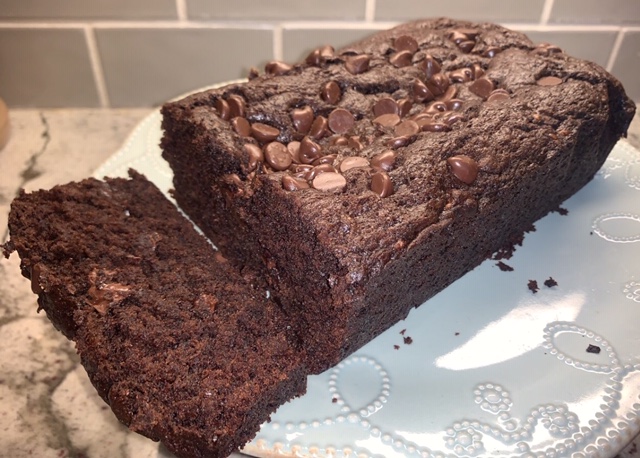
Chocolate Banana Bread

Chocolate Banana Bread

This is delicious! The other great thing about this is you can freeze it for later, so it’s a great recipe to have if you need to store some food for a while.
Ingredients:
• 1 cup of flour
• 1/2 cup of cocoa
• 1 tsp of baking soda
• 1/2 tsp of salt (I make it a heaping tsp, extra salt brings out the chocolate!)
• 2 bananas mashed (original recipe called for 3 but I only had 2 and it turned out just fine)
• 1/4 cup unsalted butter, melted
• 1/4 cup vegetable oil
• 3/4 cup packed brown sugar
• 1 large egg
• 1 tsp vanilla extract
• 1 cup of semisweet chocolate chips, divided

Instructions:
1. Heat your oven to 350 degrees and line a 9×5 loaf pan with parchment paper. Set aside.
2. Whisk together flour, cocoa powder, baking soda, salt. Set aside.
3. In a large bowl mix mashed bananas, melted butter, and oil. Stir to combine.
4. Stir in brown sugar, egg, and vanilla extract until smooth.
5. Add dry ingredients into wet ingredients, mix to combine (if you over-mix, your bread will be tough). Stir in chocolate chips, leaving a a few tablespoons behind to sprinkle on the top.
6. Pour batter into prepared pan. Sprinkle remaining chocolate chips on top.
7. Bake for 50-60 minutes or until toothpick inserted in center comes out mostly clean. Oven times may vary.
Once it’s cooked, set it to cool for about 15 minutes and then enjoy! This recipe makes a moist, chocolaty cake with just a hint of banana flavor. For some added deliciousness, you can mix a tablespoon or so of milk with some powdered sugar and drizzle it on top. But this bread it plenty sweet without that!
As reported on WREX

Posted on Leave a comment

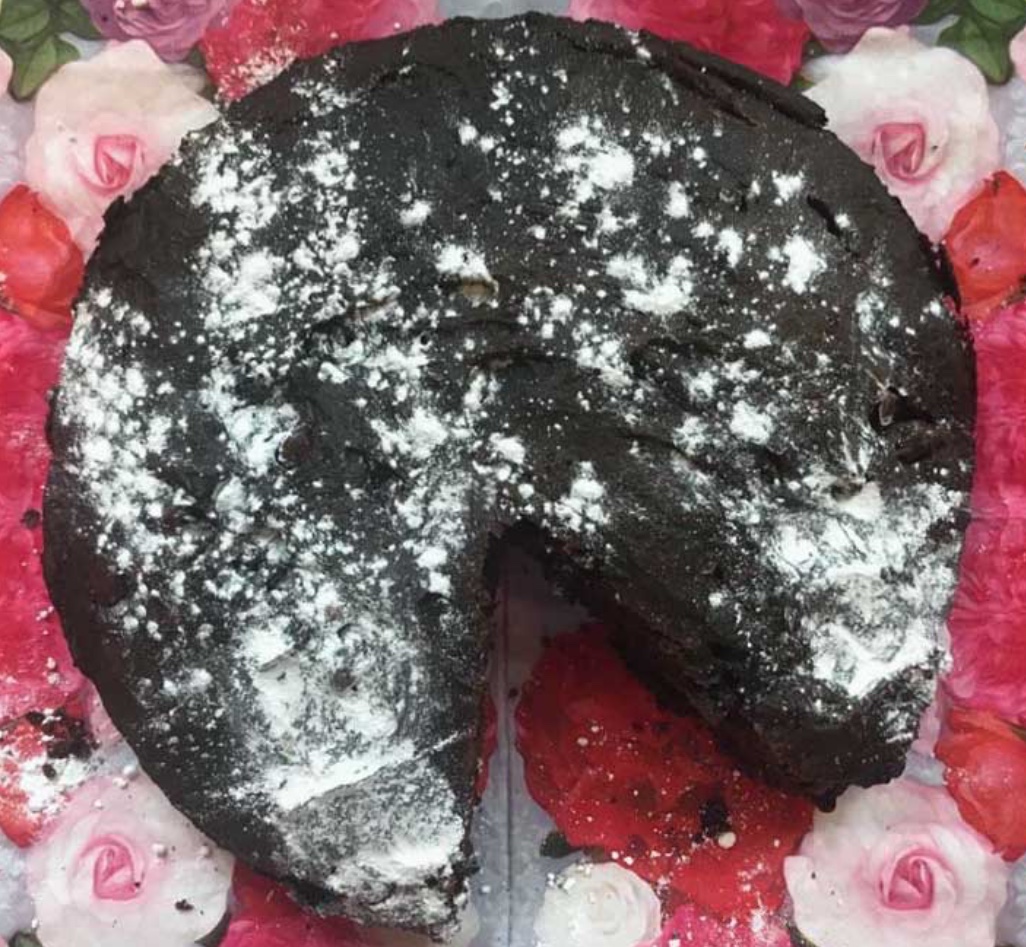
Double Chocolate ‘War’ Cake

Double chocolate war cake

For those who may be stressed about the future of the coronavirus pandemic, this dish is meant to provide some comfort: “war” chocolate cake. The dessert gets its name from World Wars I and II, when strict rations forced people to cut back on their ingredients. Unlike other cake recipes, you won’t need any butter, milk or eggs.

Ingredients:
1 1/2 cups of flour
3/4 cup of sugar
1/3 cup of cocoa powder
1 teaspoon of baking soda
1/2 teaspoon of salt
1/3 cup of oil
1 cup of water
1 teaspoon of vanilla extract
1/2 cup of chocolate chips
1 tablespoon of apple cider vinegar.

Directions:
Set the oven to 350 degrees and start on the batter. Requiring just one mixing bowl, all the ingredients can be mixed together at once. While the recipe suggests you whisk the ingredients by hand, you can choose to use an electric mixer to save some time. At first, the batter feels as thick as dough, but adding in a bit of water will help thin it out. After placing the batter into an 8 inch-by-8 inch size pan, wait by the oven door for about 35 minutes to watch the batter rise!
The results are as simple as the recipe itself. Sprinkle the final cake with a little bit of cocoa powder and bite into a rich and satisfying dessert with crisp brownie-like edges and a fluffy interior. It also has an added benefit of being dairy free and vegan because of the lack of eggs and milk.
The cake serves about nine to 12 portions. For a more fudgy textured cake, double the suggested amount of chocolate chips. You can also add fresh blueberries or strawberries to top the cake for a fresh flavor.
You can dress it up or eat it plain, and it’ll satisfy anyone who is vegan or dairy free.

This article appeared in the April 2, 2020 issue of the Hatchet.

Posted on Leave a comment

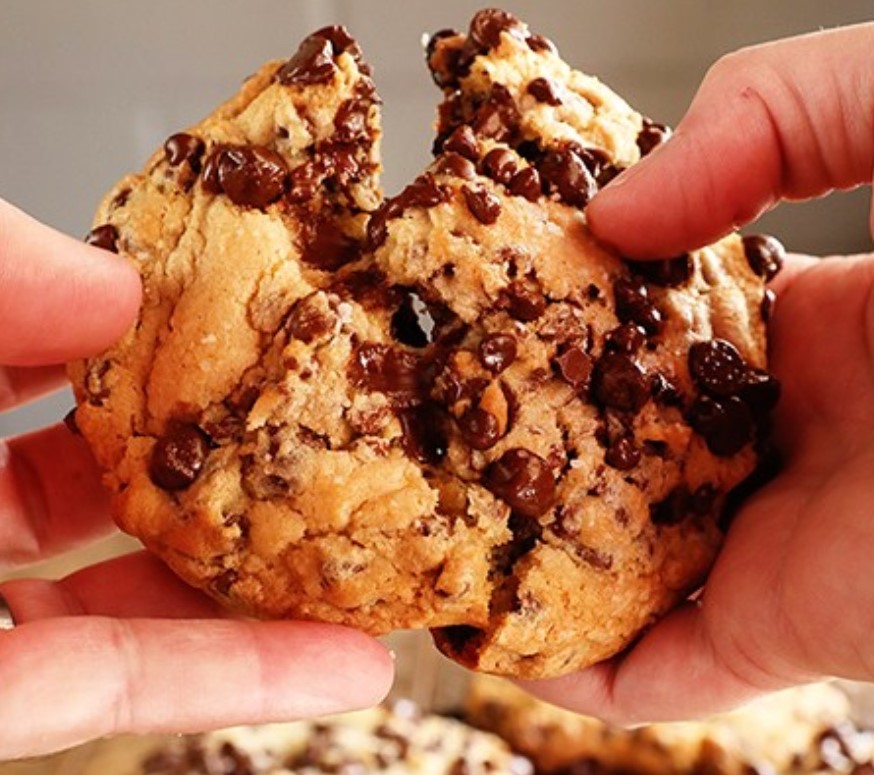
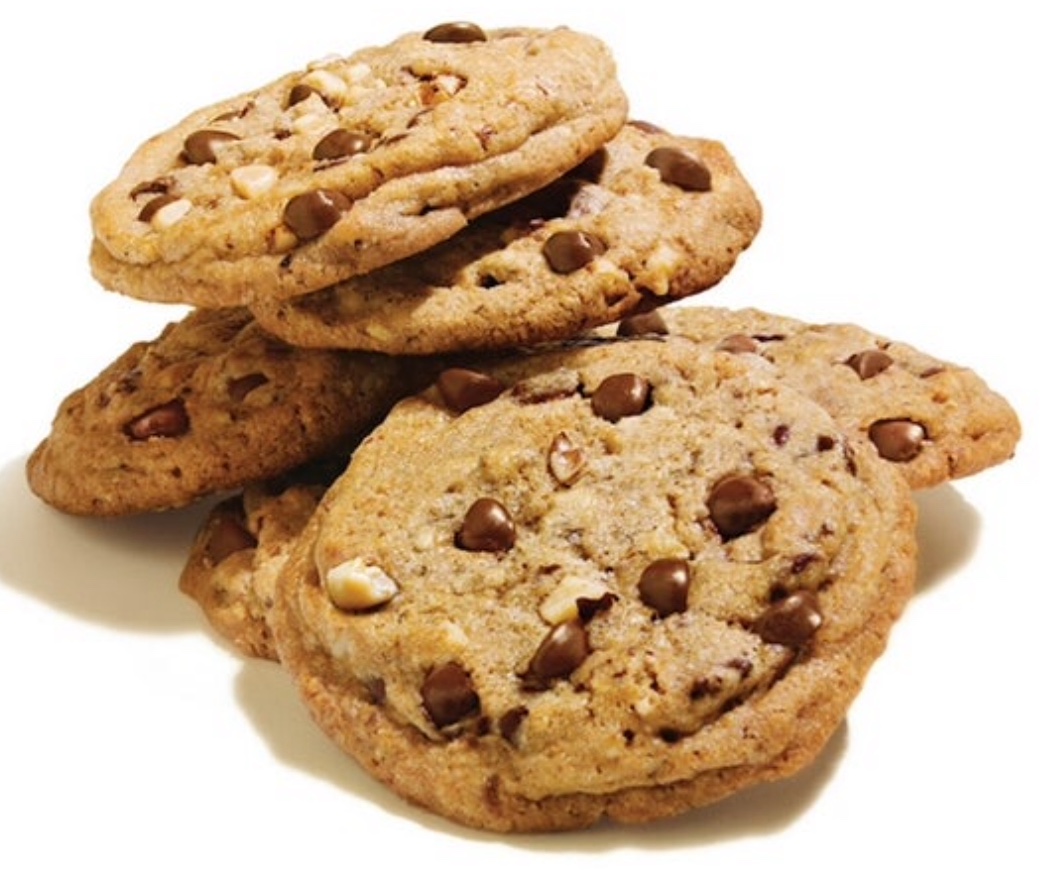
BIG APPLE CHOCOLATE CHIP COOKIES

Thank the Big Apple for these humongous chocolate chip cookies. This style of ultra-thick chocolate chip cookie, popularized by the New York bakery Levain, requires a dough with less sugar than flour and more chocolate chips than sugar. These ratios keep the cookies thick, not caky, with a flavor defined by the chocolate, so be sure to use the best-quality chips you can find. Part of the novelty of the cookies is their enormous size. They are eye-catching, for sure, but we recommend splitting them with a friend (or three). For nutritional purposes, that means we’re assuming one person is eating a quarter of a cookie. The portioned cookie dough can be wrapped tightly in plastic and refrigerated for up to 1 week. Alternatively, the portions can be individually wrapped, then placed in a freezer-safe zip-top bag and frozen for up to 6 months. Thaw frozen dough to 40 degrees, unwrap and bake as directed. These cookies taste best when freshly baked, but leftovers may be stored in an airtight container at room temperature for up to 2 days; rewarm briefly in a 350-degree oven before serving.
Recipe notes: Cookbook author Stella Parks does not recommend leaving the nuts out of this recipe, as they help provide non-melting bulk to the cookies.

Ingredients:
• 8 tablespoons (1 stick/113 grams) unsalted butter, softened to cool room temperature (about 65 degrees)
• About 1/2 cup (113 grams) firmly packed light brown sugar
• About 1/2 cup (100 grams) granulated sugar
• 1 tablespoon vanilla extract
• 2 teaspoons Diamond Crystal kosher salt (may substitute 1 teaspoon table salt), plus more for sprinkling (optional)
• 1 3/4 teaspoons baking powder
• 1 teaspoon baking soda
• Pinch freshly grated nutmeg
• 2 large eggs, cold
• About 2 1/4 cups (283 grams) all-purpose flour
• About 2 1/2 cups (425 grams) assorted chocolate chips (not chopped chocolate), such as a mix of milk, bittersweet and semisweet
• 8 1/2 ounces (scant 1 3/4 cups/240 grams) raw walnut pieces or lightly toasted pecan pieces (see NOTE)

Directions:
Step 1
Combine the butter, brown and granulated sugars, vanilla extract, salt, baking powder, baking soda and nutmeg in the bowl of a stand mixer fitted with a paddle attachment. Mix on low to moisten, then increase the speed to medium and beat until soft, fluffy and pale, about 8 minutes; halfway through, pause to scrape down the bowl and beater with a flexible spatula. With the mixer running, add the eggs one at a time, letting each incorporate fully before adding the next. Reduce the speed to low, then add the flour all at once. When the flour is incorporated, add the chocolate chips and nuts and keep mixing until the dough is homogeneous.
Step 2
Divide the dough into 8 equal portions (about 6 ounces/170 grams each) and round each into a smooth ball. Wrap in plastic and refrigerate for at least 12 hours before baking; if well protected from air, the dough can be kept in the fridge up to 1 week.
Step 3
Adjust an oven rack to the middle position and preheat the oven to 350 degrees. Line 2 baking sheets with parchment paper. When the oven comes to temperature, arrange up to 4 portions of cold dough on the prepared pans, leaving ample space between them to account for spread. If you like, sprinkle with additional salt to taste.
Step 4
Bake, 1 sheet at a time, for about 22 minutes, until the cookies are puffed and lightly brown or to an internal temperature of between 175 and 185 degrees. The ideal temperature will vary from person to person; future rounds can be baked more or less to achieve the desired consistency.
Step 5
Cool the cookies directly on the baking sheet until no warmer than 100 degrees (they should feel lukewarm) before serving. Enjoy warm, or within 12 hours; these cookies taste best when freshly baked.
Adapted from Stella Parks at SeriousEats.com.

Posted on Leave a comment

Chocolate Peanut Butter Poke Cake

Every baker has a love for sheet cakes. They’re perfect for when you want a delicious cake, but don’t want to fool with the hassle of a layer cake. And no one ever complains about turning a sheet cake into a poke cake by filling it with a delicious creamy filling, right? So this is the best of both worlds. If you love Reese’s peanut butter cups, you’re going to flip over this. And added, is even more Reese’s flavor by using International Delight’s Reese’s Peanut Butter Cup Coffee Creamer to the filling. The frosting, made with creamy peanut butter and whipped topping, is peanut butter perfection. And it’s topped with mini Reese’s cups.

Chocolate Peanut Butter Poke Cake

Prep time: 25 minutes
Cook time: 20 minutes
Total time: 45 minutes
Serves: 10
Ingredients
• 1 (15.25-ounce) box milk chocolate cake mix
• Plus ingredients to make the cake as directed
• 1 (3.9-ounce) box instant chocolate pudding mix
• 2 cups International Delight Reese’s Peanut Butter Cup Coffee Creamer
• 1 (16-ounce) container frozen whipped topping, thawed
• 1 cup creamy peanut butter
• 1 (8-ounce) package Reese’s Minis miniature peanut butter cups
Instructions
1. Prepare the cake according to the package directions.
2. Allow to cool 25 to 30 minutes in the pan.
3. Use the stick end of a wooden spoon to poke holes in the cake.
4. In a medium bowl, whisk together the pudding mix and the Reese’s creamer to make the chocolate peanut butter sauce.
5. Allow the mixture to thicken for about 10 minutes, then pour over the cake and into the holes. The mixture will not thicken completely to pudding consistency.
6. In a large bowl, whisk the peanut butter into the thawed whipped topping.
7. Spread the frosting over the cake.
8. Sprinkle the peanut butter cups evenly over the frosting.
9. Cover and keep refrigerated.
By Stacey Little, in Southern Bite

Posted on Leave a comment

Chocolate Snowballs

If there’s no real snow around to make snowballs, you’ll have these as a “reminder”! So easy to make and so, so good!

Ingredients:

• 3/4 cup butter, softened
• 1/2 cup sugar
• 1/2 teaspoon salt
• 1 large egg, room temperature
• 2 teaspoons vanilla extract
• 2 cups all-purpose flour
• 1 cup chopped pecans or walnuts
• 1 cup (6 ounces) chocolate chips
• Confectioners’ sugar

Directions:

• Preheat oven to 350°. In a large bowl, cream butter, sugar and salt until light and fluffy. Beat in egg and vanilla. Gradually beat in flour. Stir in pecans and chocolate chips.
• Shape dough into 1-in. balls; place 2 in. apart on ungreased baking sheets. Bake until set and bottoms are lightly browned, 15-20 minutes. Cool on pans 2 minutes. Roll warm cookies in confectioners’ sugar. Cool completely on wire racks. If desired, reroll cookies in confectioners’ sugar.
Note: you can substitute chopped pistachios, macadamia nuts or even almonds for pecans and walnuts if you so choose. Or you can omit the nuts and add a few more chocolate chips. Makes about 4 dozen.

Recipe from TasteofHome.com


Posted on Leave a comment

Chocolate Yummy Pie

Tastes as good as it sounds! And so easy to make – watch the video link and you’ll see (click HERE)! Don’t forget to add some chocolate shavings on top!

Ingredients:
1 cup flour
8 tablespoons butter, melted
1/2 cup chopped pecans
6 ounces softened cream cheese
1/2 cup powdered sugar
1 (8-ounce) container Cool Whip, divided
2 packages (3.4 ounce each) instant chocolate pudding mix
3 cups milk
Grated or shaved chocolate bar or extra chopped pecans

Directions:
Melt butter in a medium microwave safe bowl. Stir in 1 cup flour and 1/2 cup chopped pecans. Press the mixture into a pie pan and bake at 350 F for 12 to 15 minutes, or until lightly golden brown. Allow to cool completely.
Next, beat together with a mixer powdered sugar, cream cheese Spread over your cooled crust.
For the next layer, mix together the pudding mix and milk. Let thicken a bit. Spread over the cream cheese layer.
Spread the remaining Cool Whip on top and then top with chocolate shavings or pecans.
Keep refrigerated until ready to serve.

Posted on Leave a comment

Chocolate Energy Balls

Try something scrumptious and healthy!, yet so easy to prepare!!!

Here’s the recipe:

Ingredients:

1/4 cup almond butter
1 teaspoon vanilla
1 teaspoon cinnamon
1 teaspoon coconut flakes
1/4 cup honey
4 squares of dark chocolate chopped up
1/2 cup rolled oats

Directions:

Mix together all the ingredients. Put in the refrigerator for 1/2 hour. Then proceed, forming the balls and enjoy! Store prepared balls in refrigerator. They last up to a week – but they’re sure to be gone before then!”

Yields 6 balls

Posted on Leave a comment

Perfect Chocolate Babka Recipe

Yes, you can make this iconic Jewish cake!!!

Makes 4 babkas
Prep time: 25 minutes
Total time: 4 hours

Ingredients

for the dough:
3/4 cup|170 grams whole milk
30 grams fresh yeast
2 1/4 cups|325 grams bread flour, sifted
2 1/4 cups|325 grams pastry flour, sifted
2 large eggs, at room temperature
1/2 cup|110 grams granulated sugar
1/2 teaspoon vanilla extract
1/4 teaspoon kosher salt
8 1/2 tablespoons|120 grams unsalted butter, at room temperature, cut into cubes

for the chocolate filling:
450 grams Nutella
1 1/3 cups|200 grams bittersweet chocolate chips

for the sugar syrup:
3/4 cup|160 grams granulated white sugar
1/2 cup|120 grams water

you’ll need:
four 8 1/2-inch-by-4 1/2-inch loaf pans

Directions
1. Pour the milk into the bowl of a stand mixer fitted with the dough hook. Break up the yeast into the milk and dissolve it into the milk with a whisk or using your fingertips. Dump the flour on top of the milk, then the eggs on top of the flour, then the sugar, then the vanilla, then the salt, then half of the butter. Begin mixing at the lowest speed. After 2 minutes increase the speed to medium and continue mixing for another 5 minutes, scraping down the bowl, if necessary, so that it all mixes together. The dough should begin to come together but won’t be smooth.
2. Reduce the mixer speed to low and slowly add the rest of the butter, cube by cube, only adding more butter once the previous cube disappears into the dough. This process should take 2 to 3 minutes. Once all of the butter is incorporated, turn off the mixer. The dough should be smooth and elastic.
3. Lightly flour a work surface with bread flour, and turn the dough out onto the floured surface. Knead the dough into a smooth ball.
4. Form the dough into a rectangle (measuring about 10 inches by 6 inches) and place on a tray. Cover with plastic wrap and refrigerate for at least 2 hours but up to 12 hours.
5. Lightly grease four 8 1/2-inch-by-4 1/2-inch loaf pans with nonstick baking spray. Lightly flour a work surface with bread flour, and transfer the dough to the floured surface. Lightly flour a rolling pin and roll the dough into a rectangle measuring about 36 inches by 9 inches—it’s fine if the rectangle is bigger (up to 40 inches by 12 inches) but no smaller than 36 inches by 9 inches. If the dough shrinks back as you roll it out, cover it with a towel or plastic wrap for 5 minutes to let it rest and then continue rolling again.
6. Using an offset spatula, spread the Nutella evenly out onto the dough, spreading it out to all of the edges. Sprinkle the chocolate chips evenly out over the Nutella.
7. Place the dough in front of you with the long, 36-inch side towards you. Starting from the lower left side of the dough, use your fingertips to roll the dough, working your way from the left side to the right side and using your fingertips to the roll the dough into a roulade as tightly as possible. The tighter the roulade is rolled, the more layers of chocolate the babka will have. Once you’ve rolled the dough, gently pull the roulade so that it reaches about 48 to 50 inches in length. Using a serrated knife, cut the roulade in half lengthwise, along its 36-inch length. Cut the dough crosswise into 4 even pieces. You should now have 8 roulade halves in 4 pairs of 2. Place one of the pieces cut-side up. Place another piece on top (also with the cut-side up) to make an X with the two pieces. Twist the two halves around each other, gently pulling the dough to wrap the two pieces around each other. This is what gives the babka its telltale braided characteristic. Transfer the babka to one of the loaf pans and repeat this process with the remaining 6 roulade halves to make 4 babkas in total.
8. Cover the babkas with a towel or place in a clean plastic bag to cover completely. Set in a warm place until doubled in size, 2 to 2 1/2 hours. In the meantime, make the sugar syrup. Combine the sugar and water in a small saucepan over medium-high heat. Bring to a boil and simmer for 2 minutes. The sugar should be completely dissolved. Remove from the heat and set aside to cool.
9. Heat the oven to 350°F. Bake the babkas for 25 minutes in a convection oven or 30 minutes in a regular oven. Once they’re done baking, the babkas should be golden brown.
10. Remove from the oven and immediately brush generously with the sugar syrup. You should still have about a quarter of the syrup leftover after brushing the babkas. You can refrigerate the syrup for up to a week and reserve it for a later use.
11. Let the babkas cool completely at room temperature before turning them out from their loaf pans.
You’ll find this recipe by Breads Bakery at Vice.com.

Posted on Leave a comment

Chocolate Pancakes – Vegan, Gluten-Free

Gluten free chocolate pancakes: the breakfast you’ve been waiting for. This seemingly sweet recipe only has 1 banana to sweeten the whole batch and then some berries for the topping. Of course you can top your pancakes with pretty much anything! Why not top them with even more chocolate! Fluffy, super chocolaty, perfectly sweet, these gluten free chocolate pancakes are incredibly delicious & the perfect item on any brunch table!

Ingredients
• 3/4 cup gluten-free oat flour
• 1/2 cup brown rice flour
• 1/4 cup buckwheat flour
• 1/4 potato starch
• 2 tablespoons tapioca flour
• 1/3 cup cocoa powder
• 2 teaspoons baking powder
• pinch sea salt
• 1 ripe banana
• 1 1/2 tablespoons melted coconut oil + some more for cooking
• 1 teaspoon vanilla extract
• 1 1/4 cup non-dairy milk (or plain unsweetened oat milk)

Preparation
• Toss all ingredients in a blender, blend until well combined.
• Over medium heat, pour 1/4 cup of pancake batter on a well-oiled pan. I use unscented coconut oil.
• When bubbles start to form on the surface of the pancake, flip and cook it for a minute on the other side.
• Garnish with berries & vegan Nutella, Enjoy!

Recipe by Natalie Yonan, published in OneGreenPlanet

Posted on Leave a comment

Salted Caramel Pretzel Chocolate Bark

Turn off your ovens, because there is no baking required. Bark takes just a few short minutes to throw together, yet is packed with flavors, both sweet and salty, and loaded with crunch. Whether you love dark chocolate or semisweet, choose a chocolate that is high quality, because this is what holds the bark together. Once you have chosen your chocolate, top with a combination of nuts, dried fruit, seeds, caramel or pretzels. You can throw them all into one or separate to make three seasonal options. The following recipe is for Salted Caramel Pretzel Chocolate Bark and you can find recipes for Pumpkin Seed and Sea Salt Chocolate Bark and Dried Fruit Chocolate Bark, here.

Ingredients:

2 cups semisweet or dark chocolate
1/2 cup melted caramel candies
1 tablespoon heavy cream
1/2 cup chopped pretzels
1/4 cup chopped peanuts

Directions:

Prepare a baking sheet with parchment paper; set aside.
Melt the chocolate in a microwave-safe bowl in 30-second increments, stirring each time. Once the chocolate is 90% melted, remove the bowl from the microwave and continue stirring until all the chocolate is completely melted.
While the chocolate is melting, place the caramel candies and heavy cream in a small saucepan. Turn the heat on medium and stir until caramel is melted and the heavy cream is incorporated.
Spread the melted chocolate on the prepared baking sheet. Using a spatula, evenly spread the chocolate to cover the parchment paper until it’s approximately 1/4-inch thick.
Swirl in the caramel sauce throughout. Sprinkle the chopped pretzels and peanuts over the chocolate and caramel.
Allow the chocolate to cool at room temperature for 1-2 hours or, for quicker dry time, place the chocolate bark in the refrigerator to harden. Once the chocolate is set, cut or break the chocolate bark into a desired size and shape.
Serve immediately or store in an airtight container in the refrigerator.

Recipes: Kristen Massad of Dallas, a pastry chef and graduate of the French Culinary Institute in New York, blogs at joyoliver.com.

Posted on Leave a comment

Chocolate pistachio zucchini bread

Oh yes, it’s as good as it looks! And easy to make! With DOUBLE chocolate – cocoa powder and chocolate chips!

Ingredients:
1 1/2 cups flour
1/4 cup cocoa powder
2 tsp cinnamon
1/2 tsp nutmeg
1 tsp baking soda
1/2 tsp baking powder
1/2 tsp salt
2 eggs
1 cup brown sugar
1/2 cup olive oil
2 tsp vanilla
2 cups shredded zucchini ( 2 med/large zucchini)
3/4 cup mini semi- sweet chocolate chips
1/2 cup roasted and salted chopped pistachios ( a few extra to sprinkle on top)

Directions:
Preheat oven to 350 degrees
Grease a 9×5 inch loaf pan with non stick cooking spray
Shred the zucchini into a colander, and set in sink or over a large bowl (to let extra moisture drip out)
In a medium bowl, sift together flour, cocoa powder, cinnamon, nutmeg, baking soda, baking powder and salt. Set aside.
In large bowl, beat eggs until light colored. Stir in brown sugar, oil and vanilla until well combined. Fold in zucchini, chocolate chips and pistachios.
Stir dry ingredients into wet ingredients, and mix well. Pour into prepared loaf pan. Sprinkle a few pistachios over top of batter. Place loaf pan on a baking sheet, and bake for 45-50 minutes, until toothpick inserted in middle comes out clean ( a few chocolate crumbs can be on it ) Let cool. Slice, serve warm or at room temperature.
NOTES- you can use regular semi sweet chocolate chips if you can’t find mini. Just chop them up a bit. You can use canola oil if you don’t like olive oil. Make sure to check bread after 45 minutes, so you don’t overbake it.

As seen on News Channel 8 (click here).

Posted on Leave a comment

Chocolate Peanut Butter Lava Cake

If you love sweets, chocolate is likely at the top of your list when it comes to your favorites. Peanut butter might also be somewhere on the list. When you mix chocolate and peanut butter together, you’re sure to have a delightful treat.

For the filling:
• 3 tablespoons smooth peanut butter
• 1 tablespoon powdered sugar
• 1 tablespoon salted butter, room temperature

For the cake:
• 1/4 cup unbleached all-purpose flour
• 1 teaspoon Dutch-process cocoa
• 6 ounces, weight bittersweet chocolate
• 1/2 cup salted butter
• 3 eggs, room temperature
• 1/2 cup sugar
• 1/2 teaspoon vanilla extract
• 1/2 teaspoon espresso powder
• Chocolate sauce and powdered sugar, for topping

Directions
1. To make the filling, stir together the peanut butter, powdered sugar, and butter until smooth. Refrigerate this mixture for 30 minutes.
2. Preheat oven to 425°F. Place butter on four 6-ounce ramekins. Stir together a few spoonfuls of flour and cocoa powder. Dust the ramekins and then tap out the excess.
3. Divide the chilled peanut butter filling into four portions. After dividing the peanut butter filling put it in the refrigerator.
4. Whisk flour and cocoa together. Put the mixture aside. Melt chocolate and butter over low heat until it is melted and has a smooth consistency. Next, remove from heat.
5. Beat the eggs with the sugar until it becomes thickened. Edwards says this should take roughly three minutes. Stir vanilla and espresso powder together. Add to the egg mixture along with the melted chocolate until it is combined. Add in the flour/cocoa mixture.
6. Fill ramekins with 2/3 of the batter. Place a drop of peanut butter on top of the batter. Drip the remaining batter over the peanut butter.
7. Bake for 15 minutes. Remove from the oven and let it stand on a cooling rack for 5 minutes. Run a knife along the edge of the ramekins. Next, place a dessert plate on top and flip the plate over. Remove the ramekin.

Edwards recommends serving the cakes warm with chocolate sauce and sifted powdered sugar. She also says the cakes can be made ahead and refrigerated. You can reheat in the microwave for 30 seconds.

Source: Bridget Edwards on The Pioneer Woman blog

Posted on Leave a comment

Chocolate Zucchini Protein Muffins

These 150-Calorie Chocolate Zucchini Protein Muffins Taste Like Cupcakes! Although zucchini noodles, baked zucchini boats, and grilled zucchini are delicious, sometimes your zucchini wants a sweeter fate. It wants you to grate it up and make these double chocolate protein zucchini muffins. These double chocolate zucchini muffins are vegan, oil-free, and sweetened with a little bit of coconut sugar and maple syrup. They also contain protein powder, offering almost five grams of protein per muffin, to help you feel full longer.

INGREDIENTS
1 tablespoon ground flax meal
3 tablespoons water
1 1/4 cups unsweetened soy milk (or any nondairy milk)
2 teaspoons apple cider vinegar
1 1/2 cups white whole-wheat flour
1/2 cup plant-based protein powder (I used 1 serving of Vega Sport Vanilla)
1/2 cup coconut sugar (or organic sugar)
1/3 cup unsweetened cocoa powder, sifted
1 1/2 teaspoons baking powder
1/2 teaspoon baking soda
1/2 teaspoon sea salt
3 tablespoons maple syrup
1 teaspoon vanilla extract
1/3 cup dairy-free semisweet chocolate chips (I used Trader Joe’s; reserve a few to sprinkle on top)
1 1/4 cups grated zucchini (about 1/2 medium)
DIRECTIONS
• Preheat oven to 325 °F. Lightly spray a muffin tin with oil.
• In a small bowl, mix the flax meal and water, and set aside to thicken.
• To make vegan buttermilk, in a medium bowl, mix the soy milk with the apple cider vinegar, and set aside to curdle.
• In a large bowl, mix together the white whole-wheat flour, protein powder, coconut sugar, sifted cocoa powder, baking powder, baking soda, and sea salt.
• Mix the flax/water mixture in with the milk/vinegar mixture. Stir in the maple syrup and vanilla.
• Pour the liquid mixture into the dry ingredients, and mix until combined. Stir in the chocolate chips (saving a few to sprinkle on top) and grated zucchini.
• Distribute the batter into the prepared muffin tin, using about a heaping one-third cup per muffin. Sprinkle with a few of the reserved chocolate chips.
• Bake for 18 to 20 minutes, or until a toothpick inserted comes out clean.
• Allow to cool for a few minutes in the pan, then move to a cooling rack.
• Enjoy right away, or store in a glass container in the fridge.

For Nutrition Facts, click here.

From Jenny Sugar at POPSUGAR.COM.

Posted on Leave a comment

S’mores Blondie Pie

The simple campfire classic needs almost no improvement, but this twist on the s’more will definitely leave you wanting some more. This S’mores Blondie pie is a fun twist on the classic campfire treat.

Ingredients:

6 Hershey’s milk chocolate bars, divided 1/2 cup butter or margarine (1 stick), softened
3/4 cup sugar
1 egg
1 cup all-purpose flour
1 cup graham cracker crumbs
1 teaspoon baking powder
1-1/2 cups marshmallow creme
1/4 teaspoon shortening (do not use margarine, butter, spread or oil)
Ice cream (optional)

Directions:

Heat oven to 350 degrees. Grease 9-inch pie plate. Unwrap chocolate bars; break into pieces.
Beat butter and sugar until blended in medium bowl. Add egg; beat until light and fluffy. Stir in flour, graham cracker crumbs and baking powder; beat until well blended.
Press half of dough onto bottom and up sides of pie plate. Spread marshmallow creme over bottom of crust. Set aside 1 tablespoon chocolate bar pieces; sprinkle the remaining pieces evenly over marshmallow creme.
Form remaining dough into ball; place on sheet of waxed paper. With fingers, flatten and shape into 9-inch circle. Pick up waxed paper, supporting dough with hands. Flip dough onto pie surface; peel off waxed paper. Pinch edges of dough together and form crust edge.
Bake 20 to 25 minutes or until lightly browned. Cool completely in pan on wire rack. Melt remaining chocolate bar pieces with shortening; drizzle over top of pie.
To serve, microwave slices at high power for 15 to 20 seconds or until slightly warm and marshmallow starts to melt. Top with ice cream, if desired.

Published on GMA.com.

Posted on Leave a comment

How Sarah Kieffer Made Viral Chocolate Chip Cookies


Sarah Kieffer started banging sheet pans in ninth grade. She was going through “a cookie phase,” trying to find the perfect chocolate chip recipe, and one of them wasn’t working out. While most cookies spread in the oven, this one stayed put. “It was just this ball of dough that didn’t fall, so I hit the pan in the oven because I was mad,” she told me over the phone. “That helped.” The cookies deflated, thinned out, and spread more. Lifting the pan, then banging it down, forces cookies to breathe out all their hot air and become less puffy and cakey. It was an aha moment for Kieffer. She loved how pan-banging set the cookies’ edges, encouraged a gooey center, and, most of all, set off a wave of concentric ripples, like dropping a stone into a puddle. From then on, she “started incorporating it into almost every cookie recipe.” TO CHECK OUT ALL HER EXPERIMENTATION AND RECIPE, CLICK HERE.

Posted on Leave a comment

Chocolate Cheesecake Dip

What more can we say? It’s as good as it sounds!

Ingredients
• 4 ounces semi-sweet baking chocolate
• 8 ounces cream cheese room temperature
• 1/2 cup powdered sugar
• 2 tablespoons salted butter room temperature
• 1 1/2 teaspoons pure vanilla extract
• 1 cup heavy whipping cream
• 1 tablespoon mini semi-sweet chocolate chips

Dipping Items
• 4 1-ounce packages Vanilla Animal Cookies
• 4 1-ounce packages Chocolate Chip Cookie
• 1 cup Cheddar Lions
• 1 14-ounce package Sweet Apple Slices
• 16 ounces fresh strawberries
• 6 ounces fresh blueberries
• 1 banana, sliced

INSTRUCTIONS
• Melt the baking chocolate in a microwavable bowl for 30-second intervals, stirring in between until completely melted and smooth.
1. In a mixing bowl, mix together the cream cheese, powdered sugar, butter, vanilla, and melted chocolate until well combined. Scrape down the sides of the bowl as needed.
2. Slowly pour in the heavy whipping cream and beat for about three minutes until soft, but somewhat sturdy peaks form.
3. Spoon into a serving bowl and refrigerate for 30 minutes before serving.
4. Place the bowl of Chocolate Cheesecake Dip into the middle of a tray or large cutting board. Around the bowl, place the Vanilla Animal Cookies, Mini Chocolate Chip Cookies, and Cheddar Lions interspaced with the assorted fruit.
Recipe Notes
Makes about 3 1/3 cups calculated at 1/3 cup serving per person. Refrigerate until serving as well as any unused portion.

Presented by Shona House, Faith Baked Cakes

Posted on Leave a comment

How to Store Chocolate

You should enjoy chocolate right away… so you would never have a reason to worry about how they are stored! The reality is we all have to store chocolates sometimes (sadly). What if after all your efforts to store your chocolates safely they look dull and blotchy? It just means that the sugars in the chocolate have bloomed (another way to say rearranged). You can still eat or cook with them but the texture might be different. Here are some recommendations (click here).


Posted on Leave a comment

One-Bowl Chocolate Snack Cake With Cream Cheese Frosting

This deeply chocolate-y and uber-moist chocolate snack cake is as perfect for the 12-and-under set after school as it is for dessert following an impromptu weeknight dinner party. It is assembled quickly and bakes up in less than 30 minutes. Make Ahead: The cake can be loosely covered with plastic wrap and refrigerated for up to 3 days.

12 servings

INGREDIENTS:

FOR THE CAKE:
• 2/3 cup packed (130 grams) light brown sugar
• 2/3 cup (130 grams) granulated sugar
• 1 cup plus 2 tablespoons (130 grams) cake flour
• 1/2 cup (60 grams) Dutch-process cocoa powder
• 1 teaspoon (3 grams) baking powder
• 3/4 teaspoon (5 grams) baking soda
• 3/4 teaspoon (3 grams) table salt
• 1 1/2 teaspoons (2 grams) espresso powder
• 1 large egg plus 1 large egg yolk
• 2 teaspoons pure vanilla extract
• 6 tablespoons vegetable oil
• 2/3 cup boiling water
• 2/3 cup heavy cream

FOR THE FROSTING:
• 8 tablespoons (1 stick) unsalted butter, at room temperature, plus more for the pan
• 8 ounces cream cheese, at room temperature
• 2 teaspoons pure vanilla extract
• 1/2 teaspoon (2 grams) table salt
• 3 1/2 cups (410 grams) confectioners’ sugar
• Multicolored sprinkles (optional, but highly encouraged)

DIRECTIONS:

For the cake: Preheat the oven to 350 degrees. Grease an 8-by-8-by-2-inch square pan with softened butter or cooking oil spray. Line the bottom with parchment paper.
Combine the light brown and granulated sugars in the bowl of a stand mixer or in a mixing bowl.
Sift the flour, cocoa powder, baking powder, baking soda, salt and espresso powder onto a sheet of parchment paper, then use the paper to pour the dry ingredients into the bowl. (Or sift them directly into the bowl.) Beat on medium speed, until thoroughly incorporated.
Reduce the speed to low; add the egg and egg yolk, beating to incorporate after each addition, and scraping with a flexible spatula, as needed. Add the vanilla extract and the oil, beating to blend well. Finally, add the boiling water and heavy cream; once they are incorporated, increase the speed to medium and beat for 30 seconds, until smooth. The batter will be quite thin.
Transfer to the pan, being mindful to scrape out every last bit of batter, as you will be using the bowl again to make the frosting. Bake (middle rack) for 25 to 30 minutes, rotating the pan from front to back after the first 15 minutes, and checking for doneness with a toothpick at the center after 20 minutes. The cake is done when the tester comes out with a moist crumb or two and the cake is just beginning to come away from the sides of the pan.
Let the cake cool in its pan for 10 minutes, then run a paring knife around the edges to release it. Invert onto a serving plate to cool completely.
To make the frosting, wipe the same mixing bowl and paddle attachment or beaters with a paper towel, if necessary, then add the butter and cream cheese and beat on medium-high speed until smooth. Add the vanilla extract and salt, then beat again on medium-high speed.
Reduce the speed to low. Add the confectioners’ sugar 1 cup at a time, sifting it over if it is lumpy and beating until incorporated. Stop to scrape the bowl with a flexible spatula, as needed. Once all the sugar has been added, increase the speed to medium, and beat briefly until smooth. Do not overmix or the frosting will lose structure.
Use a generous hand and an offset spatula to spread the top of the cooled cake with the frosting. Decorate with sprinkles, if using. If you do not frost generously, you may have leftover frosting (lucky you). Cut just before serving.

From cookbook author Jessie Sheehan

Posted on Leave a comment

Chocolate truffle needing only three ingredients

Start with this very basic truffle recipe, then brainstorm endless variations. This impressive confection would make a great gift for any chocolate lover.

GIANT CHOCOLATE TRUFFLE

What you’ll need:
3 12-ounce bags chocolate chips, any variety, divided
2 tablespoons coconut oil
1/2 cup heavy cream
1/4 cup nuts, optional

Here’s how:
Prepare an 8-inch spring form pan by wrapping the removable bottom with plastic wrap then placing it back in the pan. Spray pan with cooking spray.
In the microwave, melt one bag of chips with one tablespoon coconut oil in 30 second increments. Stir between each nuke blast until the chips are completely smooth. Pour this into the prepared pan. Place in the freezer.
Next, we make ganache. This is so easy you’ll make ganache all the time. Place a bag of chips into a mixing bowl. Heat the heavy cream in the microwave until it simmers, between 45 and 60 seconds. Pour the hot cream over the chips and let that sit for five minutes. Now stir the mixture until completely smooth. As you begin, there may be a moment when you shake your fist at the sky and yell “Curse you, Patti Diamond!” because it looks like the curdled separated mess will never come together. Just keep stirring. I promise it will come together into a luxurious silky, creamy ganache.
Pour the ganache over the first layer of chocolate and stick it back in the freezer. You get to lick the spoon because you made ganache.
Repeat the process of melting the chips with the coconut oil with the final bag of chips and pour this over the ganache layer and put it back in the freezer until firm. Once firm, remove from the freezer and place in the fridge until ready to serve. To serve, cut it with a knife that’s been heated in hot water and dried before slicing.
The variations are limited only by your imagination. Use different kinds of chips. Add layers of cookies or graham crackers. Add nuts or dried fruits. Add layers of caramel, peanut butter or marshmallow cream.

By Patti Diamond Divas on a Dime

Posted on Leave a comment

Chocolate Semifreddo Ice Cream

Semifreddo, a frozen dessert that hovers between the silkiness of mousse and the ice-cold-density of gelato, requires neither churning nor an ice cream machine. It’s one of the easiest, creamiest frozen desserts you can throw together.
The basic whipped cream base can be seasoned endlessly — Rose Lawrence, the Firehouse Hotel’s pastry chef, has deployed vanilla, turnip and carrot in different iterations of this dessert. Her version here highlights chocolate’s richness without being too sweet. At the restaurant, she serves it with a saffron milk jam for a savory creaminess and hard caramel for crunch. You can get a similar effect with whipped cream and chopped nuts or sprinkles. For your party, you can cut the semifreddo and when ready to serve, set up a DIY ice cream bar with toppings.
Creamy chocolate semifreddo is delicious with crunchy saffron caramel “glass,” nuts and sprinkles.

5 hours, largely freezing. Serves 12.

• 1/2 cup unsweetened cocoa powder
• 1 can(14 ounces) sweetened condensed milk
• 2 1/2 cups heavy cream
• 1 tablespoon vodka
• 1/4 teaspoon fine salt
1 Press plastic wrap into the bottom and up the sides of a 9- by 13-inch rimmed baking sheet or cake pan with overhang on all 4 sides.
2 Sift the cocoa powder into a medium bowl. Add the sweetened condensed milk and stir until well-combined.
3 Whisk the cream using an electric mixer on medium-high speed until medium peaks form. Reduce the speed to low and add the cocoa mixture in a steady stream, then add the vodka and salt. When well-blended, pour the mixture into the prepared pan.
4 Smooth the top with a spatula, then gently press the plastic wrap overhang directly against the surface of the chocolate mixture. Freeze until firm, at least 4 hours and up to 1 week.
5 Lift the mixture out of the pan using the plastic wrap overhang and unwrap. Cut into 12 even pieces. Put on serving plates and top with shards of saffron glass. Serve immediately.

Saffron Glass
1 ½ hours, largely inactive. Serves 12.
• 1 ½ teaspoons saffron
• 3 tablespoons boiling water
• 1 cup granulated sugar
• ¼ teaspoon cream of tartar
• Pinch of fine salt
1 Put the saffron in a medium saucepan and set over medium heat. Toast, shaking the pan occasionally, until fragrant and brittle but not browned, about 3 minutes. Immediately pour the boiling water over the saffron and let stand for 1 hour to infuse.
2 Line a large rimmed baking sheet with parchment paper or a nonstick baking mat.
3 Add the sugar, cream of tartar and salt to the saffron water. Stir well, then spread in an even layer. Bring to a boil over medium heat without stirring. Use a pastry brush dipped in water to brush any sugar granules off the sides of the pan. Reduce the heat to medium-low and simmer until the sugar is an amber color and registers 310 degrees on a candy thermometer. Immediately pour onto the prepared pan and spread as thin as possible with a spatula.
4 Let stand until completely cooled and hardened. Break into shards.
Make Ahead: The semifreddo can be frozen for up to 1 week. The glass will keep in an airtight container at room temperature in a cool, dry place for up to 2 days.

Posted on Leave a comment

Chocolate Mousse Cake

It’s best to bake the cake a day in advance. Store the sponge by carefully wrapping in plastic and keeping in the refrigerator. The mousse can be refrigerated for up to 30 minutes before using. The assembled mousse cake can be refrigerated up to 1 day in advance.

Serves 9 to 12

For the cake:
6 large eggs, separated into yolks and whites, at room temperature
¼ cup plus 2 tablespoons sugar
1 teaspoon pure vanilla extract
4 ounces bittersweet chocolate, chopped and melted
¾ teaspoon cream of tartar
2 tablespoons cake flour

For the mousse:
4 large egg whites, at room temperature
1/8 teaspoon salt
¼ cup sugar
1½ cups chilled heavy whipping cream
8 ounces bittersweet chocolate, chopped, melted and kept lukewarm
½ cup mini chocolate chips or chopped chocolate (optional)

For the ganache:
10 ounces bittersweet or dark chocolate chopped
1¾ cups heavy cream
About 1 cup chocolate sprinkles (optional)

For the cake: Preheat the oven to 350 degrees. Lightly grease a rimmed baking sheet with cooking oil spray, then line the bottom with parchment paper.
Combine the egg yolks and ¼ cup of the sugar in the bowl of a stand mixer or use a handheld electric mixer; beat on medium-high speed, until light, thick and fluffy, for about 5 minutes. The mixture should nearly triple in volume and fall off the beaters in a thick ribbon. Add the vanilla extract; beating on medium-high speed, then add all the melted/cooled bittersweet chocolate, and beat until just incorporated.
Beat the egg whites in a separate, clean bowl using the balloon-whisk attachment on your stand mixer or with the handheld electric mixer on medium-high speed; once they are foamy, add the cream of tartar. Increase the speed to medium-high and beat until soft peaks form. Gradually add the remaining 2 tablespoons of sugar, beating until stiff peaks form.
Gently fold a small amount of beaten egg whites into the egg yolk-chocolate mixture, to loosen it up. Fold in a third of the remaining beaten egg whites (some white streaks can remain), then sift in a tablespoon of the cake flour and gently fold to incorporate. Repeat with the remaining beaten egg whites and the remaining tablespoon of cake flour until everything is just incorporated.
Transfer the batter to the baking sheet, trying not to deflate it. Use an offset spatula to spread it evenly into the corners. Bake (middle rack) for 17 minutes, until the top of the cake springs back when lightly pressed. The cake should be a light brown, similar in color to brown sugar. Transfer the pan to a wire rack to cool completely.

For the mousse: Combine the egg whites and salt in the bowl of a stand mixer fitted with a balloon-whisk attachment or use a handheld electric mixer; beat on medium-high speed until soft peaks form. Gradually add the sugar, beating until glossy, soft peaks form.
Beat the heavy whipping cream in a separate clean bowl (using your stand mixer fitted with a balloon-whisk attachment or a handheld electric mixer) until soft peaks form. By hand, fold half the lukewarm chocolate into the whipped cream with a spatula until incorporated, then fold in the remaining chocolate to form a smooth, homogeneous mixture.
Gently fold one-third of the beaten egg whites into the chocolate whipped cream until just blended, then fold in the remaining beaten egg whites. Gently fold in the mini chocolate chips or chopped chocolate, if using. Cover and refrigerate the mousse until chilled, but no longer than 30 minutes, or the mousse may become too stiff to work with.

When you are ready to assemble the cake, make the ganache: Place the 10 ounces of bittersweet or dark chocolate in a heatproof bowl. Heat the heavy cream in a medium saucepan over medium-high heat, just until bubbles form at the edges. Immediately pour over the chocolate; let the mixture sit for a minute or two, then whisk to form a smooth, glossy ganache. Let it cool for a bit while you begin the cake assembly.
Invert the cake slab onto a cutting board and discard its parchment paper. Cut the cake into 3 rectangles of equal size. Place one portion on a large serving platter or plate. Use a piping bag or offset spatula to spread half the chilled mousse on the bottom cake layer.
Next, stack another portion of cake on the mousse layer, pressing it lightly in place without forcing out any of the mousse below. Follow with the remaining mousse, then top with the remaining cake portion, again pressing it lightly in place.
Use an offset spatula to spread the slightly cooled ganache over the top and sides of the cake, keeping things neat. If desired, press handfuls of the chocolate sprinkles against the sides of the cake (or decorate as you wish). Refrigerate for at least 30 minutes, and up to overnight.
Let the cake come to room temperature for 15 to 20 minutes before serving.

Adapted from Rose Levy Beranbaum’s “Cake Bible,” William Morrow, 1988

Posted on Leave a comment

Sinfully Rich Brownies

Brownies are controversial territory to chart: Some like them cakey and light in flavor, more of a snack than a rich dessert; some like them moist and chewy; and others, the biggest chocoholics, like them to be purely decadent, almost as dense as fudge and deliciously dark.
We wanted to make sinfully rich brownies that would be a chocolate lover’s dream, so we started by using three forms of chocolate: unsweetened chocolate for intensity, cocoa powder for complexity and bittersweet or semisweet chocolate for moisture and well-rounded flavor.
Melting butter along with the chocolate was the key to a fudgy texture, and a generous three eggs contributed richness and structure. In addition to providing a clean sweetness, granulated sugar gave the baked brownies a delicate, shiny, crackly top crust.
We found it best to cut these brownies into small bites rather than big bake-sale squares: a little goes a long way. Tasters preferred the more complex flavor of bittersweet chocolate over semisweet chocolate, but either type works well here, as does 5 ounces of bittersweet or semisweet chocolate chips in place of the bar chocolate.

Fudgy Brownies

Servings: 36
Start to finish: 1 hour
• 5 ounces bittersweet or semisweet chocolate, chopped
• 2 ounces unsweetened chocolate, chopped
• 8 tablespoons unsalted butter, cut into 4 pieces
• 3 tablespoons unsweetened cocoa powder
• 1 1/4 cups (83/4 ounces) sugar
• 3 large eggs
• 2 teaspoons vanilla extract
• 1/2 teaspoon salt
• 1 cup (5 ounces) all-purpose flour
Adjust oven rack to middle position and heat oven to 350 F. Make foil sling for 8-inch square baking pan by folding 2 long sheets of aluminum foil so each is 8 inches wide. Lay sheets of foil in pan perpendicular to each other, with extra foil hanging over edges of pan. Push foil into corners and up sides of pan, smoothing foil flush to pan. Grease foil.
Microwave bittersweet and unsweetened chocolates in bowl at 50% power for 2 minutes. Stir in butter and continue to microwave, stirring often, until melted. Whisk in cocoa and let mixture cool slightly.
Whisk sugar, eggs, vanilla and salt in large bowl until combined. Whisk chocolate mixture into sugar mixture until smooth. Using rubber spatula, stir in flour until no dry streaks remain. Transfer batter to prepared pan and smooth top. Bake until toothpick inserted in center comes out with few moist crumbs attached, 35 to 40 minutes, rotating pan halfway through baking.
Let brownies cool completely in pan on wire rack, about 2 hours. Using foil overhang, remove brownies from pan. (Uncut brownies can be refrigerated for up to 3 days.) Cut into 36 squares before serving.
Fudgy Triple-Chocolate Espresso Brownies: Whisk in 11/2 tablespoons instant espresso powder or instant coffee powder along with cocoa.

WRITTEN BY AMERICA’S TEST KITCHEN

Posted on Leave a comment

Pots Au Chocolate

If you have a chocolate craving, this will cure it in no time. And there is virtually zero baking — in fact, it can be made in the microwave. The longest step is waiting (with bated breath) for it to chill and set up before it can be served, but don’t be above tasting a few bites while still in its liquid form!

serves 4
1¼ cups light cream heated in microwave or stove until skin forms on top
2 egg yolks
2 to 3 tablespoons of liqueur, such as Amaretto or Kahlua
1 cup chocolate chips (I use milk chocolate, but for a richer dessert you can use semi-sweet or dark chocolate chips)

Combine chocolate, egg yolks and liqueur in a blender until smooth. Add warm cream and mix until blended. Pour into individual bowls or ramekins and chill for three to four hours. Serve with whipped cream or with melted caramel and a sprinkle of salt on top for a salted caramel variety.

By Katie Smith, Bangor Metro

Posted on Leave a comment

Brownie Waffles

Here’s proof that brownies are the true breakfast of champions. Prepare a box of brownie mix according to the package instructions, but add 1 extra egg. Cook in a well-greased waffle maker, for 3 to 5 minutes. Top with a scoop of vanilla ice cream and rainbow sprinkles. For this and 4 other very simple recipes using brownie mix, click here.

Posted on Leave a comment

THICK AND CHEWY CHOCOLATE CHIP COOKIE BARS

Thick and chewy chocolate chip cookie bars

These super soft, chewy chocolate chip cookie bars are easy (one bowl!) and so delicious! The perfect fix for that chocolate chip cookie craving. Find this recipe, along with 13 other crazy good chocolate cookie recipes you’ll totally love, here, and below.

INGREDIENTS
• 12 tablespoons butter (1 1/2 sticks), melted and cooled slightly
• 1/2 teaspoon salt
• 1/2 teaspoon baking soda
• 1 cup (7 ounces) light brown sugar
• 1/2 (3 1/2 ounces) cup granulated sugar
• 1 large egg
• 1 large egg yolk
• 2 teaspoons vanilla extract
• 2 cups + 2 tablespoons (10 1/2 ounces) all-purpose flour
• 2 cups chocolate chips or chocolate chunks (semisweet, bittersweet, milk, white, peanut butter…the options are endless!)
INSTRUCTIONS
1. Preheat the oven to 325 degrees. Adjust the oven rack to lower-middle position. Line a 9X13-inch baking pan with foil, letting the excess hang over the edges of the pan by about 1 inch so you can grab those edges and pull the brownies from the pan after they have baked. Spray the foil-lined pan with nonstick cooking spray.
2. In a large bowl, whisk together the melted butter, salt and baking soda together until well combined. Add the brown sugar and granulated sugar and stir until evenly combined. Add the egg, egg yolk, and vanilla and mix well.
3. Add the flour. Using a rubber spatula or wooden spoon start folding the flour into the wet ingredients. After a few stirs (with streaks of flour remaining), add the chocolate chips or chocolate chunks and mix until combined. Don’t overmix, just stir until no dry streaks remain (sometimes I use my hands as the dough gets thick).
4. Press the batter evenly into the prepared pan.
5. Bake until the bars are light golden brown on the edges, slightly firm to the touch, and edges start pulling away from sides of pan, 24-28 minutes. Cool on a wire rack to room temperature. Remove the bars from the pan by lifting the foil overhang and transfer them to a cutting board. Cut into squares and serve.
By Mel at MelsKitchenCafé.com