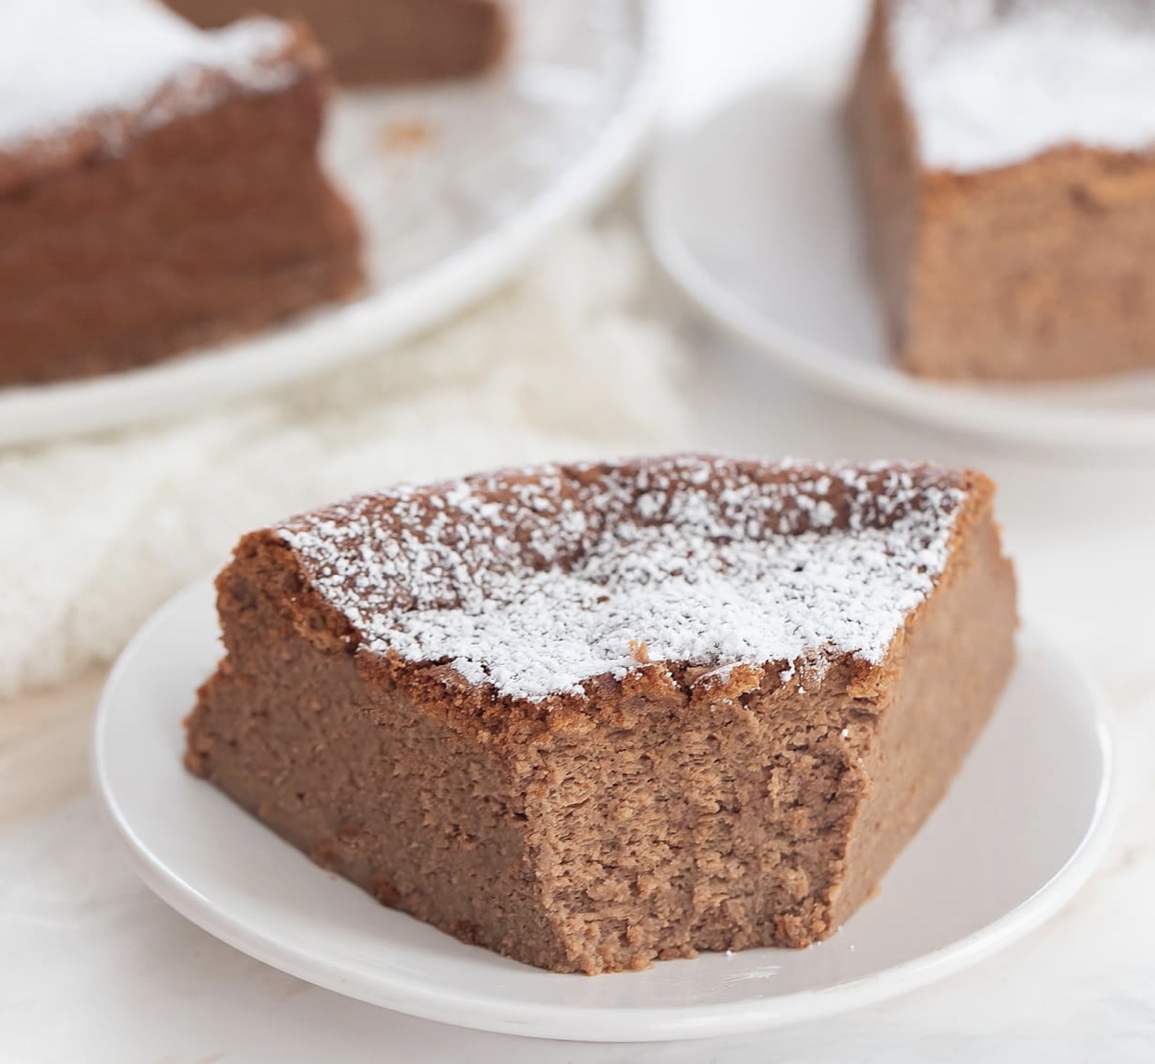
This chocolate yogurt cake is incredibly light and fluffy and has a unique texture. It is just 3 ingredients and doesn’t need any flour, butter or oil. This yogurt cake is so soft and fluffy. It is very similar to a Japanese style cheesecake, which is like a cross between souffle and cake. The cake can be made ahead of time so it’s great for gatherings and parties.
INGREDIENTS
Milk Chocolate Chips
Greek Yogurt
Eggs
Milk chocolate chips: For this recipe, I used milk chocolate chips. You can make it with semisweet chocolate chips but the cake might not be sweet enough. Even using milk chocolate, the cake is not super sweet.
Greek yogurt: You must use Greek yogurt. Regular yogurt will not work. I have only tested it with plain greek yogurt. I don’t know if a flavored one will work. The added sugar in flavored yogurt could affect the recipe. I think this recipe works best with whole milk Greek yogurt, however it does also work with fat free. The whole milk version has a richer flavor and isn’t as tangy.
INSTRUCTIONS
Preheat oven to 325°F (163°C). Grease the inside of a 7 inch round cake pan with a cooking oil spray. Use a solid one-piece cake pan (no removable bottom). Line with parchment paper. You will want to create handles first and then line the bottom and sides. See notes for how to line the cake pan.
Separate egg yolks and whites. Place eggs whites into fridge until ready to use. Let the egg yolks sit out.
Add chocolate chips to a large microwave safe mixing bowl. Melt either in the microwave or on the stove (using the double boiler method). I used the microwave. If using microwave, heat chocolate in 15 second intervals, stirring in between with a spatula, until chocolate is completely melted and smooth.
Whisk in yogurt. Make sure your yogurt is not cold to the touch before adding it. If bringing it to room temperature is not enough, you can warm up the yogurt for a few seconds in the microwave. If your yogurt is cold it will make your chocolate seize. Mix in the yogurt with a whisk until fully incorporated and the batter is smooth.
Whisk in egg yolks until batter is smooth and no egg streaks remain.
Remove egg whites from fridge. Place them into a separate clean large mixing bowl. Beat at highest speed until stiff peaks form. I prefer to use a stand mixer but you can also use a hand mixer.
Add one third of the egg white mixture to your egg yolk batter. Fold it in gently with a spatula until no egg white lumps remain (it’s okay if there are a few streaks of white in your batter). Make sure you scoop up batter from the very bottom of the bowl each time you fold to make sure all of the batter gets incorporated with the egg whites. Repeat with the next 1/3 and then remaining 1/3.
Pour batter into prepared baking pan. The cake will be baked in a water bath. To do this, place your cake pan into a slightly larger baking pan. I used a 9 x 9 inch baking pan. Place your cake pan into the bigger pan. Pour just enough cold tap water into the outer pan so that the water level reaches 1/2 inch. Make sure to add the water to the outer pan after you’ve put the cake in. If you add 1/2 inch of water before, the added weight of the cake pan and cake batter will push up your water level more than 1/2 inch. I recommend using a ruler to measure the water level. If your water level is too high, the bottom of your cake will cook too much, causing a dense bottom layer.
Place cake with water bath into your oven. Bake for 40-45 minutes or until cake looks done. (Check on the cake through the oven window and don’t open the oven door. You just want the top of the cake to look cooked.) Turn off the oven but do not open the oven door and leave the cake in the oven for one hour. It is important to leave the cake in the oven (unopened) because this allows the cake to finish cooking and the gradual drop in temperature prevents the cake from suddenly collapsing. The cake will shrink down, but it shouldn’t completely collapse. After one hour, you can remove the cake from the oven. Use the cake handles to lift the cake from the pan and transfer it to a plate. Let the cake cool to room temperature for a few hours. If desired, dust top with powdered sugar before serving.
NOTES
It’s important not to open the oven door during baking or during the one hour after. To know when to turn off the oven, take a look through your oven window. The cake should look done (it should be puffed up, the middle should not be sunken in). If you don’t have an oven window, I would just turn it off after 45 minutes.
Don’t eat the cake until fully cooled (at least a few hours). The texture will not be set and will taste a little eggy and wet before it is fully cooled.
This cake can be made a day ahead of time. If making it ahead of time, store cake in fridge and then bring to room temperature before serving.
This cake is best made in a solid one-piece round cake pan that does not have a removable bottom. A springform cake pan or a cake pan with a removable bottom results in the bottom layer of the cake cooking too fast, which will produce a dense bottom layer.
Lining the cake pan: Before lining the cake pan, you want to create some handles so that you can easily lift your cake out of the pan. First, grease the interior of your cake pan (I used an oil spray). Then place two long strips of parchment paper across the cake pan. Each strip should run from one side of the cake pan to the other with some overhang and should overlap and form an “X” at the bottom of your cake pan. See photo in post for reference. Then, line the cake pan as you normally would (bottom round parchment paper and parchment paper for the sides). You’ll want to either regrease the cake pan after adding the handles or grease the bottom round and side parchment strips so that they stick to the cake pan. If you use a nonstick pan, you don’t need to line the sides but you will need to make sure the sides are thoroughly greased. Most one piece 7 inch round cake pans I’ve seen sold in the US are not nonstick, so if you aren’t sure if it’s nonstick, I would line the sides just in case.
I used US standard large eggs. You should have approximately 142 grams of egg whites and 75 grams of egg yolks.
As posted on KIRBIECRAVINGS.COM